How to Blend Crayons: 6 Easy Methods for Smooth Color
You press two crayons together and the color piles up waxy and streaky instead of melting into one smooth shade. Blending crayons just means coaxing two or more colors to meet without a hard line, so the finish reads softer and more even. In our house, we found it takes almost no special gear. It takes light hands and the right method for the effect you want.
What You Need to Blend Crayons (Supplies & Best Paper)
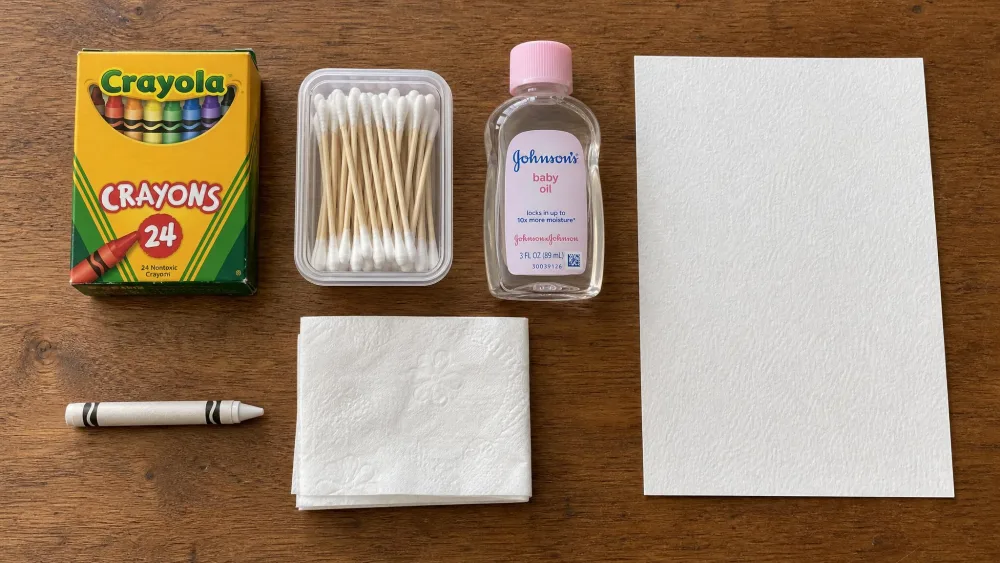
You can blend with nothing but the crayons in the box, but a few extras open up smoother results. Keep cotton swabs, a soft cloth or tissue, a white crayon, and a small bottle of baby oil within reach. For solvent blends you will want rubbing alcohol, and for melting effects a basic blow dryer does the job.
Paper matters more than beginners expect. Thicker, less-absorbent paper blends better because oil and solvent do not spread and bleed as quickly. Textured, medium-weight paper holds more layers before it clogs, while very smooth paper limits how much color you can build. Standard crayons are wax-based, so they resist blending a little. Oil and gel crayons and oil pastels are softer and slide together more easily if you want an easier start.
Method 1: Layering and Pressure (No Tools Needed)
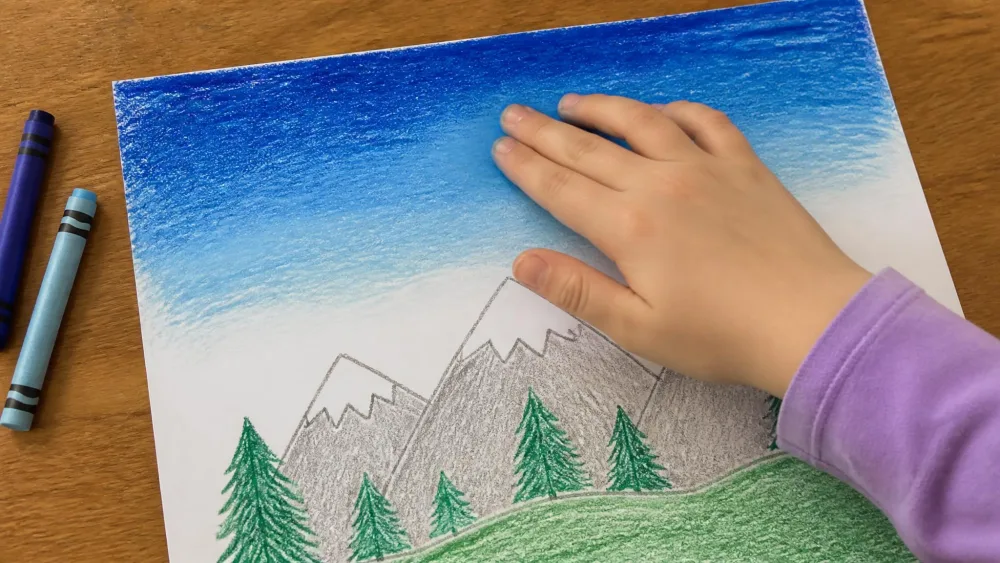
This is the method we reach for first and teach our kids before anything else. Lay down a section of color with medium pressure, then lay a second color right next to it. Go back over the seam with both colors, working them into each other until the line softens.
The trick is pressure control. Light pressure gives a light tone, medium gives a mid tone, and firm pressure gives the darkest tone. Build the color gradually in several thin passes rather than one heavy scrub. Move in one consistent direction or small circles so the layers sit evenly, and feather the edges where two colors meet. For a smooth gradient, stay in one color family and start dark, then progressively lighten your pressure as you move across.
The honest truth from our kitchen table is that kids default to pressing hard, and that wrecks the blend every time. The whole technique lives or dies on steady medium pressure, so younger children need a reminder or two. When it clicks, this method is genuinely age-appropriate and mess-free. It has no heat and no solvents, and it fills large areas like a sky or a stretch of water beautifully.
Parent tipStart every blend lighter than you think you need. You can always add another thin layer, but you cannot lift color back off once the wax builds up too thick.
Method 2: Blending With Baby Oil
Baby oil turns waxy crayon into something closer to paint. Dip a cotton swab in a little baby oil, then dab the excess off on scrap paper before you touch your drawing. Work over the crayon marks in gentle circular motions and the wax softens into a glossy, more vibrant finish.
Of all the no-heat methods, baby oil gives us the smoothest, most paint-like blend. It is also the messiest, and it soaks the paper through if you use too much, which is why you dab the swab first. Patch-test on a scrap sheet before you commit, because the wet, glossy surface can lift and smear color if you press too hard. Our eight-year-old loves it precisely because it feels less like coloring and more like painting.
NoteIn our testing, baby oil gave the smoothest blend of everything we tried without any heat or fumes.
Method 3: Solvent Blending (Rubbing Alcohol)
Rubbing alcohol works much like the baby-oil method, but it is a true solvent, so it breaks the wax down a little differently. Moisten a cotton swab in rubbing alcohol, dab off the excess, then work over the crayon marks in circular motions with gentle pressure. Reapply until the blend looks the way you want. Odorless mineral spirits is an alternative if you have it on hand.
Because you are working with fumes, keep this one to a well-ventilated spot, and let an adult handle the solvent step for younger children. We do this method for our kids rather than with them, and save it for older hands.
Watch outRubbing alcohol and mineral spirits give off fumes and are not for unsupervised young children. Blend in a ventilated room and keep the bottle capped and out of reach between uses.
Method 4: Heat Blending (Blow Dryer or Warming)
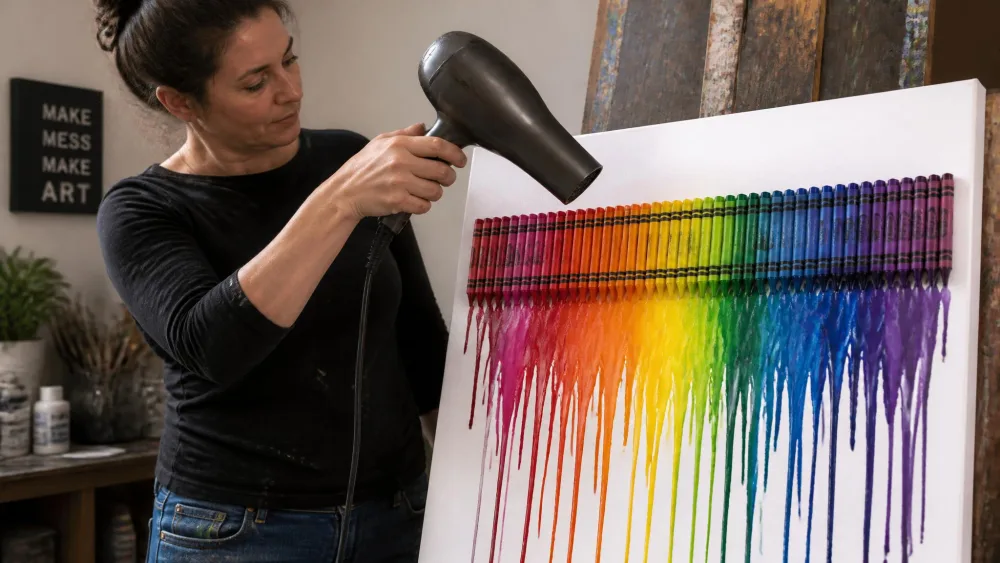
Heat is the crowd-pleaser. To melt crayons onto a canvas, peel off the labels, arrange similar-toned crayons at an angle with heat-safe glue, then aim a blow dryer downward on low-to-moderate heat. Let the wax cool and set before you remove the crayons. For a gentler version on paper, warm the sheet first and then color, because warm wax lays down and blends far more easily.
If you use a microwave to melt wax for pouring, keep the power low-to-medium and cap it at 2 minutes, stirring every 30 seconds with an adult watching. Heat methods are the messiest of the bunch because the wax runs and drips, so cover your surface first.
Safety note for kids
We keep every heat step firmly in adult hands. A blow dryer, iron, or microwave gets hot enough to burn small fingers, and melted wax stays hot after it stops looking dangerous. Let kids arrange the crayons and pick the colors, then take over for the heat itself. If wax lands where it should not, our guides on getting melted crayon out of clothes and getting crayon out of a dryer will walk you through the cleanup.
Watch outHeat blending is an adult-only step. Blow dryers, irons, and microwaves get hot fast, and melted wax holds its heat long after it looks safe to touch.
Method 5: White Crayon Burnishing
Burnishing with a white crayon is our favorite fix when a blend looks close but still shows its layers. Once your colors are down, go over them with a white crayon using light-to-medium pressure and small circular motions. The white wax fills the gaps between layers and smooths the transitions, pulling everything into one soft, even surface.
It needs no extra supplies and no cleanup, which makes it a great next step after plain layering. Keep the pressure gentle so you do not overload the page.
Method 6: Using Blending Tools (Stump, Cloth, Cotton Swab)
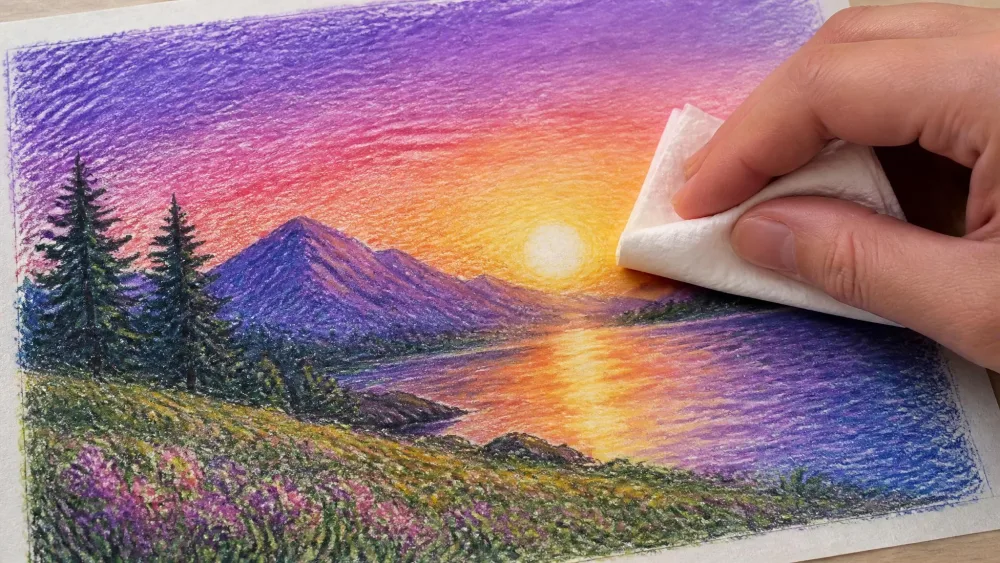
A few simple tools soften a blend without any liquid at all. Fold a piece of tissue paper into a small pad and rub it gently over color you have already layered, and you get a velvety finish. This only works once you have a couple of layers down. On a single flat coat the tissue just lifts the color instead of smoothing it, a lesson we learned the messy way.
A fingertip or cotton swab uses friction, warmth, and moderate pressure to smudge and soften the wax, and a blending stump does the same with more control. For a different look, a craft knife can notch the side of a crayon for textured strokes.
Which Method Should You Use? (Comparison Table)
Every method trades ease against mess and effect. Here is how the six stack up side by side.
| Method | Difficulty | Mess level | Best for |
|---|---|---|---|
| Layering & pressure | Easy | Low (mess-free) | Beginners, kids, filling large areas |
| Baby oil | Easy to medium | High (wet, oily) | The smoothest paint-like blend |
| Rubbing alcohol | Medium | Medium (fumes, adult) | Softening wax, older kids with supervision |
| Heat / blow dryer | Medium | High (drips) | Abstract melted effects, needs supervision |
| White crayon burnishing | Easy | Low | Smoothing transitions with no extra supplies |
| Blending tools (tissue, swab, stump) | Easy | Low | Softening color you have already layered |
Tips for Smooth, Waxy-Free Blends
The single biggest reason colors look waxy is layers going on too thick. Start with light pressure, keep each pass thin, and build up slowly. When color peels or flakes off the page, that is wax build-up from over-blending rather than a fault in the blending itself, so ease off before you overload the paper.
Keep blended colors in the same family when you want them clean, because mixing opposites tends to turn a blend muddy. If you are working with water-soluble or watercolor crayons, let each layer dry before adding the next, or the colors turn brown and gray. And if a blend fights you no matter what, switch to softer oil pastels, which blend far more smoothly while keeping that familiar crayon feel.
Parent tipIf your finish keeps coming out muddy, you are probably combining too many colors at once. Two or three shades from the same family blend cleaner than a rainbow.
Frequently Asked Questions
What's the easiest way to blend crayons for beginners?
Layering and pressure control is the easiest place to start. Color one section, add a second color beside it, then blend the seam with medium pressure using both colors. It needs no tools, no liquid, and no heat, which makes it the safest method for kids too.
How do you blend crayons with baby oil or rubbing alcohol?
Dip a cotton swab in baby oil or rubbing alcohol, dab off the excess on scrap paper, then work over your crayon marks in gentle circular motions. Both soften the wax into a smoother, glossier finish. Patch-test first, keep the swab barely wet, and let an adult handle the rubbing alcohol.
Can you blend crayons with water?
Only if they are water-soluble or watercolor crayons. Standard wax crayons do not dissolve in water, so plain water will not blend them. With watercolor crayons, add water with a brush and let each layer dry before the next so the colors stay clean.
Why do the colors peel, flake, or look waxy when I layer them?
That is wax build-up from pressing too hard or over-blending, not a fault in the technique. Start with light pressure and keep each layer thin. If flaking starts, stop adding wax and let what is on the page do the work.
Does the type of paper affect blending?
Yes, quite a bit. Thicker, less-absorbent paper blends better because oil and solvent do not bleed as fast. Textured, medium-weight paper holds more layers, while very smooth paper limits how much color you can build before it clogs.
Conclusion
Blending crayons comes down to matching the method to the effect you want and keeping a light hand while you build. Start with plain layering, since it costs nothing and teaches the control every other method depends on. From there, reach for baby oil for a paint-like glow, a white crayon to smooth stubborn transitions, or a blow dryer for melted effects with an adult at the controls. Grab some scrap paper, keep your layers thin, and the colors will start meeting the way you pictured them.