20 Easy Christmas Ornament Crafts for Kids
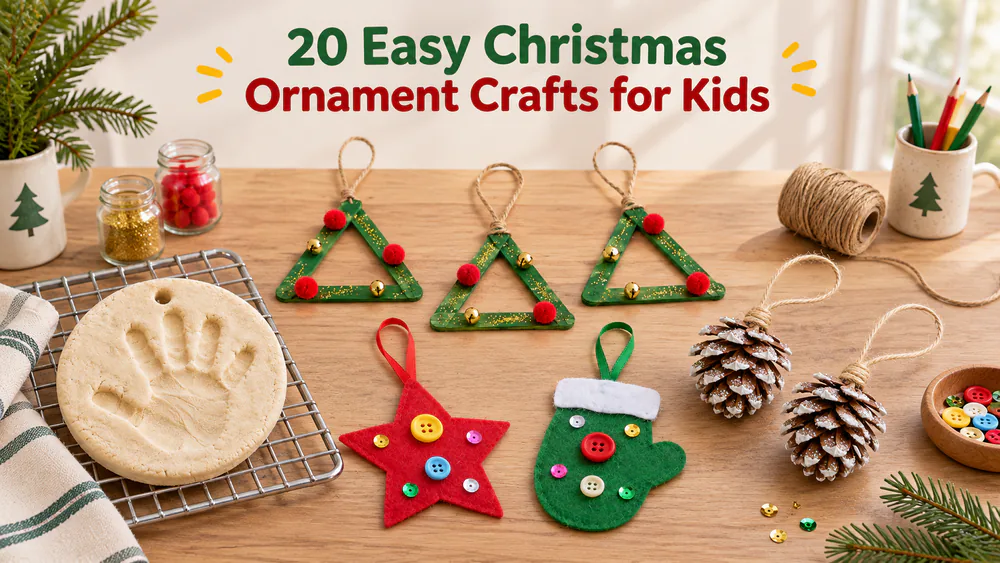
These 20 easy ornament crafts use salt dough, craft sticks, felt, beads, pipe cleaners, and paper. Every craft has a short supply list, clear steps, and a note on age and time. Toddlers can join in with a helper, and older kids can work on their own. Each one ends up as a keepsake to hang on the Christmas tree.
What You Need Before You Start
Most of these crafts draw on the same small pile of supplies.
Core supplies are craft sticks, felt, yarn, pipe cleaners, pony beads, googly eyes, egg cartons, toilet paper rolls, cardstock, acrylic paint, string or twine, and child-safe scissors. Keep tacky glue for kids and hot glue for adults.
For the salt dough and cinnamon ornaments you will also want flour, salt, ground cinnamon, applesauce, a rolling pin, cookie cutters, and a drinking straw for hanging holes.
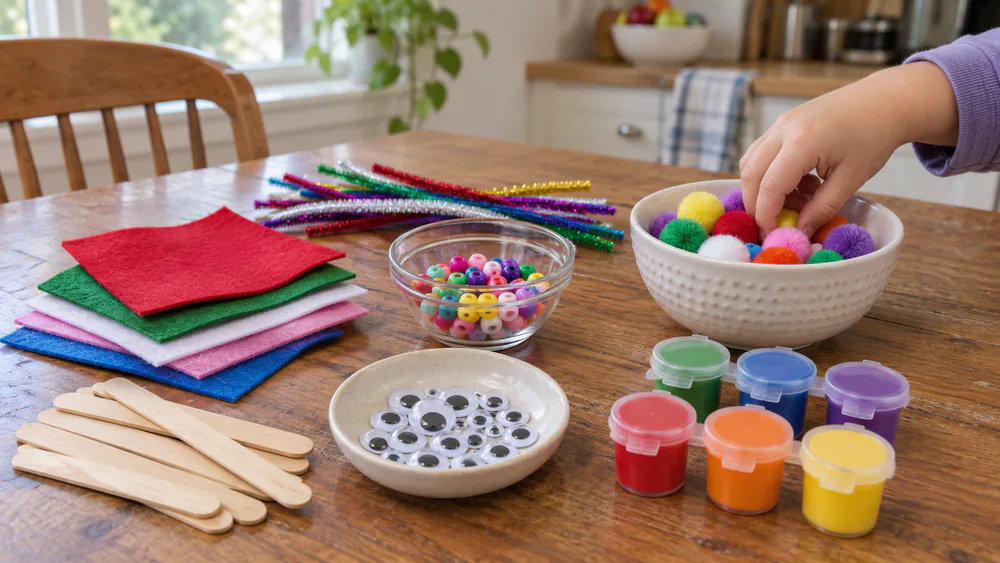
Parent tipSet out a tray with small bowls of beads and pom poms before you begin.
1. Handprint Salt Dough Ornament
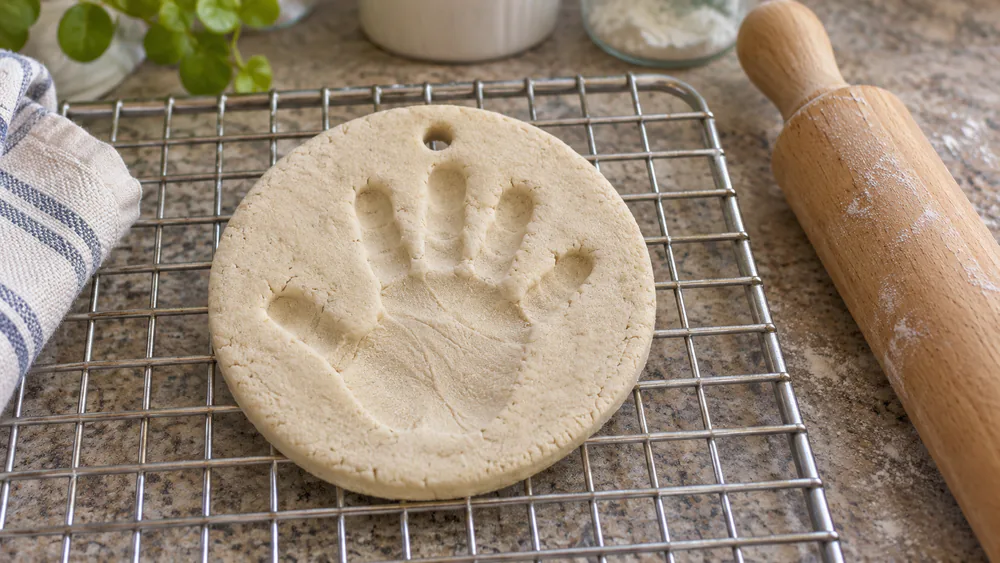
Salt dough handprints are the classic first ornament, and kids love pressing their own hand into the dough. They make a keepsake the family can hang every year.
You need: flour, salt, warm water, rolling pin, straw, cookie cutter or butter knife, acrylic paint, clear sealer.
- Mix flour, salt and warm water, then knead about 10 minutes until the dough is smooth and slightly damp, not sticky.
- Roll it about 1/4 inch thick. Press a hand firmly into the dough, or cut a round first and press into that.
- Poke a hanging hole with a straw before baking.
- Bake at 250 F, or air-dry for 24 to 48 hours and flip once so the dough does not curl.
- Paint when cool, then seal.
Ages 3 and up with help, about 45 minutes of hands-on time, low cost. Tip: slightly softer dough takes a clearer handprint, and dough pressed too thin cracks. Bake time shifts with thickness, so check for hardness rather than the clock.
Watch outSalt dough is toxic to dogs, so keep unbaked dough and finished ornaments out of pet reach. Adults should handle the oven.
2. Popsicle Stick Snowflake
Popsicle stick snowflakes are quick, sparkly, and good fine motor practice. Kids can decorate them however they like.
You need: craft sticks, tacky or hot glue (adult), twine, glitter, stickers, bells, pom poms.
- Paint plain sticks or use colored ones, and let them dry.
- An adult arranges the sticks into a snowflake and glues each crossing.
- Kids add stickers, pom poms and glitter. Dab glue, sprinkle, then shake off the extra.
- Glue a loop of twine to the back.
Ages 2 and up with help, about 20 minutes plus drying, low cost. Tip: let the paint dry before gluing. These snowflakes are so light that any string or jute holds them on the tree.
3. Craft Stick Reindeer
This little reindeer is made from just three craft sticks, and the googly eyes always get a laugh. It works well as a classroom or gift-tag ornament.
You need: three craft sticks, craft glue, brown marker, red pom pom, googly eyes, brown pipe cleaner.
- Color the sticks brown on both sides and along the edges.
- Glue three sticks into a triangle, or a V for the face.
- Glue on the googly eyes and a red pom pom nose.
- Twist a pipe cleaner around the top for antlers and a hanger, then let the glue dry.
Ages 4 and up, about 15 minutes plus drying, low cost. Tip: color the sticks before you glue them together, because the corners are hard to reach afterward. Younger kids can stick to tacky glue.
4. Popsicle Stick Christmas Tree
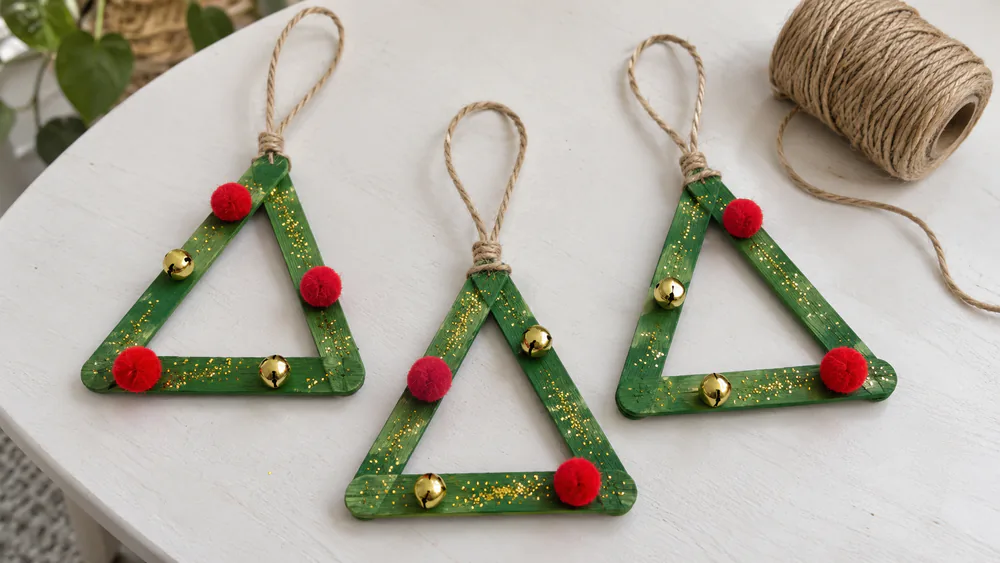
A green craft stick tree is perfect for little ones who like to decorate. The pom poms, bells and glitter turn it into a tiny Christmas tree.
You need: craft sticks, green paint, glue, pom poms, bells, glitter, twine.
- Paint the sticks green and let them dry.
- Glue the sticks into a tree or triangle shape.
- Decorate with pom poms, bells and glitter.
- Add a twine loop to the back.
Ages 3 and up, about 20 minutes plus drying, low cost. Tip: go easy on the glue. Too much makes the sticks slide around before it sets.
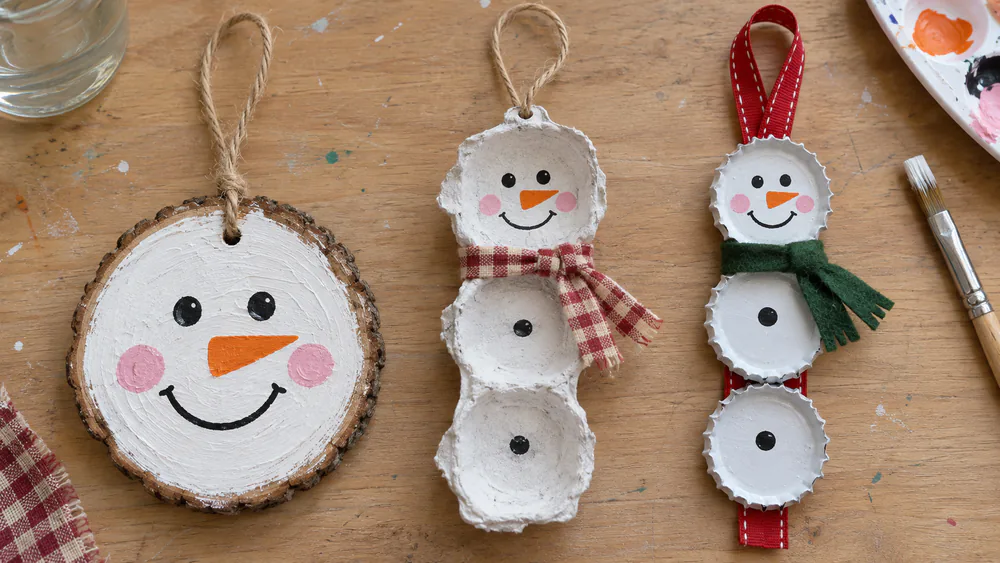
5. Wood Slice Snowman
A painted wood slice makes a sturdy round snowman that looks great on the tree.
You need: wood slice, white acrylic paint, brush, black, pink and orange paint markers, string.
- Check the slice for a hole, or drill one. You can also glue a thread loop to the back.
- Paint the slice white, add a second coat if needed, and let it dry fully.
- Draw the eyes and mouth with the black marker.
- Add pink cheeks and an orange triangle nose.
- Thread the string through the hole.
Ages 5 and up, about 30 minutes plus drying, low cost. Tip: the face goes on last, and only after the paint is completely dry. Markers smudge on wet paint.
6. Egg Carton Snowman
Egg cartons are free, and the cups stack into a cheerful little snowman. This one is perfect for preschoolers who like to paint.
You need: paper egg carton, white acrylic paint, buttons, fabric scrap, glue, string.
- Cut a three-cup section from the carton.
- Paint it white, and add a second coat if needed.
- Glue on button eyes and a scarf made from a fabric scrap.
- Add a thread loop at the top.
Ages 3 and up with help, about 20 minutes plus drying, free or low cost. Tip: for toddlers, pre-cut the carton and let them do the painting. The carton needs to be dry before you glue anything to it.
7. Bottle Cap Snowman
Three bottle caps become a tiny snowman, and kids like how small and fast it is. It uses things that usually end up in the recycling bin, so there is almost nothing to buy. The finished snowman is small enough to hang on a thin branch.
You need: three bottle caps painted white, black and orange markers or paint, ribbon, felt scrap.
- Paint three caps white.
- Draw the face on the top cap and buttons on the others.
- Link the caps vertically with ribbon.
- Add a mini felt scarf.
Ages 5 and up, about 20 minutes, free or low cost. Tip: bottle caps are small parts, so skip this one for toddlers and any child who still puts things in their mouth.
8. Melted Bead Suncatcher Ornament
Pony beads melt into a glowing, stained-glass shape that catches the light. Kids love arranging the beads.
You need: pony beads, metal cookie cutter, parchment-lined pan, oven or toaster oven, string.
- Set the cutter on the lined pan.
- Fill it with one layer of beads.
- An adult bakes it at 400 F, usually 10 to 15 minutes, until the holes close.
- Let it cool fully, then ease the cutter off.
- Add a hole and string.
Ages 5 and up, about 30 minutes, low cost. Tip: start checking at 5 minutes, because timing varies by batch. Plastic cutters melt, and the smell is strong, so open a window.
Watch outMelting beads gives off plastic fumes. Ventilate the room or use a toaster oven outdoors, and keep the oven work for adults.
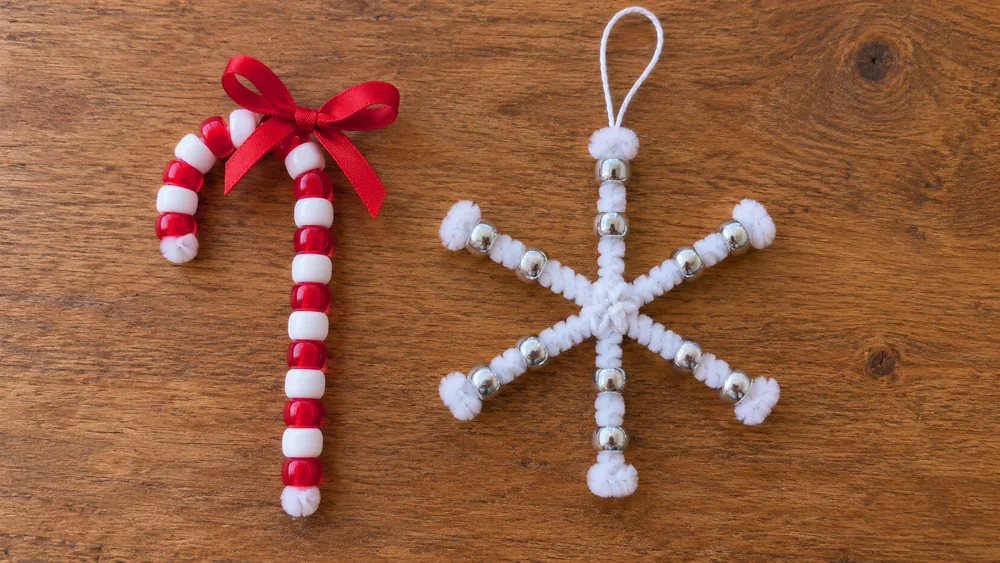
9. Beaded Candy Cane
A pipe cleaner threaded with red and white pony beads becomes a candy cane in minutes. It is great practice for small fingers, and kids enjoy choosing their own bead pattern. A few candy canes look lovely clustered together on one branch.
You need: pipe cleaner, red and white pony beads, ribbon.
- String the beads in a red and white pattern, leaving a half inch bare at each end.
- Fold the bare ends into balls bigger than the beads.
- Bend the pipe cleaner into a cane shape.
- Tie a ribbon at the curve.
Ages 3 and up with help, about 10 minutes, low cost. Tip: the folded balls matter. If the ends are not bigger than the bead holes, the beads slide right off.
10. Pipe Cleaner Snowflake
White pipe cleaners twist into a snowflake with six arms. Kids can add as many beads as they like, and no two snowflakes end up alike. Silver and blue beads give a frosty look.
You need: white pipe cleaners, beads, string.
- Cut a 12-inch pipe cleaner into three 4-inch pieces.
- Twist the middles together into six arms.
- Slide beads onto the arms.
- Add a string loop at the top.
Ages 4 and up, about 15 minutes, low cost. Tip: bend the ends of each arm so the beads stay on. This is a good one for working on fine motor skills, and the twisting part is easy to teach. Hang a few in a row for a frosty look.
11. Pom Pom Ornament
Pom poms are soft, colorful, and easy for small hands to handle. Fill a clear ornament ball with pom poms to make a bright little bauble.
You need: clear plastic or glass ball ornament, assorted small pom poms, ribbon, optional glue.
- Remove the cap from the ball ornament.
- Drop pom poms in through the opening until the ball is full.
- Replace the cap and tie a ribbon through the loop.
You can also glue pom poms onto a pinecone for a different look. Ages 2 and up with help, about 10 minutes, low cost. Tip: pour the pom poms into a small cup first so toddlers can scoop them in without spilling.
12. Mini Yarn Hat
A tiny yarn hat is a good use for leftover yarn scraps. Kids like picking the colors and the pom pom on top. A few hats in different colors look fun on the tree together.
You need: yarn scraps, cardboard or a tube, glue, pom pom.
- Cut a cardboard hat shape, or use a small tube.
- Wrap yarn around it until the cardboard is covered.
- Glue a pom pom on top.
- Tie a short loop of yarn at the peak for hanging.
Ages 5 and up, about 20 minutes, free or low cost. Tip: tuck the yarn ends under the wrapped layers and dab on a bit of glue so they do not unravel on the tree.
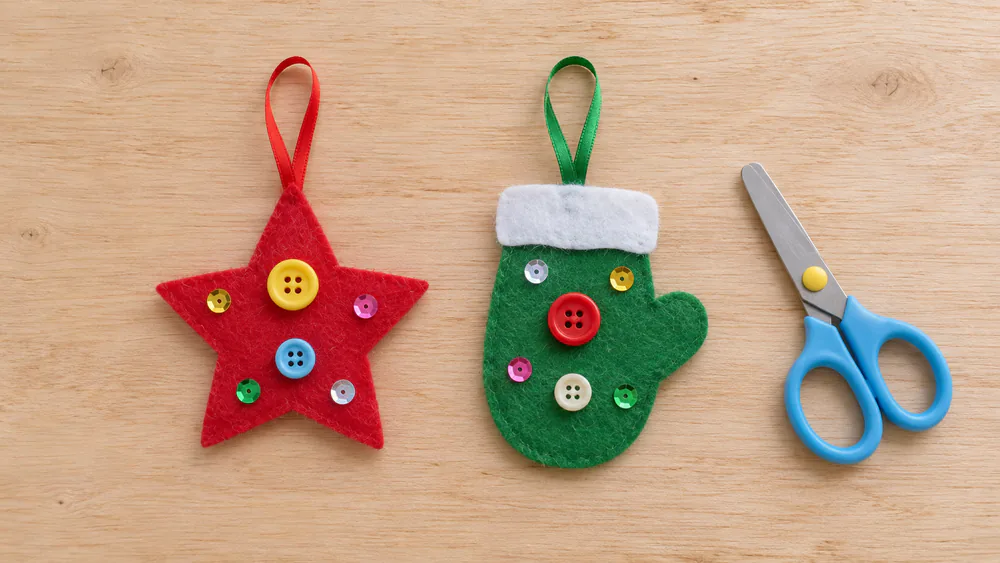
13. No-Sew Felt Ornament
Felt is easy to cut and stays put without any stitching. Kids can make stars or mittens.
You need: two sheets of felt, scissors, tacky glue, ribbon, sequins or buttons.
- Cut two matching shapes from felt, such as a star or a mitten.
- Spread tacky glue around the edges of one shape, leaving a gap at the top.
- Fold a ribbon loop into the gap and press the second shape on top.
- Decorate the front with sequins, buttons or felt scraps, then let it dry.
Ages 4 and up, about 25 minutes plus drying, low cost. Tip: trace a cookie cutter on the felt so both pieces match, and press the edges flat under a book while the glue sets.
14. Paper Strip Angel
Paper strips curl into a simple angel with a round head and wings. It is a calm, quiet craft.
You need: cardstock, scissors, glue stick, marker, gold string.
- Cut one wide strip for the body, and two thin strips for the wings.
- Roll the wide strip into a cone and glue the edge closed.
- Fold each thin strip into a loop and glue both to the back as wings.
- Draw a face on a small paper circle, glue it on top, and add a gold string loop.
Ages 5 and up, about 20 minutes, low cost. Tip: hold each glued edge for a slow count of ten so the cone keeps its shape. Younger kids can color the wings before you assemble them.
15. Printable 3D Paper Ornament
A printable template turns flat paper into a 3D star or bauble. Kids color it first, then fold it together. It is a nice challenge for older kids who want something less messy.
You need: printed template on cardstock, scissors, glue stick, markers, string.
- Print the template on cardstock and color it in.
- Cut along the solid lines and fold along the dotted lines.
- Glue the tabs together to form the 3D shape.
- Thread a string through the top before you close the last tab.
Ages 7 and up, about 30 minutes, low cost. Tip: score the fold lines with the back of a butter knife for crisp edges. Younger kids can color the pieces while an older sibling does the gluing.
16. Cinnamon Ornament (No-Bake)
Cinnamon ornaments make the whole house smell like Christmas. They are made from just two main ingredients and need no oven.
You need: ground cinnamon, applesauce, optional white glue, rolling pin, cutters, straw, ribbon, cooling rack.
- Mix cinnamon and applesauce into a stiff dough, adjusting by feel.
- Roll it about 1/4 inch thick.
- Cut shapes and poke a hole in each one.
- Air-dry on a rack, flipping halfway, for 1 to 5 days.
- Thread a ribbon through the hole.
Ages 4 and up, about 30 minutes plus drying, low cost. Tip: dough rolled too thin breaks and curls. Drying time swings with thickness and humidity, and a cooling rack speeds it up. These are for display, not eating.
17. Crystal Snowflake
This one is a mini science experiment. A pipe cleaner snowflake grows sparkly crystals overnight in a jar of borax solution.
You need: pipe cleaners, borax, boiling water, wide-mouth jar, pencil, string.
- Twist three pipe cleaner pieces into a snowflake and tie on a string.
- An adult dissolves about 3 tablespoons of borax in each cup of boiling water in the jar.
- Hang the snowflake from a pencil laid across the jar, fully submerged and not touching the sides.
- Leave it overnight, undisturbed.
- Lift it out and let it dry.
Ages 6 and up with an adult, about 20 minutes plus overnight, low cost. Tip: bumping the jar disrupts crystal growth. Ratios vary by source, and settling powder is normal.
Watch outBorax is not edible. Adults handle the hot solution, and the jar stays away from small children and pets.
18. Melted Crayon Galaxy Ornament
Melted crayons swirl inside a clear glass ornament to make a colorful galaxy. The heating is an adult job, but kids can choose the colors.
You need: clear glass ornament, crayon pieces, hair dryer, oven mitt.
- Peel and chip the crayons into small bits.
- Drop the bits into the ornament.
- Heat it with a hair dryer about an inch away, keeping it moving.
- Rotate the ornament to swirl the colors.
- Let it cool, then replace the cap.
Ages 7 and up with an adult, about 30 minutes, low to moderate cost. Tip: this can feel slow for kids. Use short bursts, and have one person hold the ornament while another holds the dryer. Glass gets hot, so little hands should not hold it.
19. Toilet Paper Roll Gnome
A cardboard roll with a felt hat and a fluffy beard makes a cute gnome. Kids like picking out the nose and the hat color. Each gnome ends up with its own silly personality.
You need: cardboard roll, felt, wooden bead nose, yarn or fur beard, glue.
- Cover the roll with felt.
- Glue a bead nose near the middle.
- Add a yarn or fur beard below the nose.
- Cut and glue a felt hat on top.
- Add a loop for hanging.
Ages 5 and up, about 30 minutes, low cost. Tip: hot glue burns are the main risk with gnomes, so younger kids stick to tacky glue and let an adult do any hot gluing.
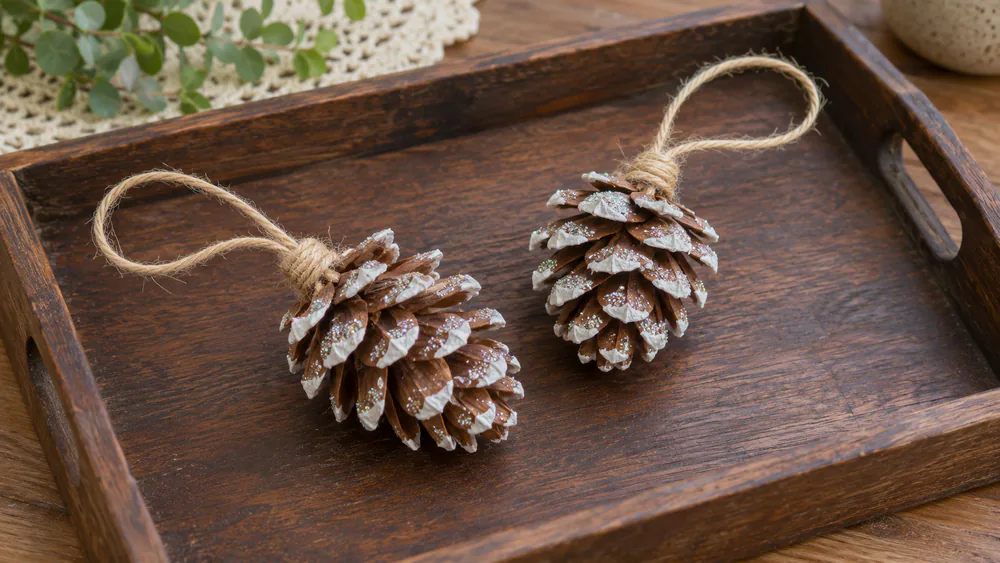
20. Snowy Pinecone Ornament
A pinecone dabbed with white paint looks like it just came in from a snowstorm. Turn a pinecone from a nature walk into an easy ornament with just a few supplies. Kids enjoy the dabbing part most.
You need: small pinecone, white paint, sponge or brush, glitter, twine.
- Brush off any dirt and let the pinecone dry fully.
- Dab white paint on the tips of each scale.
- Sprinkle glitter on the wet paint and shake off the extra.
- Tie a loop of twine around the top, and let it dry.
Ages 3 and up, about 15 minutes plus drying, free or low cost. Tip: a sponge dabber makes the paint look more like snow than a brush does.
Tips for Making Ornaments With Kids
A few habits make every craft on this list go more smoothly.
NoteThickness and humidity affect drying time, so allow the longer end of the range for salt dough and cinnamon ornaments in humid Florida weather.
Ages and Skill Levels
Toddlers can paint, dab stickers, and drop pom poms into a ball. Adults should handle hot glue, the oven, and borax. Preschoolers can cut with child-safe scissors and glue with tacky glue.
Older kids can follow most steps on their own, and tweens enjoy the 3D paper ornament and crystal snowflake.
Craft stick, bead and pipe cleaner projects build fine motor skills, so they are a good fit for younger kids.
Parent tipLet an adult do the hot gluing while kids decorate. Everything goes faster, and toddlers can still add stickers and glitter.
Hanging, Storing and Gifting Handmade Ornaments
Make sure each ornament has a hanging hole or loop before it dries. Poke salt dough holes with a straw before baking.
Seal painted salt dough with clear glaze. Write the child's name and year on the back with a paint marker.
Wrap each ornament in tissue and store them in a box with dividers.
FAQs
What are the best ornament crafts for toddlers?
Egg carton snowmen, pom pom balls, and popsicle stick snowflakes work well. Pre-cut the pieces and let toddlers paint or dab stickers.
Are salt dough ornaments safe to leave around kids and pets?
Finished ornaments are decorations, not snacks, and the dough is very salty. Keep both unbaked dough and baked ornaments away from dogs, and tell young children they are not food. Hang them higher on the tree if a pet or a grabby toddler shares your living room.
How do I rescue a salt dough ornament that cracked after baking?
A hairline crack can usually be filled with a dab of white craft glue, left to dry, and covered with paint. If an ornament breaks in two, glue the pieces together and use the painted side that hides the seam as the front.
Which ornament crafts need no baking?
Cinnamon ornaments air-dry on a rack, and the popsicle stick, felt, pipe cleaner, paper and pom pom ornaments need no heat at all.
How do I add a name or date?
Use an oil-based paint marker on the back after the ornament is sealed and dry.
Wrap-Up
Pick two or three crafts to start, and save the rest for another afternoon. Hang each one on the tree, and enjoy pulling them out again next December.
More Christmas Crafts for Kids
Looking for more ideas? Try these:
- Christmas crafts for kids
- Snowflake crafts for kids
- Winter crafts for kids
- Printable Christmas crafts
- Advent crafts for kids
- Gingerbread crafts
- Reindeer crafts for kids
- Watercolor Christmas crafts