15 Easy Snowflake Crafts for Kids
Florida kids do not get real snow, so our kitchen table becomes the winter wonderland. A tray of coffee filters, a few markers, and a spray bottle were enough to start our first snowflake afternoon. Our youngest misted too much and watched the color rinse right out of the filter, which taught us the first rule of the season. Below are 15 easy snowflake crafts for all ages, from toddlers to older kids, and most use supplies you already own.
Before You Start: Materials, Ages and Mess Level
Most of these crafts draw on the same short list: paper, glue, washable paint, scissors, yarn, and a hole punch. Keep a tray or old plate under anything wet, because coffee filters, salt, and paint all travel.
Each craft lists an age range. Treat it as a starting point, since an adult can take over the cutting or hole punching for younger kids. Crafts that build fine motor skills, like threading beads, cutting, and lacing, fit best with ages 4 and up.
Parent tipPunch holes, cut circles, and tape yarn tips before you hand anything to a small child. It keeps the fun part for them.
1. Coffee Filter Snowflakes
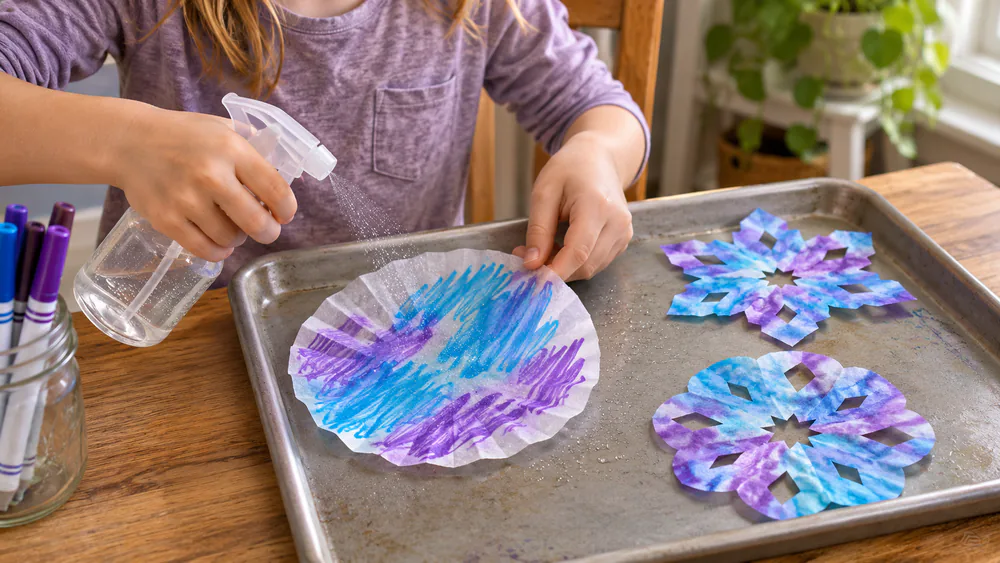
Coffee filters turn into soft, bleeding-color snowflakes that kids will love hanging in the window.
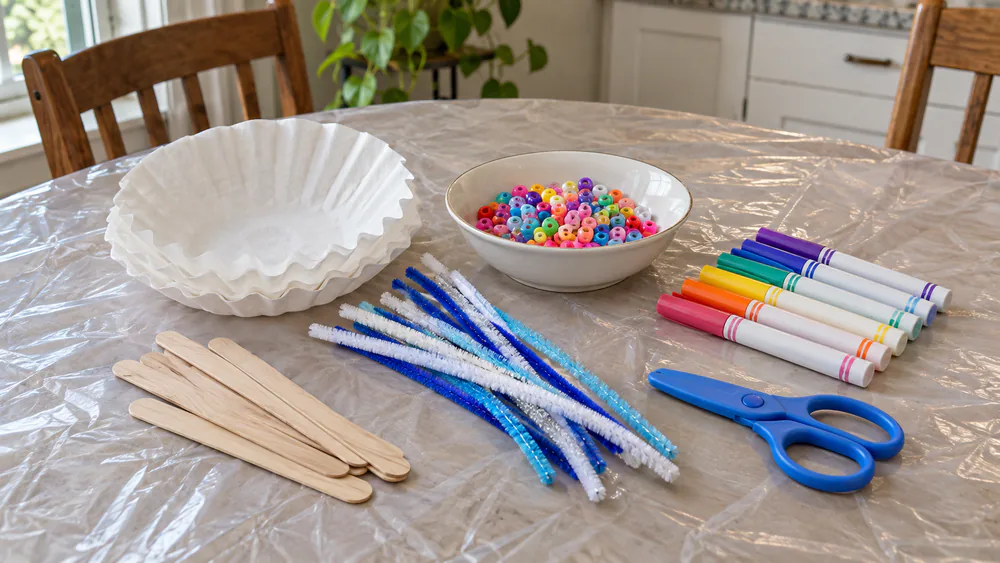
You need: coffee filters, washable markers, a spray bottle or dropper, scissors, a tray.
- Fold a filter in half three times and snip shapes from the edges.
- Unfold it flat on a tray and color it with washable markers.
- Mist or dot it with water until the colors bleed.
- Let it dry flat, which takes a few hours depending on how wet it got and the humidity in your room.
- Tape it to a window.
Ages 3+, low mess with a tray. Tip: go light on the water, because a few drops or a light mist works better than a soaking and keeps the colors from rinsing out.
2. Popsicle Stick Snowflakes
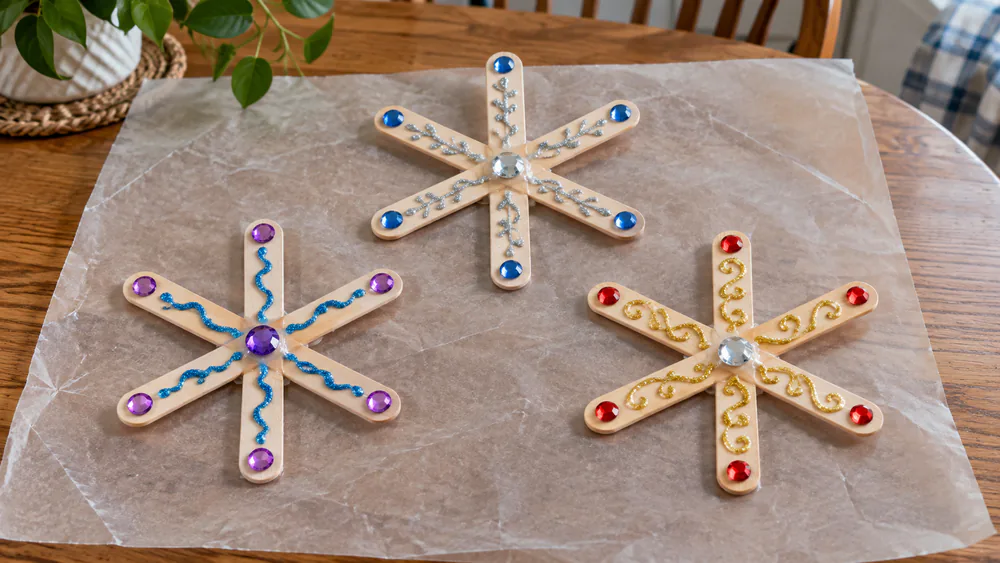
Craft sticks make a sturdy snowflake that survives being passed around, hung up, and packed away.
You need: craft sticks, white glue, paint, buttons or gems, string.
- Lay three sticks crossed in a star shape.
- Glue the center and let it set before moving it.
- Paint the star white or blue and let it dry.
- Glue buttons or gems at the tips and the center.
- Tie a string loop to the top.
Ages 4+, low mess. Tip: keep the glue dots small so the sticks do not slide around while they dry, and let younger kids handle the decorating while an adult holds the star steady. Older kids can glue a smaller star on top of the dry one for extra sparkle.
3. Q-Tip Snowflakes
Cotton swab arms radiating from a fluffy center make a snowflake with real texture. We followed the Q-tip snowflake tutorial from The Best Ideas for Kids.
You need: a cardboard circle, Q-tips, acrylic paint, tacky glue, a small white pom pom, a hole punch, string.
- Cut a cardboard circle and paint it.
- Snip the Q-tips into different lengths.
- Glue a pom pom in the center.
- Glue the Q-tip arms outward from the pom pom.
- Punch a hole and thread the string.
Ages 4+, moderate mess. Tip: younger kids do best painting and gluing while older kids cut the Q-tips and design the pattern. Lighter paint colors may need a second coat.
4. Salt and Watercolor Resist Snowflakes
Watercolor races through a salty glue snowflake, and kids watch the colors spread on their own.
You need: heavy paper, white glue, salt, watercolors, a brush.
- Draw a snowflake on the paper with white glue.
- Sprinkle salt generously over the glue.
- Tip the paper over a tray to shake off the extra salt.
- Touch a wet watercolor brush to the salt and watch the color spread.
Ages 3+, moderate mess. Tip: touch the brush to the salt rather than scrubbing it. Use heavy paper so it does not curl under the wet glue. The colors keep spreading for a minute or two after you lift the brush, so give kids time to watch before they add more. Hang the dry page in a window, or tuck it into a card for a grandparent.

5. Pipe Cleaner Snowflakes
Pipe cleaners bend easily, which makes these a good first snowflake for small hands.
You need: pipe cleaners, scissors, beads (optional).
- Cut pipe cleaners into thirds.
- Twist three pieces together at the center.
- Spread the arms out evenly.
- Add beads or small side branches.
Ages 3+, very low mess. Tip: twist the center tightly so the arms do not spin loose. An adult can do the cutting, and older kids can add extra branches for a more detailed design. Each takes only a few minutes, which suits kids who lose interest quickly, and the leftovers make good bookmarks or gift toppers. Twist a spare piece around a pencil first if you want curly tips that look like frost.
6. Window Cling Snowflake Suncatchers
Puffy paint dries into a peelable snowflake that sticks right to the glass. Glittery ones can stay on a window for over a year if nobody peels them off.
You need: puffy paint or school glue, a freezer bag or plastic sheet, glitter, a snowflake template.
- Slip a snowflake template under the plastic.
- Trace the lines with paint.
- Sprinkle on glitter.
- Let it dry flat until firm.
- Peel it off and press it onto the glass.
Ages 4+, moderate mess. Tip: peel only when the paint is fully dry, or the snowflake will tear. Kids can press several onto one window to build a whole snowy scene, and they peel off cleanly from glass.
7. Beaded Snowflake Ornaments
Threading beads builds fine motor skills, and kids enjoy watching the pattern grow along each arm.
You need: pipe cleaners, pony beads, string.
- Thread beads onto each pipe cleaner piece.
- Leave the ends free and twist the pieces together at the center.
- Fold the tips back so the beads stay on.
- Add a string loop for hanging.
Ages 4+, low mess. Tip: fold the tips back or the beads slide off. Little ones who still put things in their mouths should skip the small beads or use larger ones. Sorting the beads into a muffin tin first keeps them from rolling off the table. Older kids can plan a repeating color pattern, such as blue, white, blue, before they start threading.
8. Clothespin Snowflakes
Wooden clothespins pull apart into halves that fit together like snowflake arms.
You need: clothespins, glue, white paint, glitter.
- Pull the clothespins apart into halves.
- Glue the halves flat in a star shape.
- Paint the star white.
- Dust it with glitter while the paint is wet.
Ages 5+, moderate mess. Tip: let the glue set before painting, or the arms will shift. These look best hung from a ribbon on a bare branch or the tree. Spread newspaper first, since glitter travels everywhere, and use spare halves for tiny snowflakes on gift tags. Younger kids can handle the painting while an adult sets the halves in place and checks that each arm touches the center.

9. Salt Crystal Snowflakes (Borax-Free STEM)
Kids can grow their own sparkly snowflake, and no borax is needed. Table salt, Epsom salt, sugar, and alum all grow crystals.
You need: pipe cleaners, hot water, table salt or Epsom salt, a jar, a pencil, string.
- Twist a pipe cleaner into a snowflake shape.
- Stir salt into hot water until no more will dissolve.
- Hang the snowflake from a pencil resting across the jar.
- Leave it undisturbed for 1-3 days.
- Lift it out and let it dry.
Ages 6+, with an adult handling the hot water. Tip: the solution has to be saturated. Results are hit or miss, since some jars grow a coat of crystals in a day or two and others show nothing after a week. Dry crystals are fragile, so handle them gently.
10. Paper Plate Yarn Snowflakes
Lacing yarn across a plate makes a graphic star kids can follow with their fingers, inspired by this paper plate yarn snowflake from I Heart Crafty Things.
You need: a paper plate, yarn, a hole punch or pin, tape.
- Mark an even star of dots near the rim.
- Punch the holes.
- Tape the yarn at the back and lace it across in a star.
- Tape the end.
Ages 6+. Tip: punch the holes before handing the plate over. Yarn-on-plate snowflakes suit elementary kids, and preschoolers need an adult to start the holes. Older kids can try a second color of yarn over the first for a layered look, and everyone enjoys choosing between thin yarn and bold, thick yarn.
11. 3D Paper Snowflakes
Rolled paper points turn a flat cut into a snowflake that stands up.
You need: paper, scissors, a stapler or glue, a template.
- Print or cut six squares.
- Fold each one and cut slits following the template.
- Roll alternating points to the center.
- Staple the points together.
Ages 8+, low mess. Tip: stop each cut before the opposite edge so the paper holds together. An adult should handle the stapler for younger kids. Make several in different paper sizes and hang them at different heights, and fold crisp creases with a fingernail so every point rolls neatly. Count the points together as you roll them, since six matching arms is what makes the finished snowflake look balanced.

12. Tape Resist Snowflake Painting
Peeling the tape off a painted page reveals a crisp white snowflake, and it feels like magic every time.
You need: masking tape, paper, blue paint, a brush.
- Press masking tape onto the paper in a snowflake shape.
- Paint over it in blues.
- Let it dry fully.
- Peel the tape off slowly.
Ages 4+, moderate mess. Tip: press the tape edges down firmly so paint does not seep underneath. Try a few tape snowflakes on one page for a night sky full of flakes, painted in any shade of blue from pale sky to deep midnight. Press the tape down with a fingernail and give the page a full hour to dry before peeling, since damp paint can lift the paper.
13. Doily Snowflake Prints
Pre-cut paper doilies already look like lace snowflakes, so kids only have to add the color. We took the idea from the doily snowflakes at Kitchen Table Classroom.
You need: paper doilies, watercolors or paint, white paper.
- Paint the doily with watercolor.
- Press it onto white paper.
- Lift it carefully and let the print dry.
Ages 3+, moderate mess. Tip: do not overload the brush, or the print blurs into a puddle. Try a second print from the same doily for a softer, paler snowflake. Pair a pale blue doily print with a dark blue background paper for the strongest contrast. These make lovely cards and look sweet taped around a window.
14. Cardboard Lacing Snowflakes
Lacing is quiet, focused work, and the finished star looks great hung in the window. The cardboard lacing snowflakes at Our Kid Things were our guide.
You need: cardboard, yarn, a hole punch, tape, scissors.
- Cut a cardboard circle.
- Cut 8 evenly spaced slits around the edge.
- Punch a hole between the slits.
- Wrap and lace the yarn through the slits and holes.
- Tape the end.
Ages 5+, low mess. Tip: tape the tip of the yarn first. It stops fraying and makes threading easier for small hands. Different yarn colors make each star look unique, and kids can wrap the yarn in any pattern they like. The back of the cardboard stays tidy if you tape each loose end flat.
15. Pasta Snowflakes
Wagon wheel, penne, and fusilli pasta glue together into chunky snowflakes. We followed the pasta snowflakes at One Little Project.
You need: wagon wheel, penne, or fusilli pasta, glue, white paint or glitter, string, wax paper.
- Arrange the pasta in a snowflake shape on wax paper.
- Glue the pieces where they touch and let it dry completely, ideally overnight.
- Paint it white or cover it in glitter.
- Add a string for hanging.
Ages 4+, moderate mess. Tip: use a thicker glue so the pasta holds. Keep the finished snowflakes away from toddlers who might try to eat them. A mix of wagon wheel and penne makes a pleasing center and arms.
Snowflake Crafts by Age: Toddlers, Preschoolers and Older Kids
Toddlers do best with crafts that need no cutting: coffee filters, salt and watercolor resist, and pipe cleaner snowflakes. Plastic-bag window clings also keep kids who dislike messy hands clean.
Preschoolers can handle painting, gluing, and simple threading. Try the popsicle stick, Q-tip, tape resist, and doily crafts. Scissors are fine with supervision, but pre-cut anything tricky.
Older kids are ready for lacing, 3D paper folding, and the salt crystal experiment. Light shows through coffee filter and tissue snowflakes, so they work best taped to a sunny window.
Final Thoughts
Pick one craft that matches your supplies and your kids' ages, and let the rest wait for another snow day. If you want more seasonal ideas, try our easy Christmas crafts for kids or our gingerbread crafts for kids.