20 Free Printable Christmas Crafts for Kids (Templates Included)

December is busy and nobody wants to hunt for craft supplies on top of everything else, so printable templates fix that: you hit print, hand over the crayons, and the festive part is already done.
Here are 20 low-prep Christmas crafts that suit kids of all ages, and each one lists what you need, the steps, and a quick tip. Most only take paper, color, scissors, and glue, so none need a special trip to the store. You can browse our other easy Christmas crafts for kids when you want more ideas.
Supplies You Need for These Printable Christmas Crafts
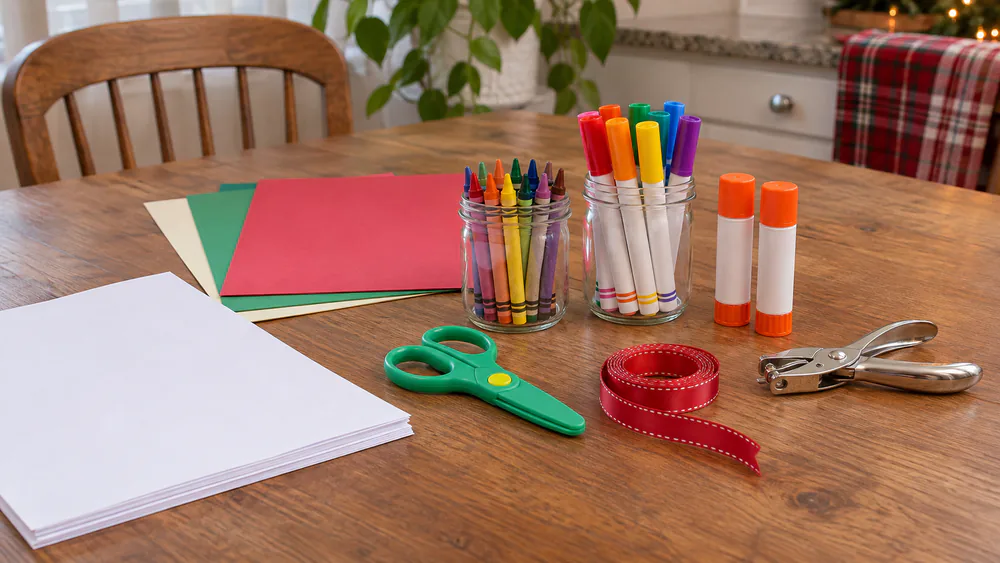
Most of these crafts use the same few things. You likely have them at home already.
- A printer and white paper or cardstock
- Crayons or washable markers
- Child-safe scissors and a glue stick
- Optional: ribbon, yarn, tape, a hole punch, craft sticks, and paper fasteners
Paper choice matters. Heavier cardstock holds up better for puppets, crowns, masks, ornaments, and garlands that get handled or hung. Plain printer paper is fine for flat coloring crafts. A shallow tray or baking sheet on the table also keeps tiny cut-out pieces from disappearing during assembly.
Parent tipLoose glitter makes a mess. Metallic crayons, sticker dots, or glitter glue give the same sparkle with easier cleanup.
Supervise scissors, hole punches, and staplers, and keep small decorations away from little ones. The CPSC guidance for children's products is a helpful reference.
How to Download and Print the Templates
Print one test page first and check the preview. If the edges clip, use the Fit setting. If you want the designed size, choose Actual size.
For puppets, crowns, masks, and houses, print straight onto cardstock. Puppets, crowns, and masks flop on plain paper, and they stand up much better on cardstock or backed with cereal-box cardboard.
Toddlers and preschoolers need an adult to pre-cut eye openings, inner wreath circles, small tabs, and narrow details. Older kids can handle most cutting alone, which builds scissor skills and fine motor control.
The 20 Printable Christmas Crafts
Work through them in order or jump to whatever suits your kids today, since every craft follows the same pattern of coloring first, then cutting, then gluing, which keeps the process calm and the pieces tidy.
1. Mix-and-Match Christmas Tree
Kids build their own tree from loose ornaments, so every tree ends up different. It is a gentle first craft for the holiday season, and it gives younger kids plenty of coloring and gluing.
You need: a printed tree template, crayons or markers, child-safe scissors, and a glue stick.
- Color the tree and the loose decorations.
- Cut out the big pieces. An adult trims the tiny shapes for little ones.
- Glue the trunk and star first.
- Layer the ornaments and garland on the branches.
Ages 4 and up, low cost, quick to finish. Tip: we color the whole page before cutting because loose small pieces are hard to hold, and we wait to glue the ornaments until the tree is colored and cut.
2. Spiral Paper Ornaments
A flat circle becomes a twirling ornament with a single cut. These are great scissor-skill practice, and they work well for a group of kids at a party. Templates come in left- and right-handed versions.
You need: a spiral template, crayons or markers, child-safe scissors, string or ribbon, and a hole punch.
- Color the spiral page.
- Cut along the spiral line from the outside toward the center.
- Punch a hole at the top and thread string through.
- Hold the string and let the spiral drop into a twirl.
Ages 5 and up, low cost. Tip: cut slowly and stay on the line, because cutting off the line can snap the spiral.
3. Photo Frame Ornament
This is the craft grandparents keep. Kids decorate a paper frame, and a small photo turns it into a gift that is perfect for the tree.
You need: a printed frame template on cardstock, a small photo, child-safe scissors, tape, ribbon, and a marker.
- Color and cut out the frame, including the opening.
- Trim the photo to sit behind the opening and tape it on the back.
- Add a paper backing and a ribbon loop.
- Write the name and year on the back.
Ages 5 and up, low cost. Tip: an adult should trim the photo and the opening for young kids. Let marker ink dry before you stack or fold anything.
4. Santa Paper Puppet
A Santa puppet turns a quiet craft into a story hour. Kids color the pieces, build the face, and then act out their own holiday scene.
You need: a Santa template on cardstock, crayons, child-safe scissors, glue, and a craft stick.
- Color the face, hat, and suit.
- Cut out the head, hat, mustache, and beard pieces.
- Glue the face and beard first, then the hat and pom-pom.
- Tape a craft stick to the back and let it dry.
Ages 4 and up, low cost. Tip: tape the craft stick along at least half the length of the back so Santa does not wobble, and give the glue about five minutes to dry before the show begins, while kids practice a silly Santa voice.
5. Elf Headband
Kids love wearing what they make. This elf headband gives them a costume for the whole afternoon, and it works well as a party activity.
You need: a headband template on cardstock, crayons, child-safe scissors, glue or tape, and a stapler for an adult to use.
- Color the elf hat or face panel and the strips.
- Cut out the pieces.
- Join the strips into a band sized to the child's head.
- Attach the elf piece to the front.
Ages 4 and up, low cost. Tip: measure the band on the child before you fasten it. Tape is gentler than staples for little heads, and it is simple to redo if the fit is off.
6. Reindeer Antlers Headband
Antlers are a classic, and they are simple enough for a classroom or a playdate. Our reindeer crafts for kids page has more ways to build on this one.
You need: an antler template on cardstock, crayons, child-safe scissors, a hole punch, string or paper strips, and tape.
- Color the antlers.
- Cut them out.
- Punch a hole on each side and tie string, or tape on a band strip.
- Fit the band around the head and secure it.
Ages 3 and up with adult help, low cost. Tip: tape is easier than staples for a classroom because you can adjust the fit in seconds, and brown, red, and even rainbow antlers all look festive in a family photo.
7. Build-a-Snowman
A snowman made of three paper snowballs is easy to stack, and kids enjoy choosing the hat and scarf. It is a friendly craft for a snowy-day feeling, even when the weather is warm.
You need: a snowman template, crayons, child-safe scissors, glue, and optional pale blue paper for a background.
- Color the snowballs and accessories.
- Cut them out.
- Stack and glue the three snowballs.
- Add the face, arms, buttons, hat, and scarf.
Ages 4 and up, low cost. Tip: stack the snowballs before you add the face. Gluing the face on first makes everything crooked. Older kids can cut the small buttons and the carrot nose, while younger ones color the hat and scarf and glue the pieces on.
8. Snow Globe
This paper snow globe gives kids a tiny winter scene to design. Add snow dots and a shiny cover, and it looks surprisingly festive.
You need: a globe template, crayons, child-safe scissors, glue, a white crayon or torn paper, and optional clear contact paper.
- Color the globe base and the scene pieces.
- Cut out the globe and the chosen pieces.
- Glue the scene inside.
- Add snow dots or torn paper, then cover with clear contact paper for a glassy shine.
Ages 5 and up, low cost. Tip: press the contact paper down from the center outward to push out air bubbles, then hang the finished globe in a window where the light makes the colors glow.
9. Gingerbread Person Dress-Up
Kids dress a paper gingerbread person in whatever outfit they dream up. It is a good pick for pretend play, and it invites careful cutting of small pieces. Find more ideas in our gingerbread crafts for kids guide.
You need: a gingerbread template on cardstock, crayons, child-safe scissors, and glue.
- Color the body and the clothing.
- Cut out the large body first.
- Cut out the outfit pieces.
- Glue on the face and clothes, or leave them loose for play.
Ages 5 and up, low cost. Tip: store the loose outfit pieces in an envelope between games, and print a few extra bodies so kids can design a whole family of gingerbread friends with different clothes and hats.

10. Paper Gingerbread House
A flat template folds into a little house that stands on its own. Kids color every window, door, and shingle before cutting, then watch the flat sheet take shape as the walls fold up and the roof tabs meet at the top.
You need: a house template on cardstock, crayons, child-safe scissors, and glue.
- Color the house.
- Cut along the outline.
- Fold on the marked lines.
- Glue the tabs to close the house.
Ages 5 and up, low cost. Tip: crease every fold line against a ruler edge before you glue, and if you print several copies, kids can line the houses up side by side to make a tiny gingerbread street on a shelf or windowsill.
11. Nativity Scene
A paper nativity gives families a quiet craft for the holiday season. Kids color the stable and figures, and the finished scene can sit on a shelf all month.
You need: a nativity template on cardstock, crayons, child-safe scissors, glue, and an envelope for storage.
- Color the stable and the figures.
- Cut them out and fold the base tabs.
- Glue the figures to the tabs.
- Arrange them inside the stable.
Ages 6 and up, low cost. Tip: detailed cutting needs adult help, so let younger kids color while a grown-up cuts. Keep the pieces in the envelope after Christmas so the scene is ready to set up again next year.
12. Paper Strip Angel
Loops of colored paper become a sweet angel with wings and a halo. It is a nice way to practice careful gluing, and the finished angel is light enough to hang from a branch, a doorknob, or a window latch.
You need: a strip template, crayons, child-safe scissors, glue, and ribbon.
- Color the strips and the head.
- Cut the strips out.
- Glue the strips into loops for the body and wings.
- Add the head and halo, plus a ribbon loop to hang.
Ages 5 and up, low cost. Tip: hold each loop for a few seconds while the glue grabs, since a glue stick sets slower than white glue, and let kids pick pastel or gold paper so the wings stand out from the body.
13. Pop-Up Christmas Card
Open this card and a tree pops forward. It is a lovely handmade gift for relatives, and it feels more impressive than it is to make.
You need: a card template on cardstock, crayons, child-safe scissors, and glue.
- Color the card and the tree pieces.
- Fold the card on the center line.
- Cut the marked slits and fold the tree forward.
- Glue the pieces and write a message.
Ages 6 and up, low cost. Tip: crease the fold sharply before cutting the slits, and let marker ink dry first because wet ink transfers when the card is folded, while younger kids color the tree and a grown-up makes the cuts.
14. Decorate-a-Stocking
Kids design their own stocking with a cuff and a pile of tiny decorations. It is a fun way to practice careful gluing, and it looks great taped to a door.
You need: a stocking template, crayons, child-safe scissors, and glue.
- Color the stocking and the decorations.
- Cut out the base, cuff, and shapes.
- Glue the cuff across the top.
- Add the decorations and a name label.
Ages 4 and up, low cost. Tip: glue two stockings together along the side and bottom edges only, which leaves a pocket for notes or small treats, and make one for every person in the family so each name label can have its own colors and shapes.
15. Christmas Bookmarks
Bookmarks are quick, useful, and easy to make in a batch. They make a tidy gift for teachers, classmates, and cousins. The rectangular shape gives plenty of room for a name, a pattern, or a short holiday message along one edge.
You need: a bookmark page, crayons, child-safe scissors, cardstock, glue, and optional laminating.
- Color the design and add a name.
- Cut around each rectangle.
- Glue each one to cardstock for strength.
- Punch a hole at the top and tie on a ribbon.
Ages 4 and up, low cost. Tip: if you laminate, leave a small border of plastic around each bookmark and trim the edges once more afterward for a clean finish, then tie a ribbon through a punched hole at the top to make each one a ready-made gift.
16. Paper Wreath
A paper wreath is festive, simple to hang, and a good one for layering colors. Kids can add as many decorations as they want, from paper berries and bows to stars, until the ring is full.
You need: a wreath template, crayons, child-safe scissors, glue, and ribbon.
- Color the ring and the decorations.
- Cut out the outer shape. An adult removes the center for little ones.
- Layer and glue the decorations.
- Add a ribbon at the top.
Ages 4 and up with adult help, low cost. Tip: an adult can fold the ring in half to start the inner cut, which leaves younger kids free to color and glue the decorations, and a few red sticker dots make easy berries.
17. Christmas Crown
A crown makes dinner feel like a celebration. Kids decorate the front panel with patterns and shapes, then wear it all evening, which makes the crown a favorite for holiday meals with cousins.
You need: a crown template on cardstock, crayons, child-safe scissors, and tape or glue.
- Color the front panel and the side strips.
- Cut out the pieces.
- Tape a strip to each end.
- Fit the crown around the head, then secure the overlap.
Ages 3 and up with adult help, low cost. Tip: overlap the two ends by about 2 cm before taping so the crown can be adjusted, and set out stickers and metallic crayons so every guest at the table can decorate a crown before dinner.
18. Build-a-Nutcracker
Kids stack a uniform, a hat, and a face into a tall paper soldier. It takes a little patience and a steady hand, which makes it a nice pick for older kids who like to plan each piece before gluing.
You need: a nutcracker template, crayons, child-safe scissors, glue, and optional paper fasteners.
- Color the uniform.
- Cut out the body and clothing.
- Check the order of the pieces.
- Glue the hat, face, jacket, arms, legs, and boots.
Ages 6 and up, low cost. Tip: dry-fit the pieces in a line before pressing down, then glue from the bottom up so the boots sit neatly under the legs and the hat lands last on top of the face.
19. Paper Garland
A garland lets every child in the house add something to the display. It is perfect for classrooms, mantels, and bedroom walls, and a family can fill a whole mantel together.
You need: garland shapes, crayons, child-safe scissors, a hole punch, and ribbon or yarn.
- Color enough shapes to fill the display space.
- Cut them out.
- Punch a hole near each top. An adult should do this step.
- Thread the shapes onto string and leave extra at the ends.
Ages 4 and up, low cost. Tip: print two copies for a longer garland, and let kids alternate shapes and colors to make a pattern, or try our snowflake crafts for kids for a snowy variation.
20. Christmas Village
Finish the season with a whole paper village. Kids color the houses, fold them, and arrange the street however they like, and the finished village can stay on a tabletop for the whole holiday season.
You need: house templates on cardstock, crayons, child-safe scissors, and glue.
- Color the houses, trees, and details.
- Cut out the pieces and fold the base tabs.
- Glue the roofs, doors, and windows.
- Arrange everything on a snowy base.
Ages 6 and up, low cost. Tip: keep paper away from heat if you add lights, and leave about 5 cm between houses so a snowy road of white paper fits between them and the village reads as a little town.

Frequently Asked Questions
Should I laminate the finished crafts, and will they last?
Laminating suits bookmarks, ornaments, and the village houses, and it makes them wipe-clean for next year. Un-laminated paper crafts keep well in an envelope or flat box, though colors on thin paper may curl a little in humid rooms.
Are these free to use, and how many copies do I print for a class?
Check the usage terms on the site you download from before copying for a class. For a class, print one copy per child plus two or three spares for mistakes, and let kids keep their finished piece.
How long does cutting prep take an adult?
Toddlers and preschoolers need an adult to pre-cut eye openings, inner wreath circles, small tabs, and narrow details. The wreath, photo frame, and pop-up card have the most of that. Flat crafts like the bookmarks and garland shapes need almost none.
Which crafts suit a toddler?
The antlers, crown, stocking, and Mix-and-Match Christmas Tree work best for ages 3 to 4, since toddlers can scribble the color and press on glue sticks. The nutcracker and nativity are better saved for ages 6 and up.
Final Thoughts
These crafts need only paper, color, and a little time. Pick one tonight, and save the rest for a busy week in the holiday season. For more ideas, try our Christmas art projects for kids.