25 Easy Winter Crafts for Kids
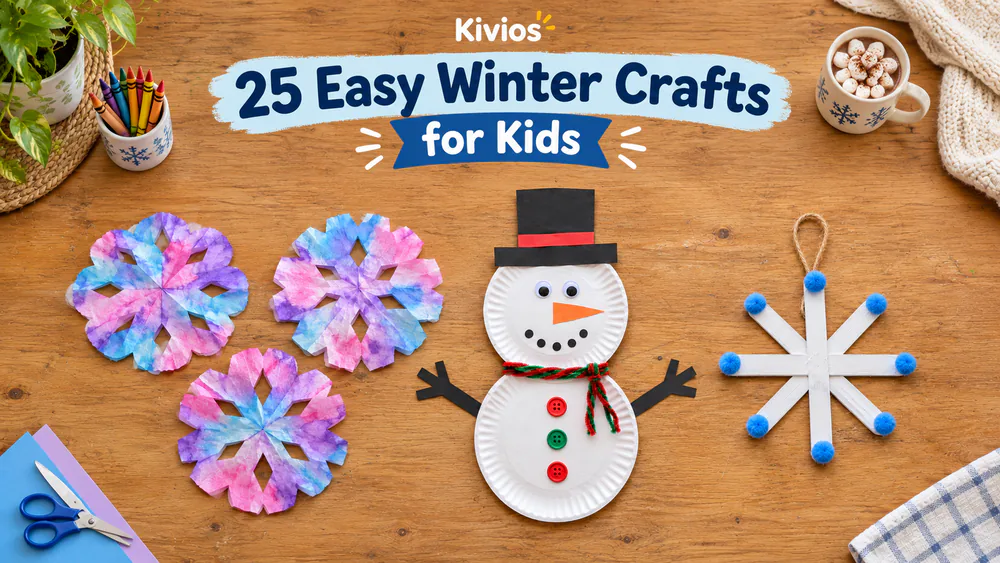
This list gives you 25 winter crafts for toddlers through elementary kids, from snowmen and penguins to snowflakes and polar bears. Each one uses simple supplies like paper, glue, pipe cleaners and cotton balls, and most fit into a 15-30 minute block on a snowy day indoors.
25 Winter Crafts for Kids to Make
1. Coffee Filter Snowflakes
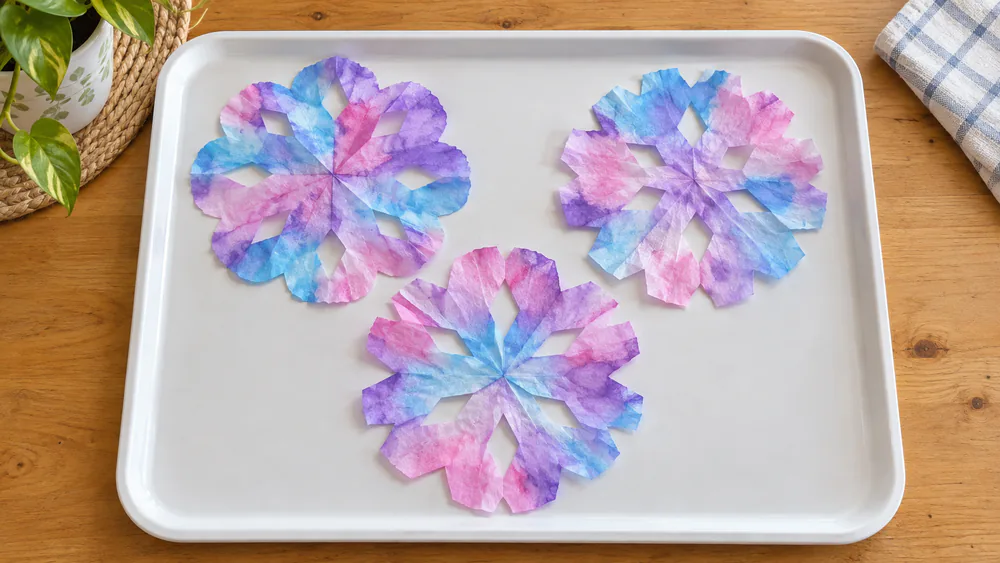
Coffee filters turn scribbles into soft, colorful snowflakes, and kids love watching the colors bleed together.
You need: coffee filters, washable markers, scissors, a spray bottle of water, a tray.
- Fold a filter in half, then fold it again three or four times into a small wedge.
- Snip small notches and shapes along the edges.
- Unfold the filter and scribble markers across it.
- Mist lightly with water so the colors bleed, then dry it flat on a tray.
Ages 4+, about 20 minutes, low cost. Tip: too much water makes the colors muddy, so mist lightly. Hang a few in a sunny window so the light shows through the thin paper.
2. Paper Plate Snowman
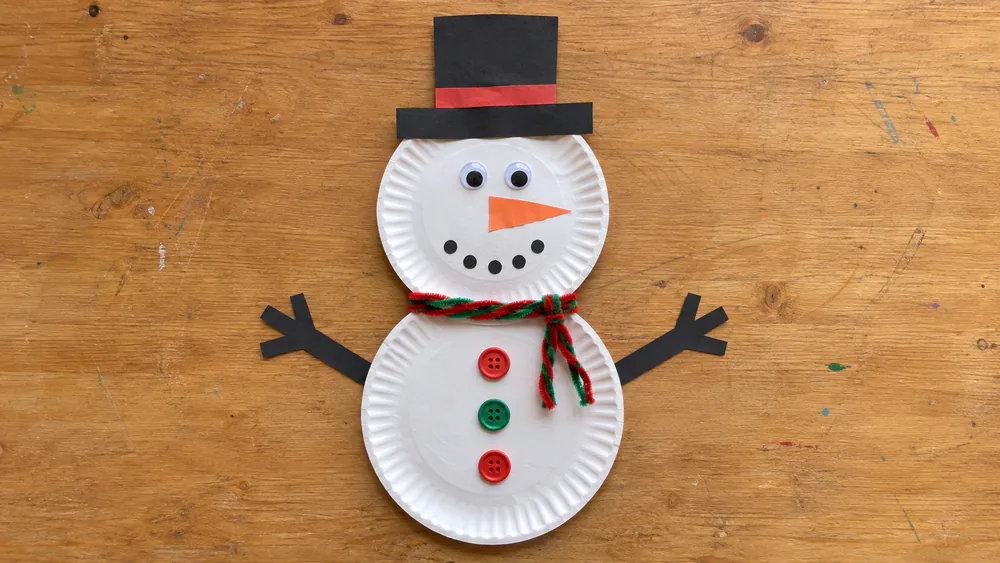
A paper plate snowman gives kids a big, friendly face to decorate. Stacking two plates makes a tall body, and every child can give theirs a different hat.
You need: two paper plates, a glue stick, hot glue (adult), construction paper, buttons, googly eyes, a pipe cleaner, scissors.
- Glue two plates together, rim to rim, for a taller body.
- Cut a hat and arms from construction paper and glue them on.
- Add googly eyes, a paper carrot nose and button coins down the front.
- Tie a pipe cleaner around the middle as a scarf.
Ages 3+, about 20 minutes, low cost. Tip: plain glue slides off plates, so let an adult add a hot glue dot to join them.
3. Popsicle Stick Snowflakes
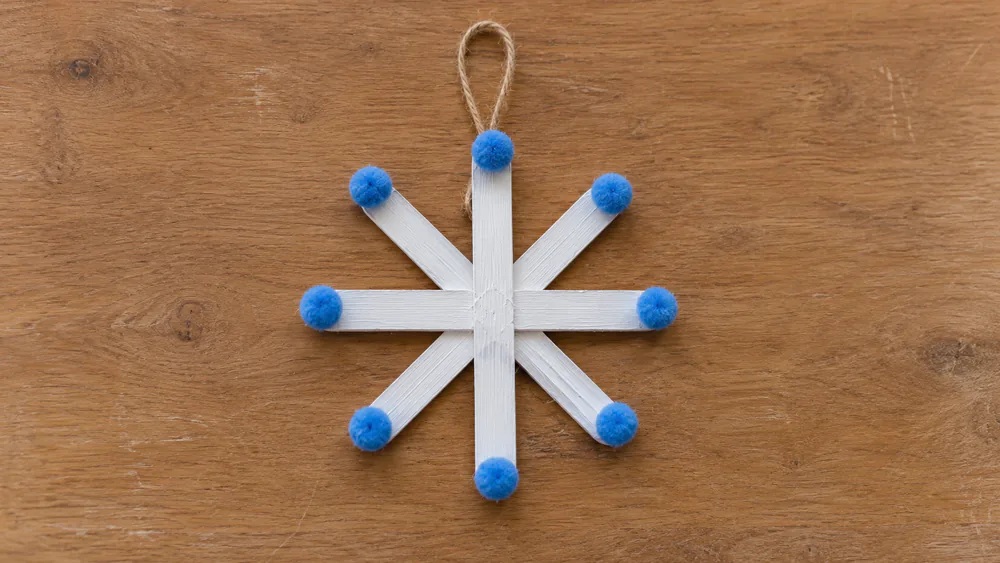
Craft sticks make sturdy snowflakes that kids can paint and decorate however they like. They hang well in a window and store easily for next winter.
You need: craft sticks, white or blue paint, glue (hot glue for an adult), glitter, pom-poms, buttons, twine.
- Paint the sticks white or blue and let them dry.
- Glue two sticks in a cross, then glue two more diagonally across them.
- Dab glue on the arms and add pom-poms, buttons or glitter.
- Loop twine on the back for hanging and dry the snowflake flat.
Ages 5+, about 25 minutes plus drying, low cost. Tip: wet paint makes sticks slide, so let them dry first. Younger kids can paint while a grown-up handles the glue.
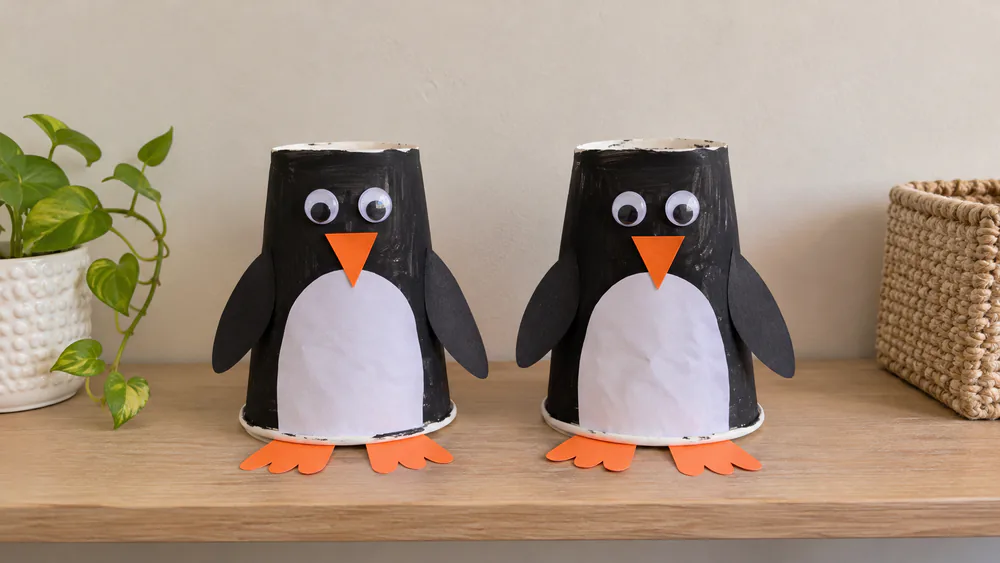
4. Paper Cup Penguin
A paper cup becomes a chubby penguin in a few quick steps. Preschoolers can mostly do it on their own, and it stands up by itself when finished.
You need: a paper cup, black and orange paint or paper, white paper, googly eyes, glue.
- Paint the cup black, leaving a white belly patch if you like.
- Cut flippers from black paper and glue them to the sides.
- Add a paper belly, googly eyes and an orange triangle beak.
- Glue orange paper feet at the base so the penguin stands.
Ages 3+, about 20 minutes, low cost. Tip: let the paint dry fully before gluing the flippers, or they will peel off. Line several penguins up on a shelf for a snowy scene.
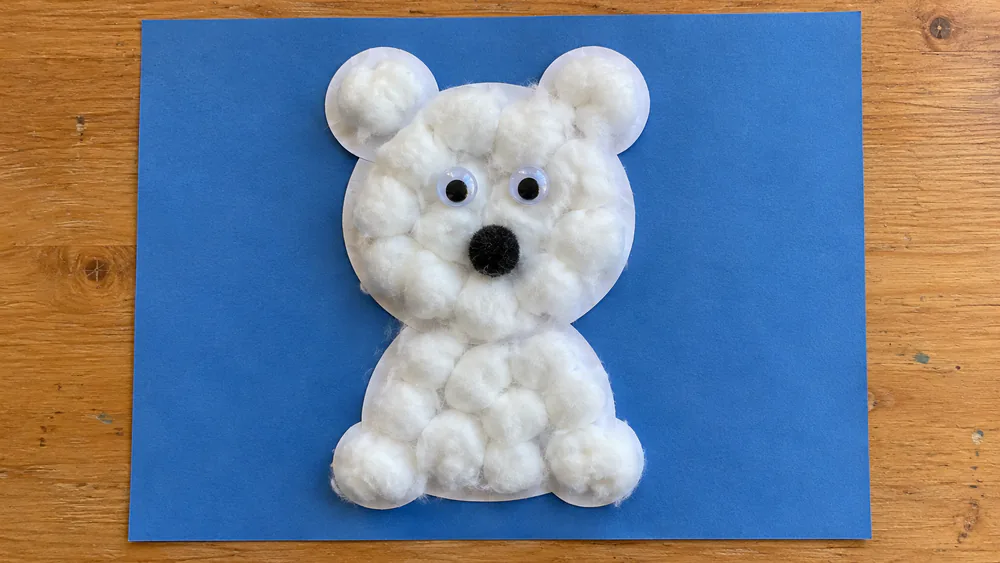
5. Cotton Ball Polar Bear
Fluffy cotton balls give this polar bear a soft, cuddly look. It suits kids who love sticking things down, and the texture is fun to touch afterward.
You need: a white paper plate or paper, black paper, cotton balls, googly eyes, a black pom-pom or marker, glue, blue paper.
- Cut a bear head shape from the plate or paper.
- Glue on ears and a snout.
- Stick cotton balls over the face and body.
- Add googly eyes and a black nose, then mount the bear on blue paper.
Ages 3+, about 20 minutes, low cost. Tip: use thin layers of glue or the cotton falls off. This one is among the messiest, so cover the table first. Scrunched tissue paper works in place of cotton balls.
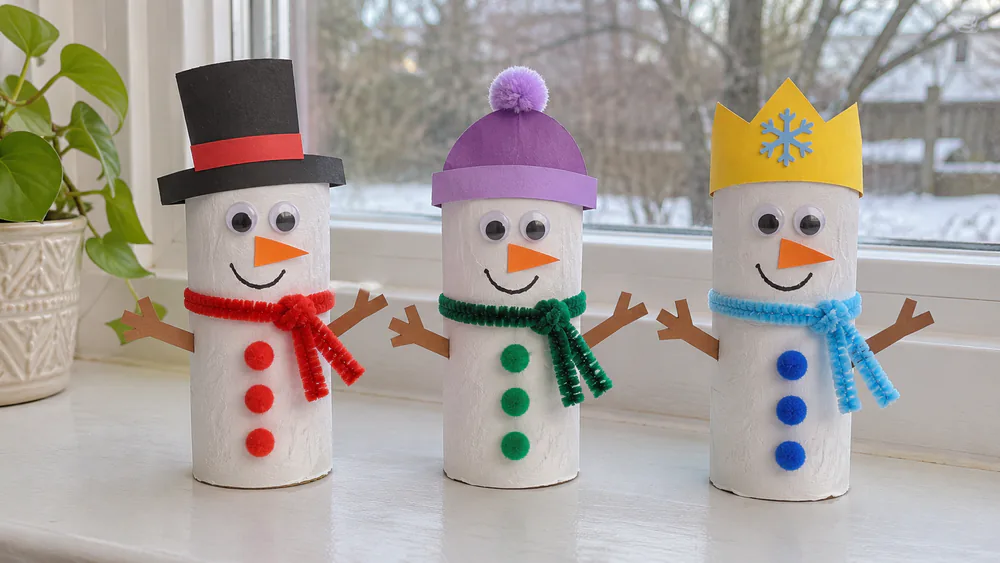
6. Toilet Paper Roll Snowman
Recycled cardboard rolls make a tiny snowman that is easy to line up on a windowsill. A whole snowman family takes very little time.
You need: a toilet paper tube, white paint, googly eyes, orange paper, pom-poms or buttons, hot glue (adult), a pipe cleaner.
- Paint the tube white and let it dry.
- Glue on googly eyes and an orange paper nose.
- Add pom-pom buttons down the front.
- Wrap a pipe cleaner scarf around the neck, then add paper arms and a hat.
Ages 4+, about 25 minutes plus drying, low cost. Tip: two coats of white cover the brown cardboard completely. Make a small family of three or four, each with a different hat, and line them up on a windowsill to enjoy.
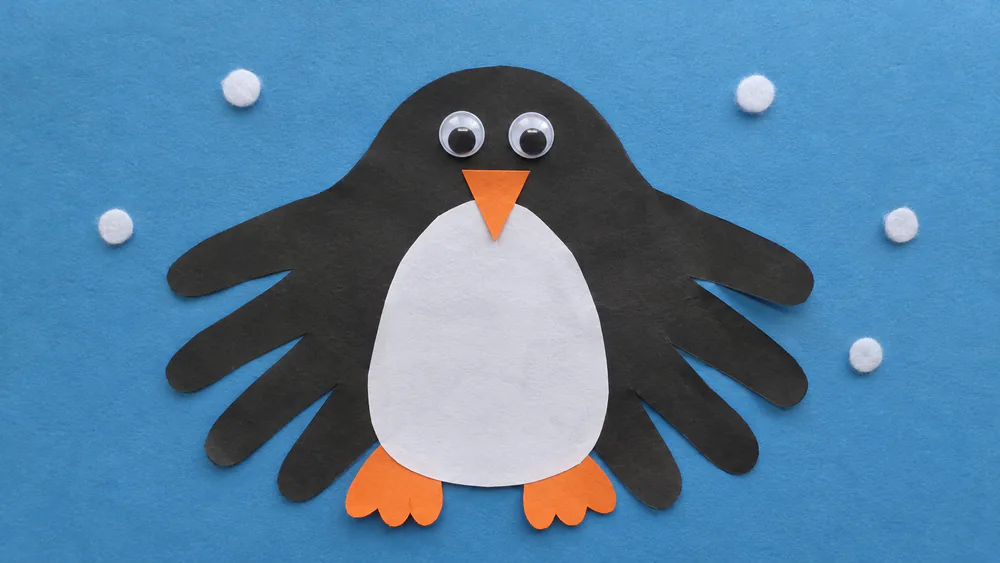
7. Handprint Penguin
A handprint penguin is a sweet keepsake, and kids enjoy seeing their own hands turn into something new. It also records how small they were this winter.
You need: cardstock, white and black paper, orange paper, googly eyes, white felt or pom-poms, blue paper, glue.
- Trace the child's hands on black paper and cut them out.
- Fan the two handprints together to form the penguin body.
- Add a white belly, googly eyes and an orange beak.
- Glue the penguin to blue paper and add snow dots with felt or pom-poms.
Ages 3+, about 20 minutes, low cost. Tip: trace with the fingers held together so the shape reads as a body. Toddlers will need a grown-up to do the cutting.
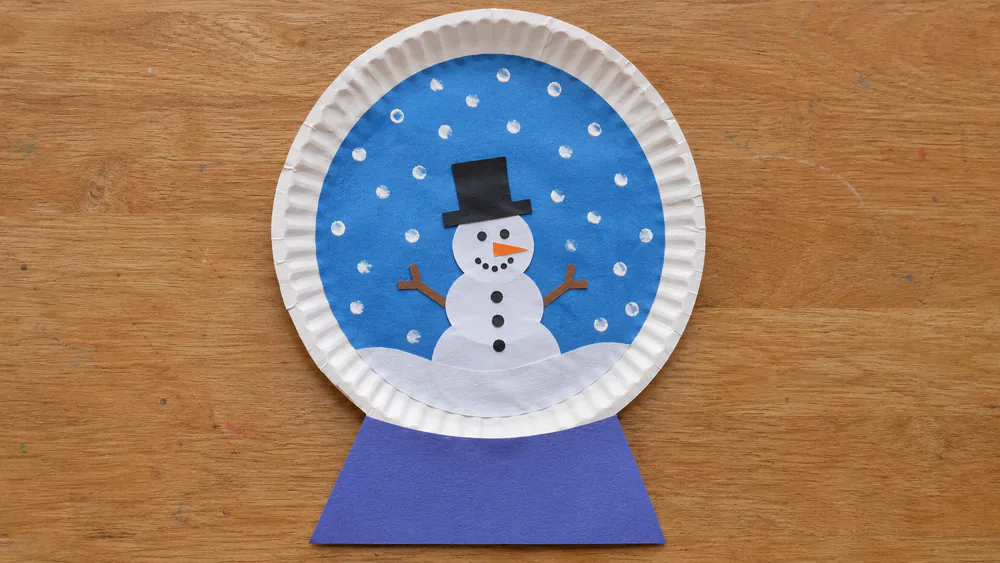
8. Paper Plate Snow Globe
This flat snow globe is a no-mess cousin of the glass kind. Kids build a tiny winter scene inside a paper circle, and the finished globe stands up on its own base.
You need: a paper plate or cardstock, blue paper, white paper, scissors, a glue stick, Q-tips, white paint.
- Cut a circle for the globe and a base from paper.
- Cut a white snowman and a black hat from scraps.
- Glue the snowman low inside the globe.
- Dip Q-tips in white paint, dab on snow, then glue the globe onto the base.
Ages 4+, about 25 minutes, low cost. Tip: add snow last, once everything else is dry. Kids like to swap in their own figures, and a dinosaur in place of the snowman often becomes the favorite.
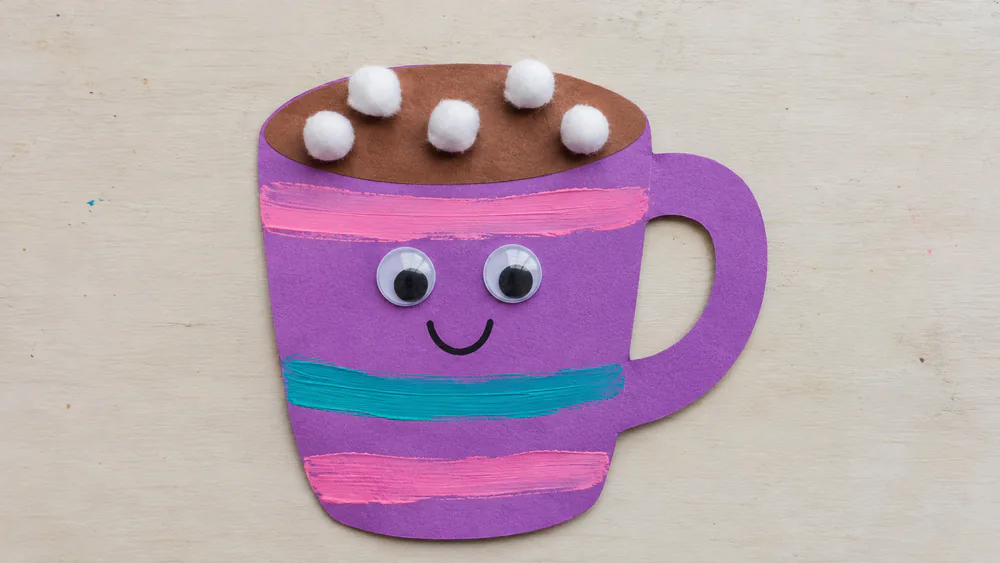
9. Hot Cocoa Paper Craft
A paper mug of hot cocoa is a cozy craft with a built-in snack theme. Kids pick their own decorations and pile on the marshmallows.
You need: cardstock, brown paper, mini pom-poms, paint pens, googly eyes, glue.
- Cut a mug shape from colored cardstock.
- Glue brown paper across the top to look like cocoa.
- Decorate the mug with snowflakes or stripes using paint pens.
- Glue pom-pom marshmallows on top and add googly eyes for a funny face.
Ages 4+, about 20 minutes, low cost. Tip: leave the cocoa edge slightly curved so the marshmallows fit. Pair it with a real mug of cocoa. Let kids choose their own mug colors and decorations so each one looks different.
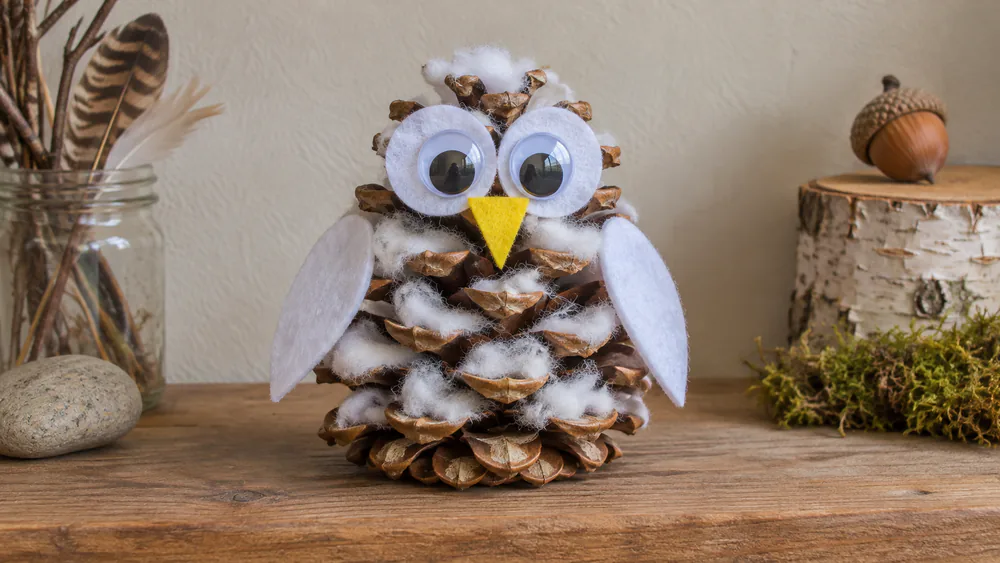
10. Pinecone Snowy Owl
A pinecone makes a ready-made owl body, and cotton balls give it a snowy coat.
You need: a pinecone, white cotton balls, black, yellow and white felt, large googly eyes, tacky or hot glue.
- Tuck torn cotton balls between the scales of the pinecone.
- Cut felt wings, a beak and two eye circles.
- Glue the eyes and beak near the top.
- Glue the wings onto the sides.
Ages 5+, about 25 minutes, low cost. Tip: tacky or hot glue holds better on pinecone scales than a glue stick. An adult should handle any hot glue. Place the finished owl on a shelf where small hands cannot knock it over.
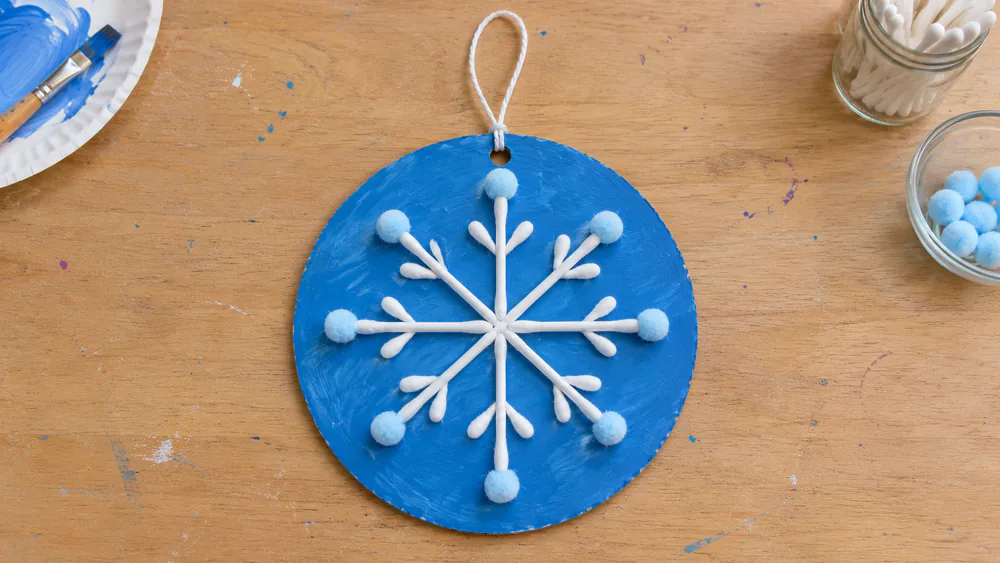
11. Q-Tip Snowflakes
Q-tips make clean, crisp snowflake arms that kids can arrange themselves.
You need: cardboard, Q-tips, acrylic paint, tacky glue, small pom-poms, a hole punch, string.
- Cut a cardboard circle or shape and paint it a winter color.
- Glue Q-tips in a star pattern across the card.
- Add pom-poms on the tips of the arms.
- Punch a hole and add string for hanging.
Ages 4+, about 30 minutes plus drying, low cost. Tip: tacky glue needs several minutes to grab. Older kids can design the snowflakes themselves, while preschoolers can paint the cardboard and glue on the Q-tips.
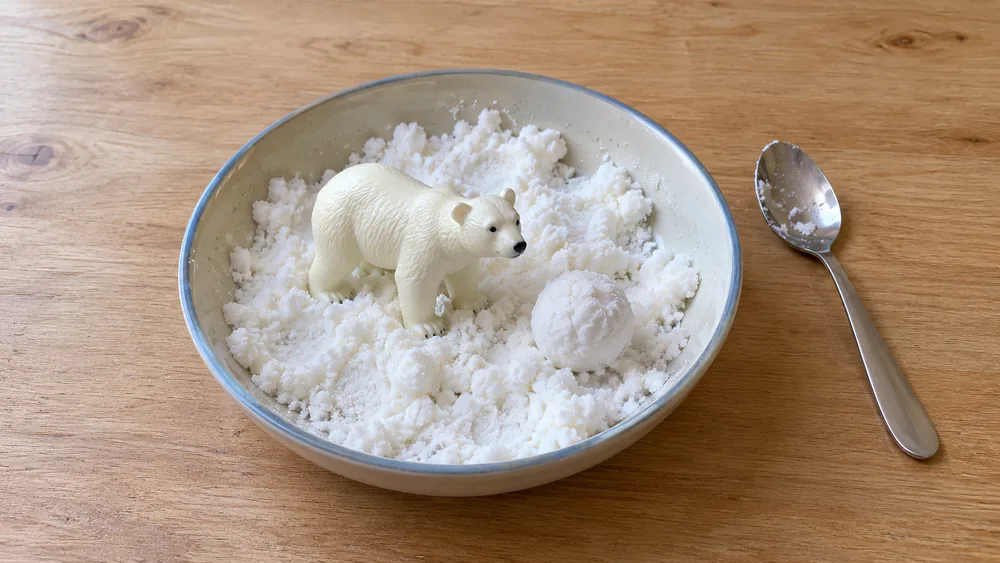
12. Homemade Fake Snow
Fake snow gives kids a cold-looking sensory bin without any actual cold. Kids can pack, scoop and mold it like real snow, then add small arctic animal toys to create a play scene.
You need: baking soda, white hair conditioner, a bowl, a spoon, small toys or arctic animals.
- Put about 3 cups of baking soda in a bowl.
- Mix in about 1/2 cup of white hair conditioner, adding it gradually.
- Knead until it packs like snow.
- Scoop and mold snowballs, then set small toys in the bin.
Ages 3+ with supervision, about 15 minutes, low cost. Tip: if it is too dry, add conditioner, and if it is too wet, add baking soda. Skip it for kids who still mouth things.
13. Salt Painting Snowflakes
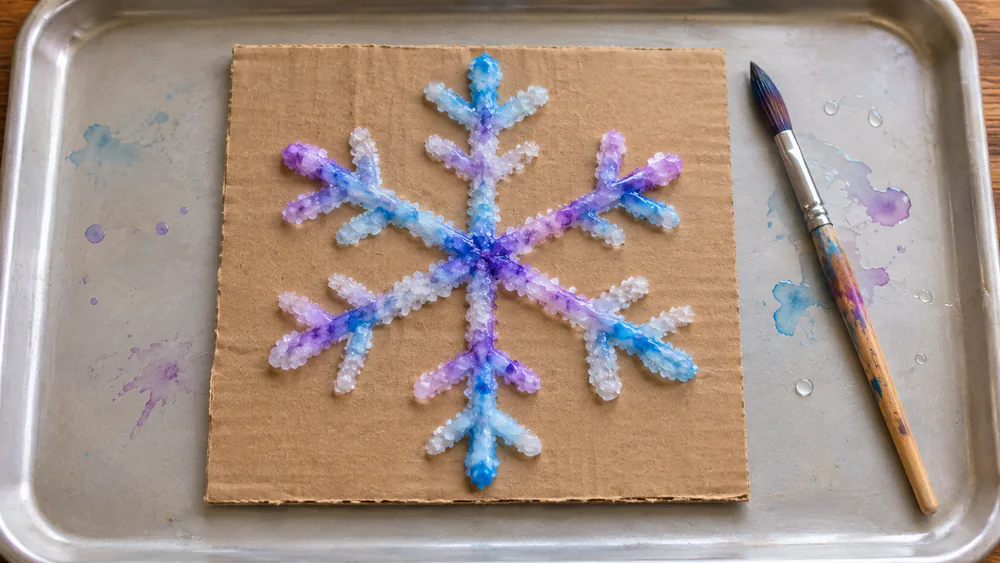
Salt painting feels a little like magic. Kids love watching watercolor flow through the salt, and the crunchy texture makes a snowflake that looks frosted.
You need: cardboard, a pencil, white glue, salt, watercolors, a paintbrush.
- Draw a snowflake in pencil on the cardboard.
- Trace the lines with white glue.
- Pour salt over the glue and tip off the extra.
- Touch a wet watercolor brush to the salt and watch the color spread, then dry flat.
Ages 4+, about 20 minutes plus drying, low cost. Tip: glue lines must be thick and fully covered with salt, or gaps show. Let it dry flat before you hang it up, since the glue and salt take a while to set firmly.
14. Crayon Resist Winter Hats
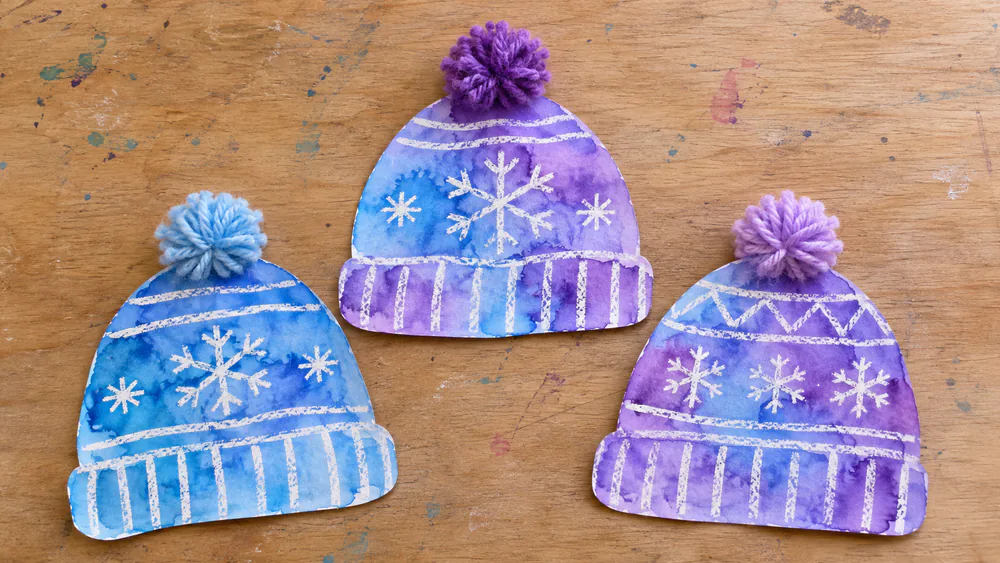
Crayon resist is a quiet craft where hidden patterns appear under the paint. It suits kids who like a small surprise, and each hat turns out different.
You need: white cardstock, white crayons or oil pastels, watercolor paint, yarn, scissors.
- Draw a winter hat shape on the cardstock.
- Press white patterns onto it, like stripes, dots and snowflakes.
- Paint watercolor over the whole hat so the pattern shows.
- Let it dry, cut out the hat, and add a yarn pom-pom on top.
Ages 4+, about 20 minutes plus drying, low cost. Tip: press hard on the crayon or the pattern will not show. Make several hats for a cozy wall display.
15. Mitten Garland
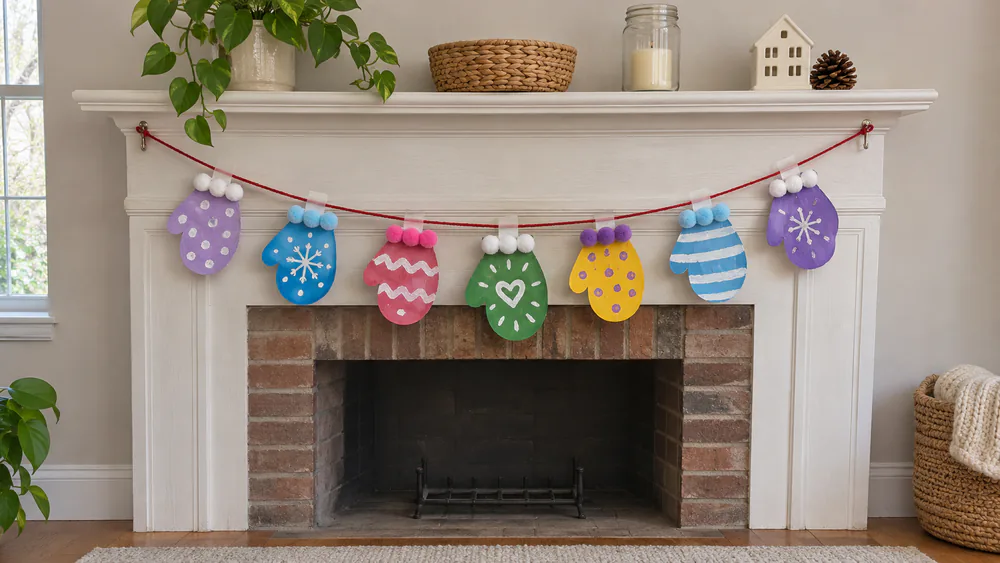
A mitten garland brightens a mantel or window, and every child can add their own pair. The garland grows as more kids join in.
You need: cardstock or felt, paint, yarn or twine, pom-poms, tape, glue, scissors.
- Cut mitten shapes from cardstock or felt.
- Press painted hands onto them, or brush paint on.
- Let them dry, then add pom-poms for decoration.
- Tape the mittens to a length of yarn.
Ages 4+, about 25 minutes plus drying, low cost. Tip: threading felt mittens onto a string is fiddly for younger kids, so a grown-up should do that step. Add a few extra mittens for a longer string. Hang the finished garland where everyone can see it.
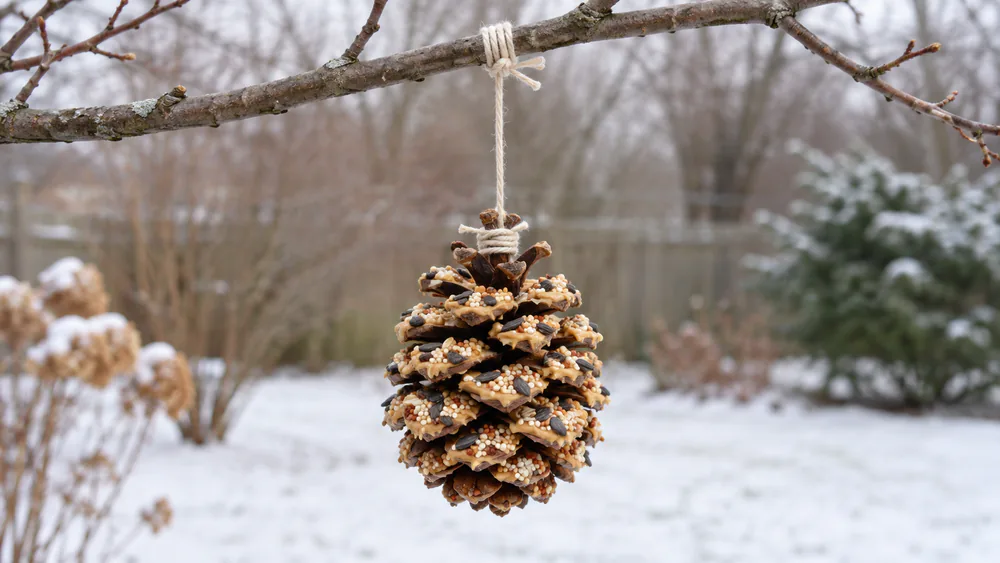
16. Pinecone Bird Feeders
A bird feeder sends the craft outdoors, and kids can watch for visitors from the window. It teaches them to notice who comes to eat.
You need: pinecones, peanut butter, birdseed, string, a butter knife.
- Tie a length of string to the top of the pinecone.
- Spread peanut butter into the crevices with the butter knife.
- Roll the pinecone in a plate of birdseed.
- Hang it from a branch outside where you can see it.
Ages 3+, about 15 minutes, low cost. Tip: check for nut allergies at home first, and use sunflower seed butter as a swap. Wash hands well after the rolling. Hang the feeder low enough that kids can watch the birds arrive.
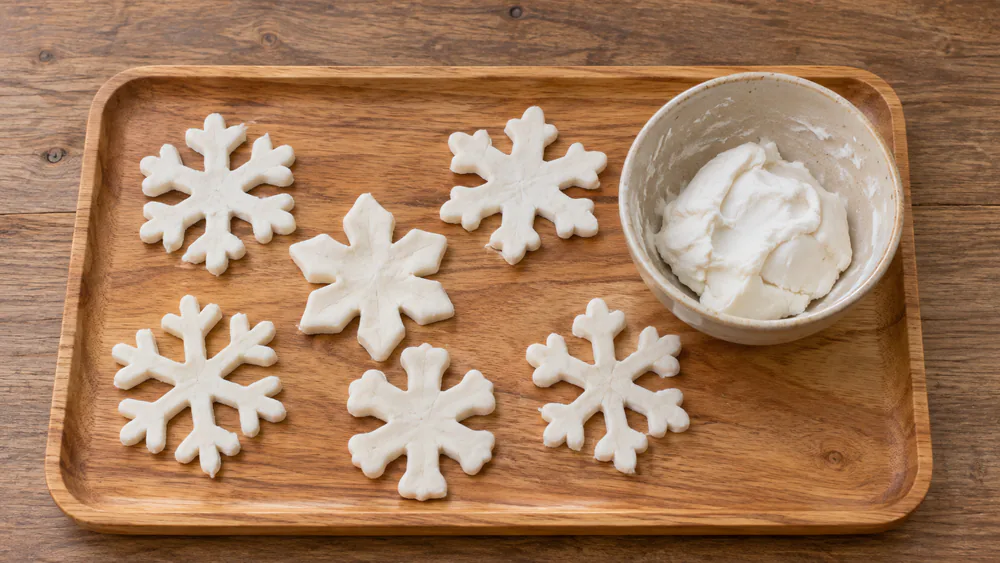
17. Snow Dough
Snow dough is soft, cold-looking and fun to squish. It is a good sensory craft for a snowy day indoors, and it keeps little hands busy for a long stretch.
You need: cornstarch, lotion, optional glitter, a bowl.
- Put about 1 cup of cornstarch in a bowl, with a pinch of glitter if you like.
- Stir in about 1/2 cup of lotion slowly, a squirt at a time.
- Knead until the dough is soft.
- Press it into shapes or roll small snowballs.
Ages 3+ with supervision, about 15 minutes, low cost. Tip: start with about 2 parts cornstarch to 1 part lotion, then adjust a squirt at a time, since lotion brands differ. Add more lotion if the dough crumbles, or more cornstarch if it feels sticky.
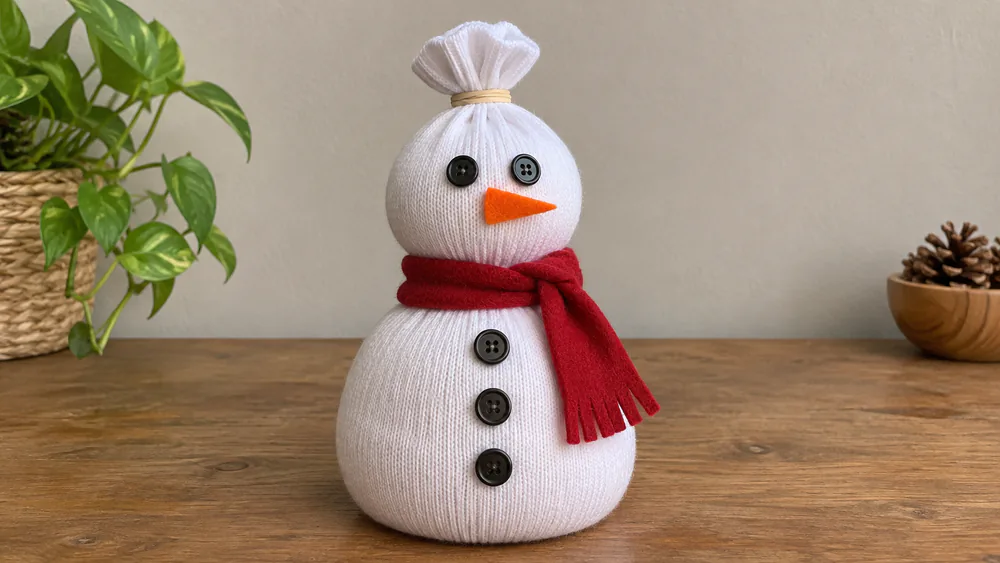
18. No-Sew Sock Snowman
A sock snowman is soft and huggable, and no sewing is needed. It makes a lovely little gift for grandparents, and older kids can decorate the face any way they like.
You need: a white sock, rice, a funnel, rubber bands, a scarf scrap, buttons, orange felt.
- Fill the sock with rice, using a funnel to keep it tidy.
- Tie off the top with a rubber band.
- Band the middle to form the head and body.
- Add a scarf, a felt nose and button eyes.
Ages 6+, about 25 minutes, low cost. Tip: use extra rubber bands so the rice stays in. This one is not for toddlers, since the rice and small buttons are a hazard.
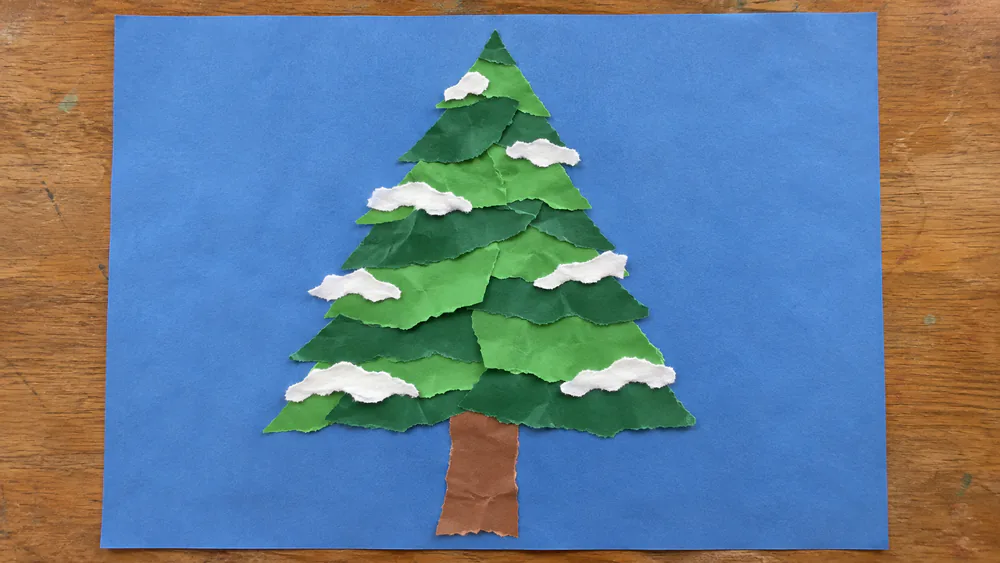
19. Torn Paper Winter Trees
Tearing paper builds fine motor skills, and it stays pleasantly tidy. The rough edges make the trees look like real evergreens against a calm blue sky.
You need: blue paper, green and white paper, a glue stick, brown paper.
- Glue a brown paper trunk onto blue paper.
- Tear green paper into small scraps.
- Glue the scraps in layers to build a tree shape.
- Tear white paper into tiny pieces for snow on the branches.
Ages 3+, about 20 minutes, low cost. Tip: tear by hand for rough edges rather than cutting with scissors. Little kids can do the whole craft alone. It is one of the tidier crafts on this list, so it works well for a quick afternoon.
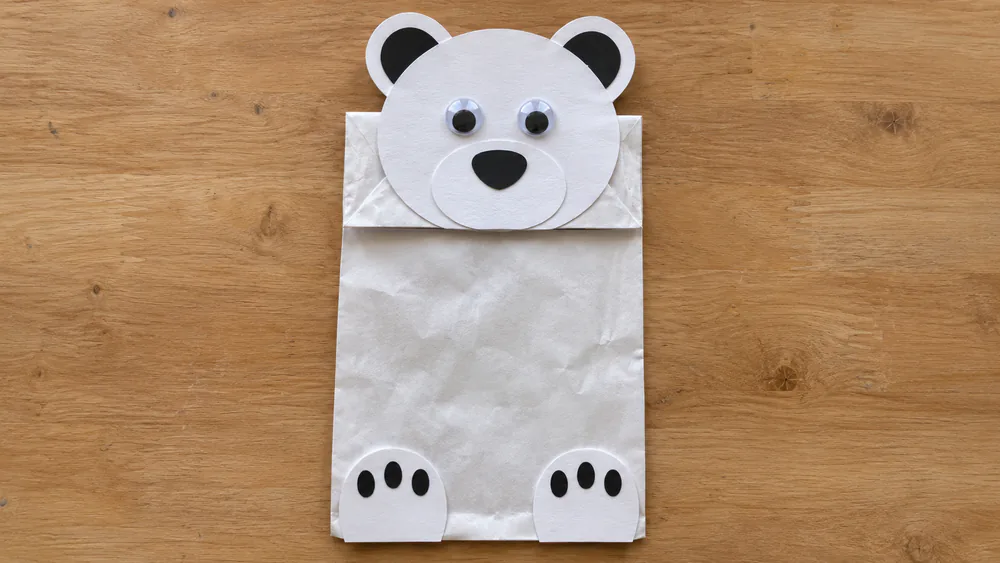
20. Paper Bag Polar Bear Puppet
A paper bag puppet gives kids a polar bear for storytelling afterward. The folded bag flap makes a natural mouth, and the puppet is ready to play as soon as the glue dries.
You need: a white paper bag, white and black construction paper, googly eyes, glue.
- Glue a round head shape to the folded bag flap.
- Add two ears and a snout.
- Glue on googly eyes and a black nose.
- Add paw shapes at the bottom of the bag.
Ages 4+, about 20 minutes, low cost. Tip: put the face on the folded flap so the mouth can move. Kids can put on a polar bear show once the glue dries and the ears are firmly attached.
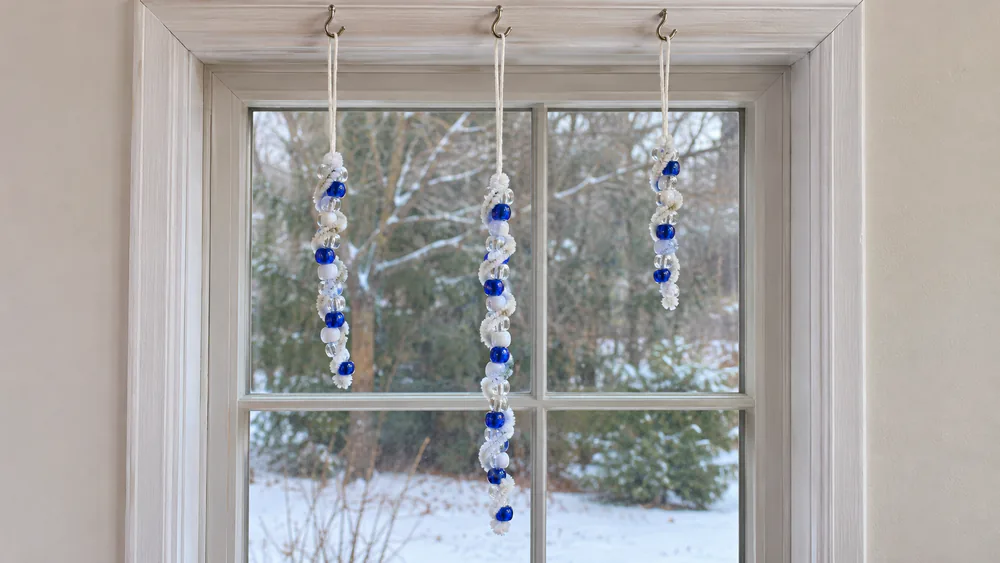
21. Pipe Cleaner Icicles
Beaded pipe cleaner icicles catch the light in a window. They are quick to make, and threading the beads is great practice for fine motor control.
You need: pipe cleaners, pony beads, string, a pencil.
- Bend one end of a pipe cleaner so the beads stay on.
- Thread pony beads along its length.
- Wrap the beaded pipe cleaner around a pencil to curl it.
- Slide it off and add a hanging loop of string.
Ages 4+, about 15 minutes, low cost. Tip: bend the end first or the beads slide off. Pick blue, white and clear beads for an icy look. Hang a few at different heights, and let kids bend them into curls for variety.
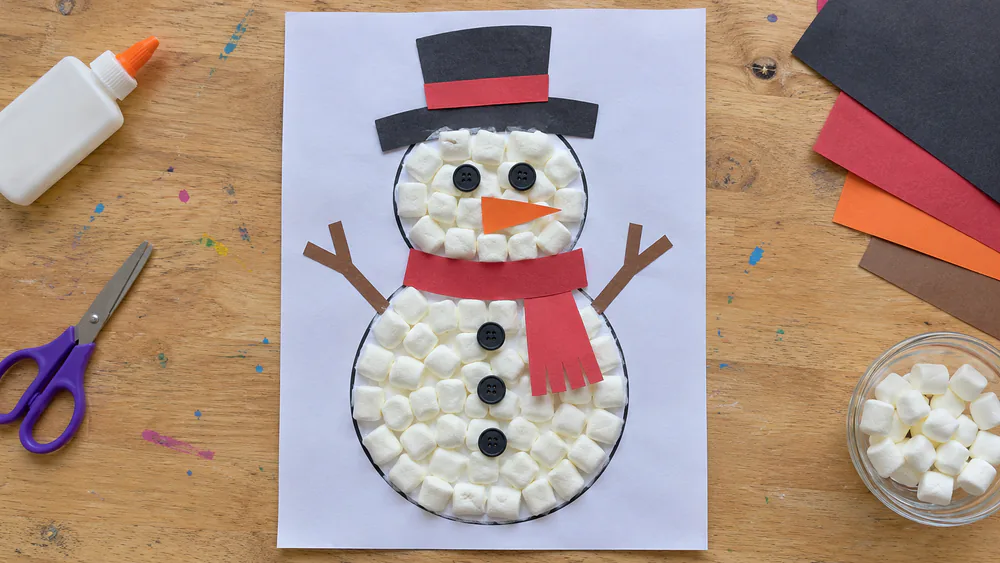
22. Marshmallow Snowmen
Marshmallow snowmen suit toddlers well, and some marshmallows get eaten along the way. A drawn outline guides little hands to the right spot.
You need: paper, a glue stick, white glue, mini marshmallows, paper scraps, buttons.
- Draw a large snowman outline on paper.
- Glue paper scraps on for a hat and a scarf.
- Outline the snowman with white glue.
- Press on mini marshmallows to fill the shape, then add button eyes.
Ages 2+ with supervision, about 15 minutes, low cost. Tip: use a glue stick for paper and white glue for marshmallows. Keep extra marshmallows nearby for snacking, and wipe sticky fingers before they touch anything else. Press each marshmallow down firmly so it sticks.
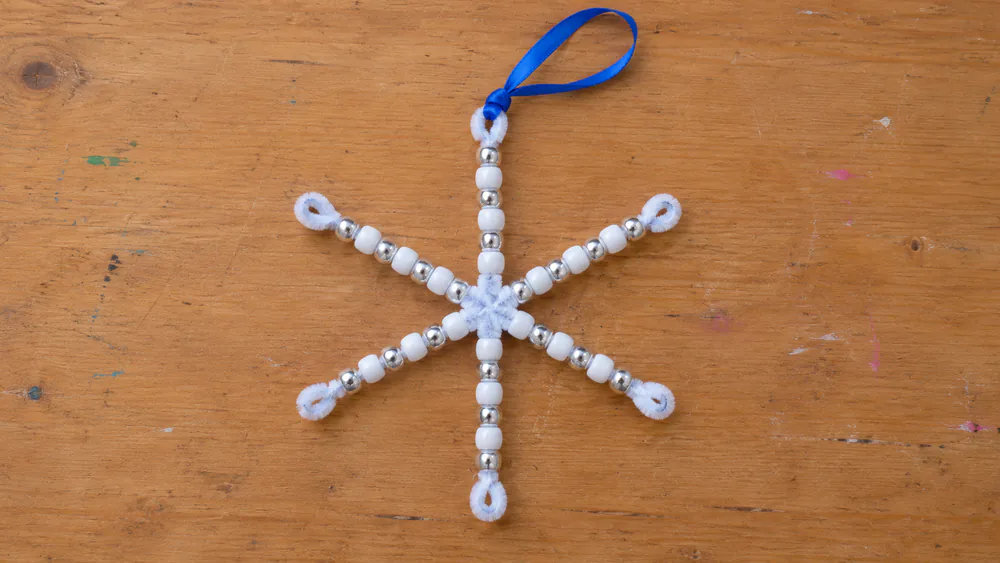
23. Beaded Snowflakes
Beaded snowflakes are bright, sparkly and easy to hang. Kids count and sort beads as they work, so the craft doubles as a quiet math game.
You need: pipe cleaners, beads, scissors, ribbon.
- Thread beads onto three pipe cleaners.
- Twist the three together at the center to make six arms.
- Trim any long ends with scissors.
- Tie a ribbon at the top for hanging.
Ages 5+, about 20 minutes, low cost. Tip: fold the ends back to hold the beads in. Younger kids can use large pony beads, which are easier to thread. Hang a few in a window so the beads catch the daylight, and count the beads together as you thread them for a little extra math practice.
24. Ice Lanterns
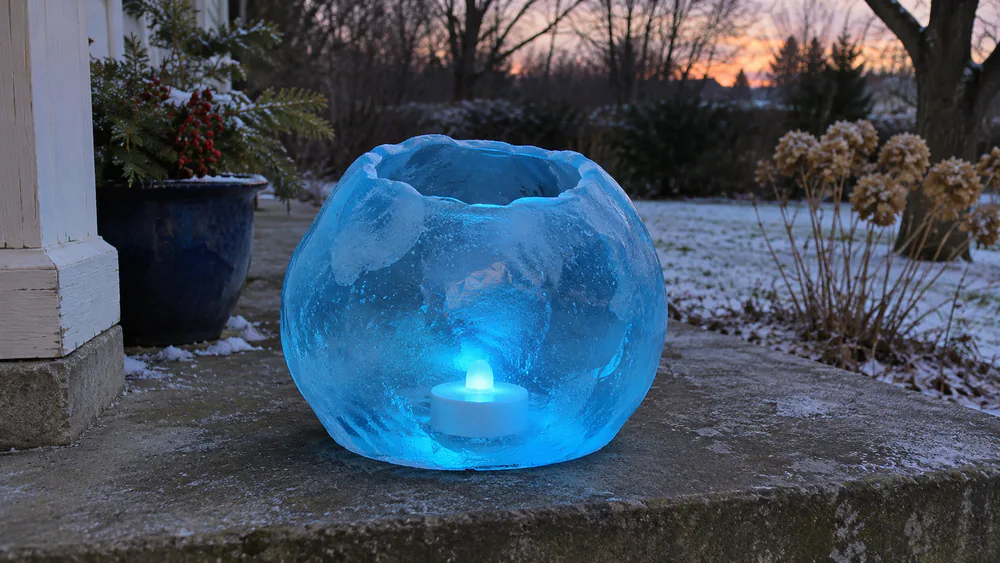
Ice lanterns glow on a dark porch and look a little magical. They need a cold night, so this one works best when the weather helps.
You need: balloons, water, food coloring, a freezer or cold porch, an LED tea light.
- Fill a balloon with water and add a drop of food coloring.
- Tie the balloon closed.
- Freeze it overnight.
- Peel off the balloon, then set an LED light inside the hollow.
Ages 6+, about 15 minutes of work plus overnight freezing, low cost. Tip: use LED lights, never real candles. An adult should handle the balloon peeling, and the lantern should go outside right away so it stays frozen.
25. Handprint Winter Tree
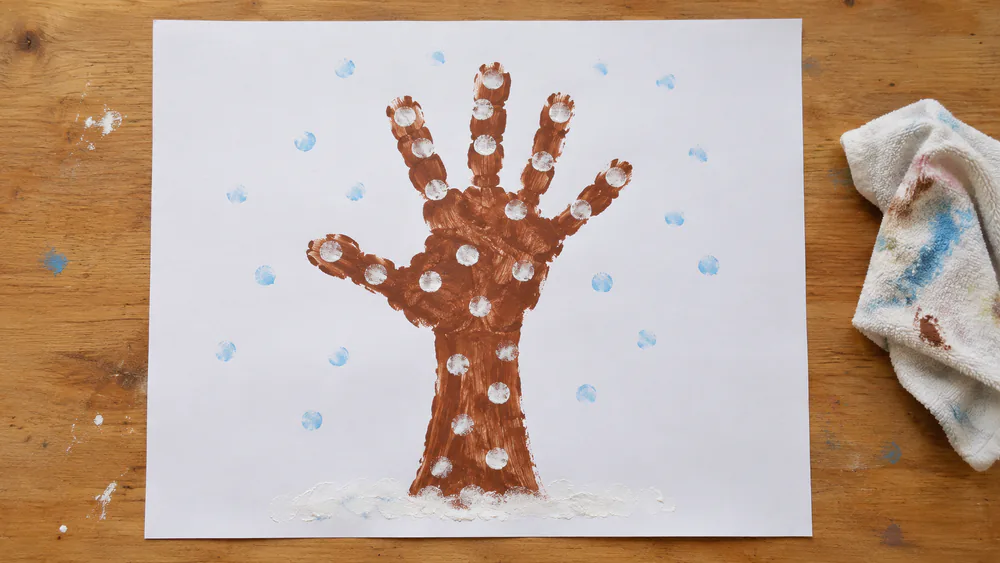
A handprint tree uses the child's arm as the trunk and their hand as the branches. It is a lovely keepsake for the wall, and kids enjoy the squishy paint.
You need: paper, washable paint, glue, a damp cloth.
- Paint the child's forearm brown to make a trunk.
- Press the arm and hand onto paper to make the print.
- Add fingerprint dots for snow or leaves.
- Let the print dry flat on the table.
Ages 3+, about 20 minutes, low cost. Tip: wash off the paint right away with a damp cloth. Add the date on the back so you remember the winter. Kids can press a few extra fingerprints along the branches for more snow, and the print looks great framed or taped to the fridge.
Supplies to Keep on Hand for Winter Crafts
Most of these crafts use the same short list: paper, glue sticks, white paint, googly eyes, pipe cleaners, cotton balls and pom-poms. Recycled rolls and cups cover the rest, so a bin of those basics lets you start almost any craft here without a store trip.
Parent tipPuffy snow paint is a good extra to try. Mix 1/4 cup of foam shaving cream with 1/4 cup of white glue, and it dries into a soft, snowy texture.
Tips for Crafting with Toddlers and Older Kids
Toddlers do best with big, forgiving steps like sticking, tearing and dabbing, as in the marshmallow snowmen (22) and torn paper trees (19). Older kids can take on the cutting, the design and the fiddly threading, such as the beaded snowflakes (23) and mitten garland (15).
The cotton ball polar bear (5) is the messiest craft on the list, so cover the table first. Torn paper trees (19) and the paper plate snow globe (8) stay tidy.
Watch outCotton balls, buttons, beads and rice are small parts, so keep them away from children who still mouth things.
More Winter and Christmas Craft Ideas
Once you finish this list, there is plenty more to try. We have more snowflake crafts for kids and winter art projects for kids ready to go.
For the holidays, try Christmas crafts for kids, gingerbread crafts for kids and reindeer crafts. You can also count down with advent crafts for kids, printable Christmas crafts and watercolor Christmas crafts.
Frequently Asked Questions
What are the easiest winter crafts for toddlers?
Marshmallow snowmen, torn paper winter trees and the paper cup penguin are the easiest. They use big, simple actions like sticking and tearing.
How do we hang or store finished crafts?
Snowflakes, icicles and mittens hang from string in a window or on yarn across a mantel. Flat paper crafts like the handprint tree store well in a folder until next winter.
Which crafts need a grown-up with hot glue?
An adult should handle the hot glue for the paper plate snowman, popsicle stick snowflakes and toilet paper roll snowman. The pinecone owl also holds best with tacky or hot glue.
What can a child who still mouths things make?
Torn paper trees and the handprint winter tree use no small parts. Skip the fake snow, snow dough, beads, rice and buttons for now.
How do these crafts help kids learn?
Cutting, tearing and threading build fine motor skills, and folding and arranging teach symmetry and hand-eye coordination.
Final Thoughts
Pick one craft that matches your kids' ages and the supplies already in your drawer. Start small, let the results be lopsided, and enjoy the cozy time together.