20 Easy New Year's Crafts for Kids
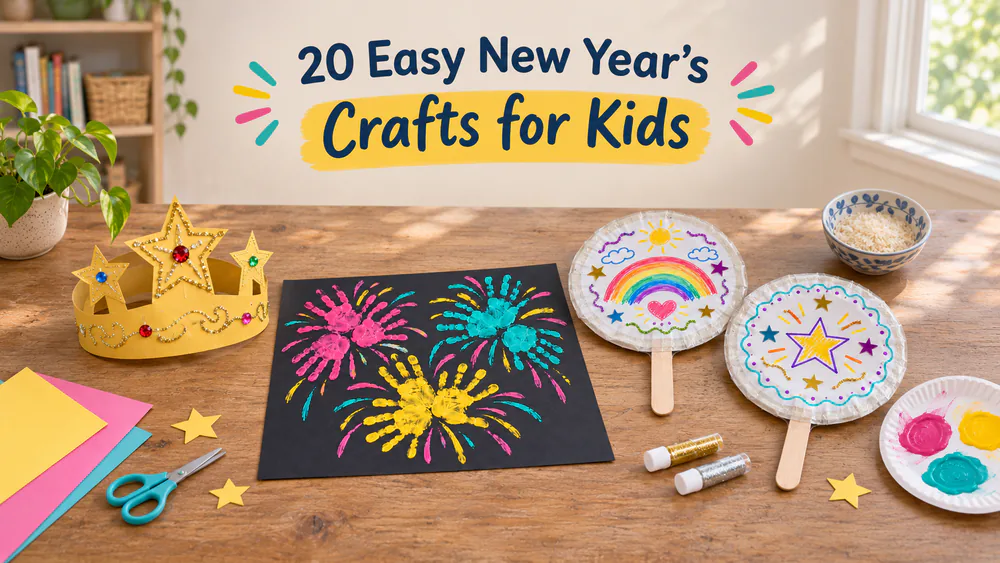
If you want the kids busy and happy until the countdown, a table full of paper, glue, and glitter is the easiest plan we know. New Year's Eve is a long evening for little hands, so a craft gives them a job while dinner cooks. These 20 projects use simple supplies, and most suit all ages with a little adult help.
What You'll Need
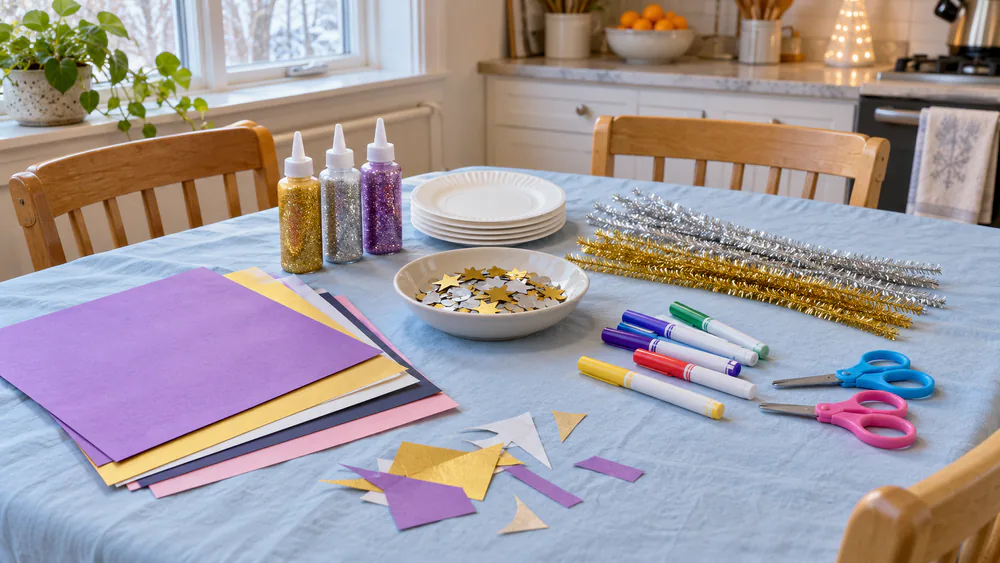
Most of these crafts pull from the same shelf, so one trip to the craft drawer covers nearly everything. The basic kit is construction paper, glitter glue, paper plates, craft sticks, child-safe scissors, glue sticks, markers, pipe cleaners, tinsel stems, confetti, uncooked rice or dried beans, balloons, rubber bands, and tape.
Each craft lists supplies, steps, and suggested ages, along with time and cost estimates. Cover the table with a washable cloth to catch stray glitter.
Watch outSeveral crafts use small parts, glitter, balloons, and loose beads, so keep them away from children who still put things in their mouths. Pick up popped balloon pieces right away.
1. Salt Firework Painting
Salt on wet watercolor soaks up the pigment and leaves star-like bursts that look like fireworks, and kids watch it happen closely.
You need: watercolor paper, watercolors, a brush, and table salt.
- Paint thick, wet lines radiating out from a center point on the paper.
- While the paint is still wet, sprinkle table salt over all the lines.
- Watch the salt pull the color into starry textures as it sits.
- Let the painting dry flat, then brush off the loose salt.
Ages 4 and up, about 20 minutes plus drying, low cost; tip: sprinkle the salt while the paint is still wet or no pattern forms, and lay the paper on a tray to catch extra salt.
2. Handprint Fireworks Art
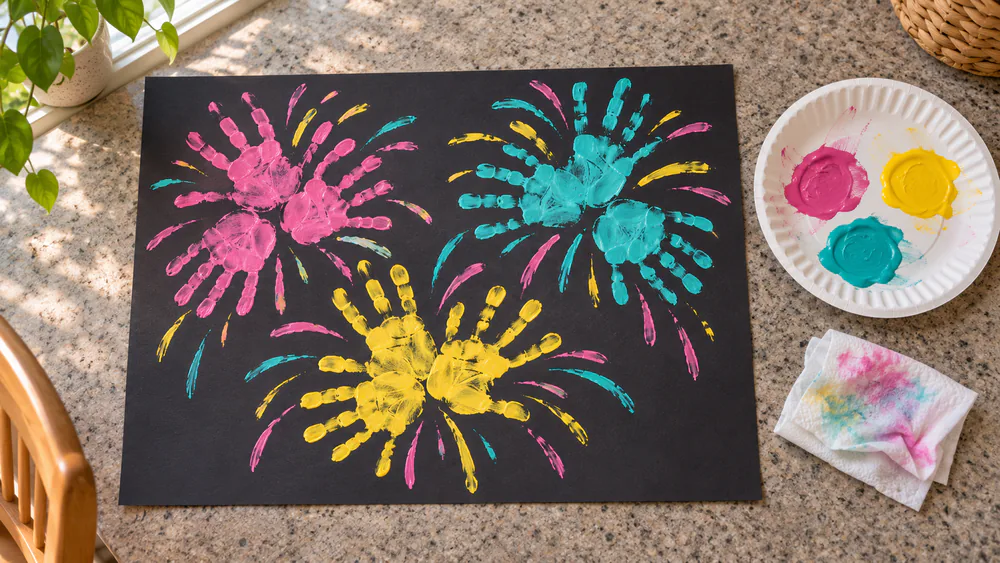
A handprint turns into a firework burst when you print it in a fan shape on dark paper, and little hands make the best bursts.
You need: black cardstock, washable paint in bright colors, a paper plate for the paint, wipes, and number stickers.
- Pour a little paint onto the paper plate for easy dipping.
- Press a whole hand or just the fingertips into the paint.
- Print on the black cardstock in a fan or burst shape.
- Let it dry, then add number or letter stickers or dots.
Ages 2 and up, about 15 minutes, low cost; tip: keep the paint layers thin because thick paint smears, and add stickers only once the prints are dry.
3. Q-Tip Firework Painting
Kids who prefer neat work to splashes can use cotton swabs to build firework bursts from tidy dots.
You need: black or dark blue paper, a few colors of washable paint, a paper plate, and cotton swabs.
- Squeeze small puddles of paint onto the plate so every color is within reach.
- Dip a swab in paint and press a dot in the middle of the paper.
- Dot outward in lines from the center, like the rays of a firework.
- Use a fresh swab for each new color so the colors stay bright.
Ages 3 and up, about 15 minutes, low cost; tip: toddlers do well with simple firework painting when an adult helps, so give them one color and a large sheet.
4. Sparkly Wishing Wand
Real sparklers are a fire hazard around kids, so a tinsel-stem wand gives the same twinkle safely.
You need: bamboo skewers or dowels with trimmed tips, silver and gold tinsel stems, pony beads, sequins, and star beads.
- Trim the skewer points and let any gold paint on the skewers dry.
- Bend the top third of each tinsel stem into a loop or curl.
- Thread beads and sequins onto the lower two thirds of the stem.
- Twist the plain end around the skewer, using about four stems per wand and a fifth at the tip if it feels loose.
Ages 5 and up, about 25 minutes, low cost; tip: make the wands ahead for younger kids.
5. Paper Plate Countdown Clock
This clock gives kids a way to see how close midnight is, as they move the hands toward twelve while the evening goes on.
You need: a paper plate, marker, number stickers, cardstock for hands, a brass fastener, and a hole punch.
- Write or stick the numbers 1 to 12 around the edge of the plate.
- Cut two clock hands from cardstock in different lengths.
- Punch a center hole and attach the hands with the brass fastener.
- Decorate the rim with tinsel or glitter, then move the hands toward midnight.
Ages 5 and up, about 20 minutes, low cost; tip: space the numbers evenly by marking 12, 3, 6, and 9 first.
6. Paper Chain Countdown
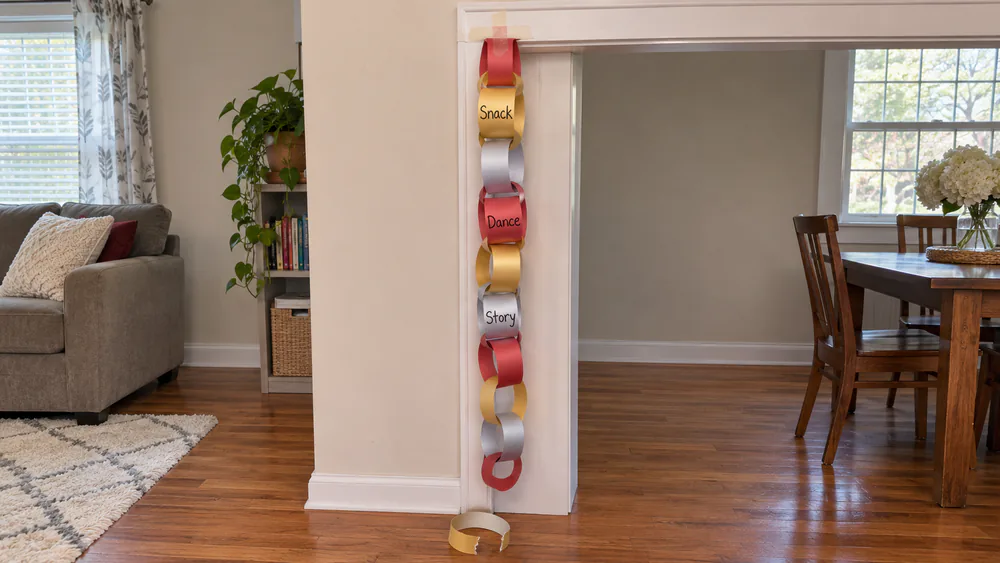
A paper chain is the countdown craft that costs almost nothing, and each link is an activity or a time that kids tear off as the night moves on.
You need: construction paper strips, a glue stick, and a marker.
- Cut strips and write an activity or a time on each one.
- Loop one strip and glue the ends together to start the chain.
- Thread each new strip through the last loop and glue it closed.
- Hang the chain up and tear off one link each hour.
Ages 4 and up, about 20 minutes, low cost; tip: hold each glued end for a few seconds until it sticks or the chain pulls apart.
7. Balloon Countdown Clock
A balloon countdown clock keeps kids watching the wall for each hourly pop, and an early "noon" version suits young ones best.
You need: 12 balloons, folded paper slips with activities, painter's tape, and cardstock hands.
- Write 12 activities on paper slips, one for each hour of the countdown.
- Put one slip in each balloon, then blow it up.
- Tape the balloons in a circle on a wall or door.
- Tape cardstock hands in the center and pop one balloon each hour.
Ages 4 and up, about 30 minutes, low cost; tip: put the slip in before you inflate the balloon, collect the scraps after each pop, and pick activities that fit the hour, like a snack or a dance.
8. Confetti Party Poppers
This party popper craft is rated easy and takes about 30 minutes of active time, and kids pull a ribbon so the confetti puffs out.
You need: cardstock, a marker, tissue confetti rounds, ribbon, glue, tape, and scissors.
- Print or draw a popper shape and cut it out of cardstock.
- Fold the outer edges under so the popper holds its shape.
- Tape a ribbon pull cord on the back of the popper.
- Glue the popper low on a folded piece of cardstock, then glue the confetti around it.
Ages 5 and up, 30 minutes, low cost; tip: glue the popper low to leave room for the burst and tuck the ribbon in before you glue, then practice one first on scrap paper so the pull cord feels easy for small fingers.
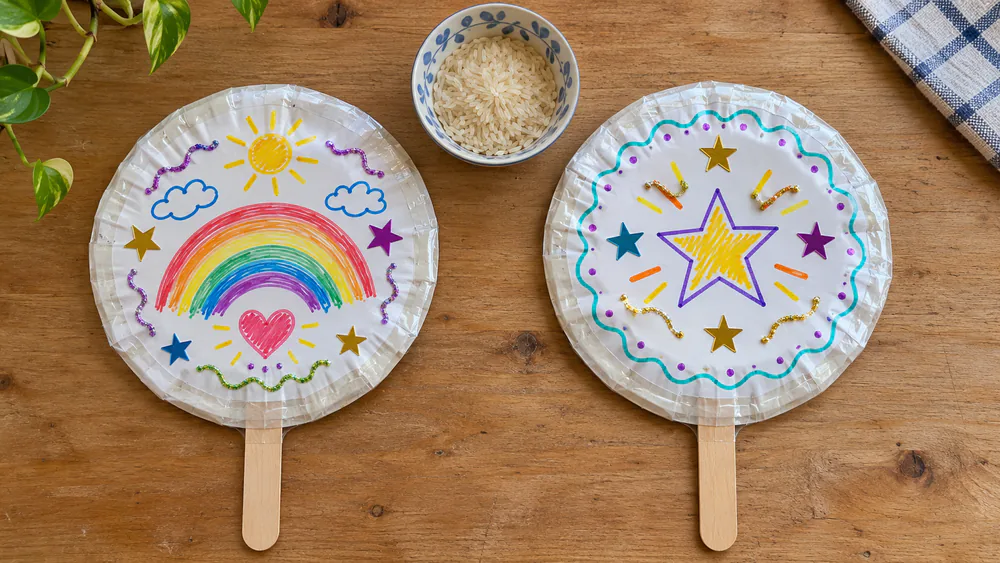
9. Rice Shaker Noisemakers
Rice and bean shakers work like small maracas, and kids keep shaking them long after the craft is done.
You need: two paper plates, uncooked rice or beans, stickers, markers, glitter glue, a stapler or tape, and a craft stick.
- Decorate the outside of both plates with stickers, markers, and glitter glue.
- Put a small handful of rice on one plate.
- Match the plates face to face and staple or tape the edge fully.
- Add a craft stick handle and shake.
Ages 3 and up, about 20 minutes, low cost; tip: seal all the edges so the rice does not leak, and run tape over the staples so small fingers stay safe while everyone shakes.
10. Paper Plate Tambourines
This is a noisemaker kids can dance with, and the jingle bells add a bright sound that rice alone can't.
You need: two paper plates, dried beans or rice, markers, stickers, jingle bells, and ribbon.
- Decorate both plates with markers and stickers before you close them.
- Add the beans and bells between the two plates.
- Staple the edges closed all the way around.
- Tie ribbon on, then shake and dance.
Ages 3 and up, about 20 minutes, low cost; tip: keep the staples on the rim and cover them with tape so no sharp points reach small hands. Let each child pick how many bells to add, since some kids like a loud jangle and others a quiet jingle.
11. Toilet Paper Roll Poppers
Pull the tissue and out comes the confetti, which makes a mess, so popping these over a towel or inside a big box makes cleanup easy.
You need: cardboard tubes, tissue paper, rubber bands, confetti, and stickers or paint.
- Decorate the tube with stickers or paint and let it dry.
- Fill the tube with confetti.
- Cover one end with tissue and hold it with a rubber band.
- Repeat on the other end, then pull the tissue to pop.
Ages 5 and up, about 20 minutes, low cost; tip: put a towel under every confetti craft and keep a lint roller handy, since it picks up the small pieces a broom misses and glitter turns up around the house for months.
12. Sparkly Party Hats
A party hat is the craft that makes everyone look ready for midnight, and the order is to color it first, sparkle it second, and roll it last.
You need: cardstock or a printable template, markers, stickers, glitter glue, curling ribbon, and tape.
- Color the template with markers on the flat side.
- Add stickers and glitter glue on top of the color.
- Let the glue dry fully before you touch the hat again.
- Roll the paper into a cone, tape it closed, and top the hat with curling ribbon.
Ages 3 and up, about 25 minutes plus drying, low cost; tip: roll the cone only after the glue is dry, let toddlers color while an adult rolls, and make a spare template so one mistake does not end the project.
13. Star Crowns
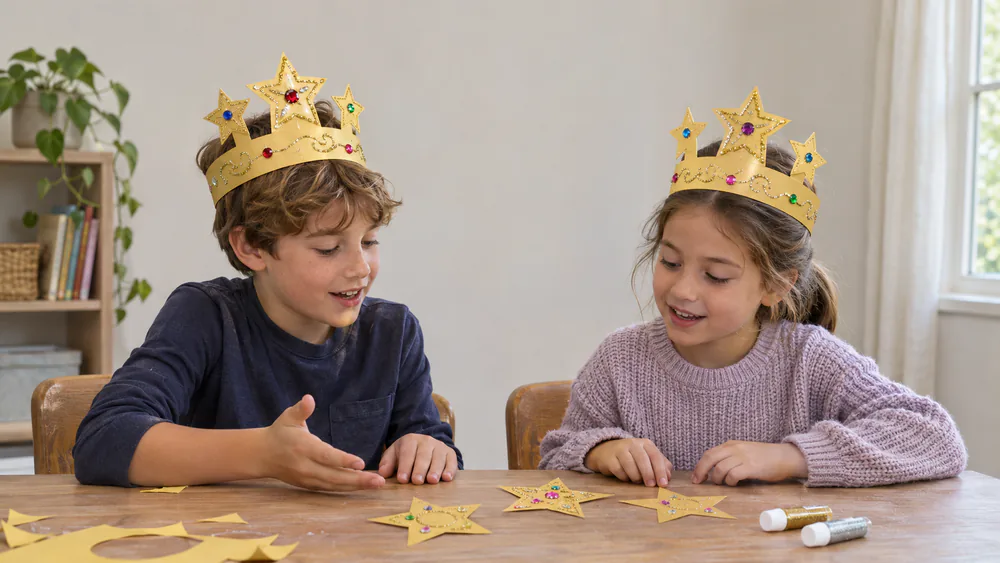
Kids of many ages can make a star crown to wear, with a paper band sized to fit each child's head.
You need: construction paper strips, stick-on gems, glitter glue, and tape or a stapler.
- Cut a headband strip and several star shapes from the paper.
- Decorate the stars with gems and glitter glue.
- Let everything dry completely.
- Attach the stars, then size the band to the head and tape it.
Ages 3 and up, about 20 minutes plus drying, low cost; tip: measure around the head first, and make the crowns early so the glitter glue can dry.
14. Photo Booth Props
Props turn a living room corner into a photo booth, and kids make their own and then star in the pictures.
You need: cardstock or felt, wooden skewers or craft sticks, markers, and stick-on gems.
- Cut out bow ties, mustaches, glasses, or stars from the cardstock, sketching the shapes in pencil first if that helps.
- Decorate them with markers and gems.
- Let them dry before anyone picks them up.
- Tape each one to a stick and take photos.
Ages 4 and up, about 25 minutes, low cost; tip: tape the sticks to the back with a long overlap so the props do not flop, trim skewer points first, and let each child pick a favorite prop to pose with.
15. Confetti Shaker Bracelets
These bracelets rattle with every wave of the wrist, and they take a little more care than the other crafts here, so an adult should handle the sealing.
You need: clear plastic tubing, confetti or beads, tape or caps, and scissors.
- Cut the tubing to wrist length plus a little overlap.
- Seal one end with tape or a cap.
- Fill the tube with confetti, seal the other end, and join the tube into a ring.
- Test it and shake.
Ages 6 and up, about 20 minutes, low cost; tip: seal the ends completely to keep small parts inside, and skip this craft with toddlers. Older kids with steady hands can help fill the tubes.
16. Wishing Wall
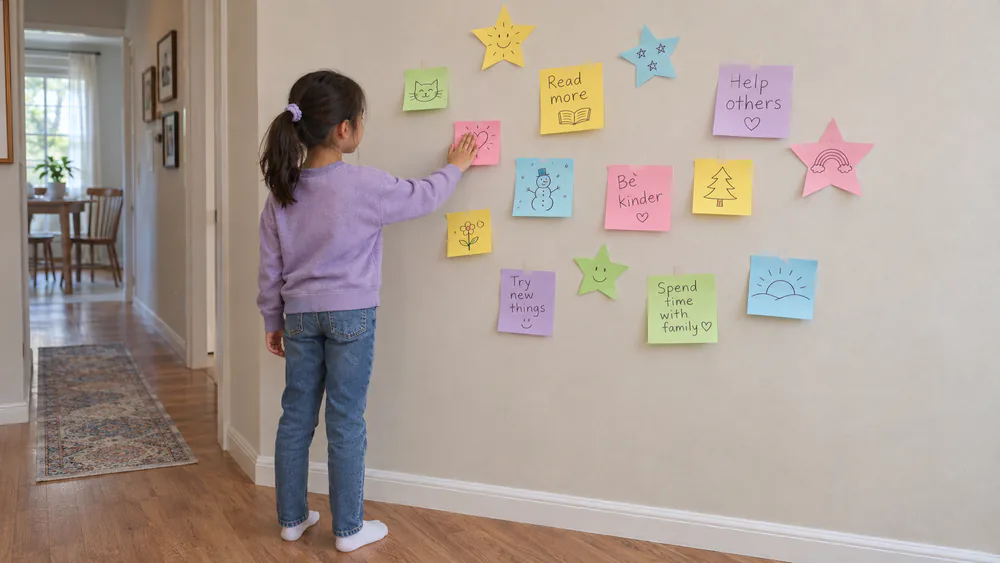
A wishing wall needs no scissors and gives the whole family a job, since everyone adds a wish for the new year, grown-ups included.
You need: poster board or open wall space, sticky notes or paper stars, markers, and tape.
- Pick a wall or a large piece of poster board.
- Give everyone sticky notes and a marker.
- Write wishes for the new year on the notes.
- Stick them up and read them aloud.
All ages, about 15 minutes, low cost; tip: help young kids write or let them draw their wish and tell you what it says, then read each wish aloud so everyone hears it, and keep extra notes nearby for second wishes.
17. Resolution Stars
A resolution star is a wish with a shape, where each family member writes one small goal on a star and hangs it where it will be seen.
You need: gold or yellow cardstock, a star template, markers, string, and a hole punch.
- Trace and cut out one star for each person in the family.
- Write or draw one goal for the new year on the front.
- Decorate the edges with markers or stickers.
- Punch a hole, tie on string, and hang the star.
Ages 5 and up, about 20 minutes, low cost; tip: keep goals small and specific, like reading one new book a week, so kids can feel proud when they reach them.
18. Time Capsule Box
A time capsule gives the evening a purpose beyond midnight, since you seal it that night and open it a year from now.
You need: a shoebox, paper, markers, photos, notes about favorite things, and tape.
- Decorate the box with markers and any leftover stickers.
- Fill it with photos, drawings, and notes.
- Seal it with tape.
- Write the open date on the lid and open it next New Year's Eve with the whole family.
Ages 4 and up, about 30 minutes, low cost; tip: write the date on the lid in big numbers and tuck the box somewhere you will remember, like a high closet shelf, and add a reminder to next year's calendar.
19. Celebration Slime
Slime is a sensory craft that holds attention, and stirring in silver and gold glitter and confetti turns it into a celebration.
You need: your usual slime, silver and gold glitter, confetti, a bowl, and a tray.
- Set a tray on the table to catch spills and stray glitter.
- Put the slime in a bowl.
- Sprinkle in glitter and confetti a little at a time.
- Stir and knead until the sparkle spreads evenly.
Ages 5 and up, about 15 minutes, low to mid cost; tip: for a cooked, edible-ingredient option, try the celebration playdough, which uses flour, salt, cream of tartar, and oil, and supervise closely. Stir gently so the glitter stays in the bowl, and store the finished slime in a sealed container.
20. New Year Sensory Bottle
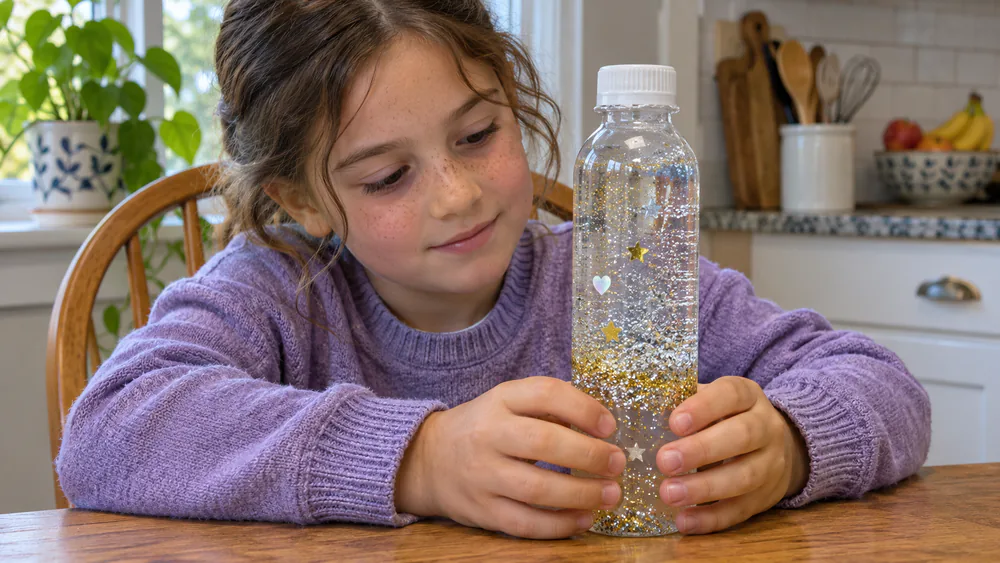
A sensory bottle is a calm craft for the last hour before midnight, as kids shake it and watch the glitter fall.
You need: a clear plastic bottle, clear glue, warm water, silver and gold glitter, and confetti or beads.
- Fill part of the bottle with warm water and glue.
- Add the glitter and confetti.
- Top off the bottle with water.
- Glue the lid shut, then shake and watch it fall.
Ages 3 and up, about 15 minutes, low cost; tip: glue-based fills hold their color better than dish soap, which loses its glitter color within days, and gluing the lid on keeps the bottle away from babies and toddlers who might try to open it.
Tips for Crafting With Kids on New Year's Eve
A "kid midnight" countdown at 8:00 or 9:00 p.m. keeps the excitement without the exhaustion.
Parent tipDo the cutting, skewer trimming, and sealing ahead of time, so the kids get the fun parts of decorating, filling, and shaking.
New Year's Crafts for Kids FAQ
What are easy New Year's crafts for toddlers?
Handprint fireworks art, a colored party hat, and simple salt firework painting with adult help suit toddlers best, because they do better with big pieces and few steps.
What if my child can't stay up until midnight?
Hold a "kid midnight" countdown at 8:00 or 9:00 p.m. with the balloon clock or paper chain, setting the hours to match.
Which crafts are safest around small parts?
Handprint fireworks art, the wishing wall, the paper chain, and resolution stars use no loose pieces, so skip the bracelets, wands, and bead crafts for children who still mouth things.
What crafts work for a classroom?
The paper chain, rice shakers, party hats, and wishing wall scale well to a group. Prepare the cutting ahead.
Final Thoughts
You do not need all 20 crafts, so pick three or four and let the kids choose.
If you like seasonal projects, browse our Lunar New Year crafts for kids, winter crafts for kids, and snowflake crafts for kids. Happy New Year, and enjoy the countdown.