12 Winter STEM Activities for Preschoolers (Easy, Low-Prep Ideas)
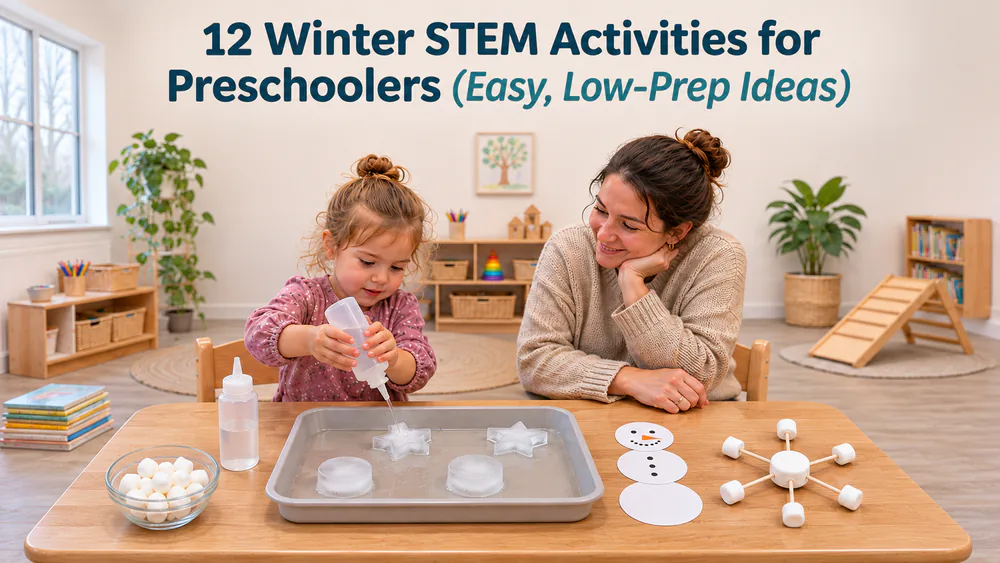
Winter is a great season for hands-on science with ages 3 to 5. Ice and cold air give preschoolers plenty to explore on short, gray winter afternoons. In our home, the activity that kept our preschoolers busiest was squirting warm water on frozen shapes and watching them melt. These twelve ideas use simple supplies and take minutes to set up.
What Winter STEM Looks Like for Ages 3 to 5
At this age, STEM means noticing, guessing, and trying again. Your child predicts what will happen, watches it, and talks about the surprise. The lessons here cover melting and freezing, floating and sinking, shadows, simple machines, and counting.
Keep the setup small and let kids do the pouring, sprinkling, and squeezing. Always ask for a guess before you start. That one question turns play into a science experiment.
Watch outStay close for every activity here. Salt, tablets, toothpicks, and marshmallows are small parts, and nothing in this list is for eating. Keep drops of paint and fizzing liquid away from eyes.
1. Snowstorm in a Jar
A jar of oil and fizzing tablets makes a swirling snowstorm that kids love to watch. It is mostly a visual show, so it works best with a question to keep them thinking.
You need: a clear jar, baby oil, white paint, water, Alka-Seltzer tablets, and optional glitter.
- Fill the jar about 3/4 full with oil.
- Mix white paint into water until it looks milky, then pour it in.
- Pause and ask what your child sees before adding anything.
- Break a tablet into pieces and drop in 2-3 at a time, then add more to start the storm again.
Ages 3+, about 15 minutes, low cost. Tip: oil goes in first, and tablets are never for eating. If the snow slows to a trickle, use smaller tablet bits or more white paint. Pour leftover oil back into the bottle, not down the drain.
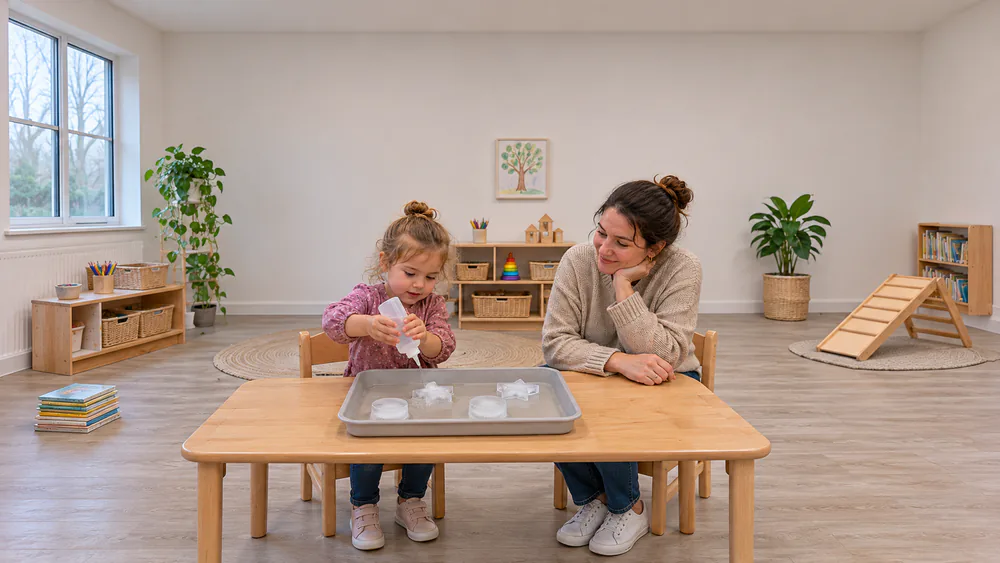
2. Ice Melt Race
Kids predict which piece of ice will melt first, then watch to see whether they were right. It is a simple way to practice predicting and comparing.
You need: a muffin tin of frozen ice, salt, sugar, warm water, and droppers or spoons.
- Freeze water in a muffin tin overnight.
- Label the cups: salt, sugar, warm water, and nothing.
- Ask your child to predict which one melts first.
- Add each material at the same time, then watch and compare.
Ages 3+, about 20 minutes, low cost. Tip: keep one plain cup as the control. Salted ice is the fastest to melt, and sugared ice is only slightly faster than plain. Many kids guess ice sitting in water wins, but warm water poured over ice usually does, which surprises them.
3. Salt and Ice Painting
Salt carves little channels into ice, and drops of color race along them. Kids feel like they are painting with frozen canvas.
You need: an ice block or large cubes, coarse salt, liquid watercolors or food coloring, droppers, and a tray.
- Set the ice block on a tray.
- Sprinkle salt over the top in small pinches.
- Drip color onto the salt and watch it carve channels.
- Compare the salted spots with the unsalted spots.
Ages 3+, about 15 minutes, low cost. Tip: heavy salt melts the ice fast, so teach pinches. Let your child tilt the tray to see where the color runs. Droppers also build fine motor strength, since squeezing and aiming are not easy for small fingers.
4. Snow or Ice Sink and Float
Sorting objects into sink and float piles makes a quick lesson in density. A tub of water and a handful of winter odds and ends is all it takes.
You need: a tub of water, snow or ice cubes, and small objects like a pinecone, pom-pom, coin, stone, and mitten.
- Fill the tub with water.
- Hold up an object and have your child predict float or sink.
- Drop it in, then sort it into a sink pile or a float pile.
- Add an ice cube last and notice that it floats.
Ages 3+, about 15 minutes, free. Tip: let your child predict before every drop, even when they guess wrong. Wrong guesses are where the learning happens.
5. Ice Fishing Experiment
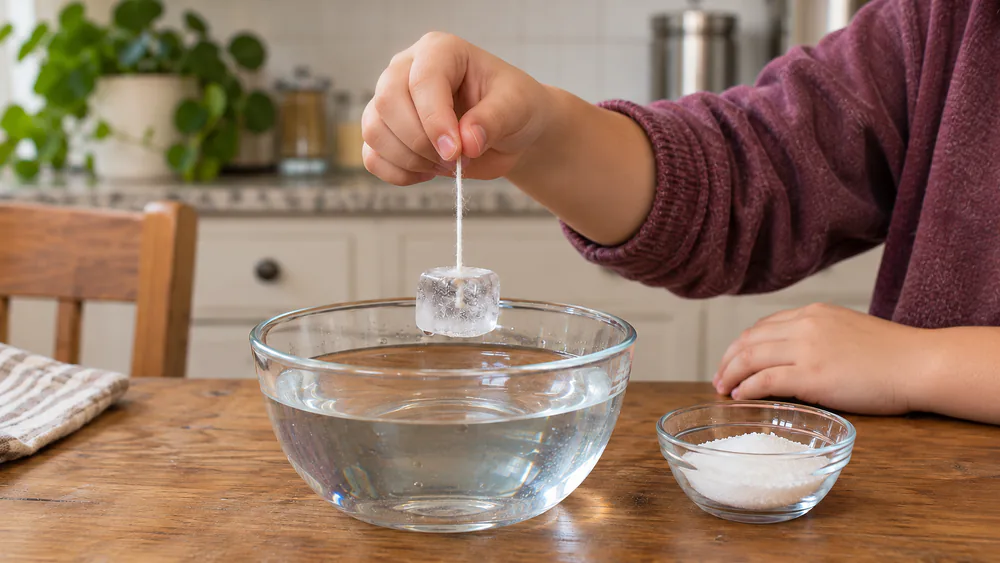
Kids try to lift an ice cube with a plain string, and it slips every time. Then salt makes the string stick, and they feel like they caught something.
You need: a bowl of water, ice cubes, string, and salt.
- Float an ice cube in the water.
- Try lifting it with plain string and watch it slip.
- Lay the string across the cube and sprinkle salt on top.
- Wait until the string feels stuck, then lift the cube.
Ages 4+, about 10 minutes, low cost. Tip: the wait depends on how much salt little hands sprinkle, so go by feel, not by the clock. Make sure the string lies right on the salted spot, or the trick fails.
6. Frozen Bubbles
Bubbles that freeze into crystal globes feel like magic. They only work on the right day, so treat this one as a bonus when the weather cooperates.
You need: bubble solution, optional corn syrup, a straw or wand, and a very cold, calm day outside.
- Chill the bubble mix first.
- Head outside on a very cold, still day.
- Blow a bubble and set it down gently on a surface.
- Watch the ice crystals spread across it.
Ages 3+, about 15 minutes, low cost. Tip: it needs well below freezing, roughly under 20 F, and single digits work best. The cold threshold varies with wind, so wait for a calm morning. Wind or mild air pops the bubbles, and a little corn syrup makes a thicker mix.
7. Build a Snowman with Shapes
Stacking paper circles into a snowman teaches sizes, shapes, and counting all at once. There is no mess, and it works any day of the winter.
You need: paper circles in three sizes (or playdough and loose parts), plus small shapes for a hat, face, and buttons.
- Lay out the big, medium, and small circles.
- Stack them from biggest to smallest.
- Add shape faces and buttons.
- Count the shapes together.
Ages 2 to 5, about 15 minutes, free. Tip: ask your child to name each shape as they place it. Younger kids can build one circle at a time and say big or small. Older kids can sort the buttons by color.
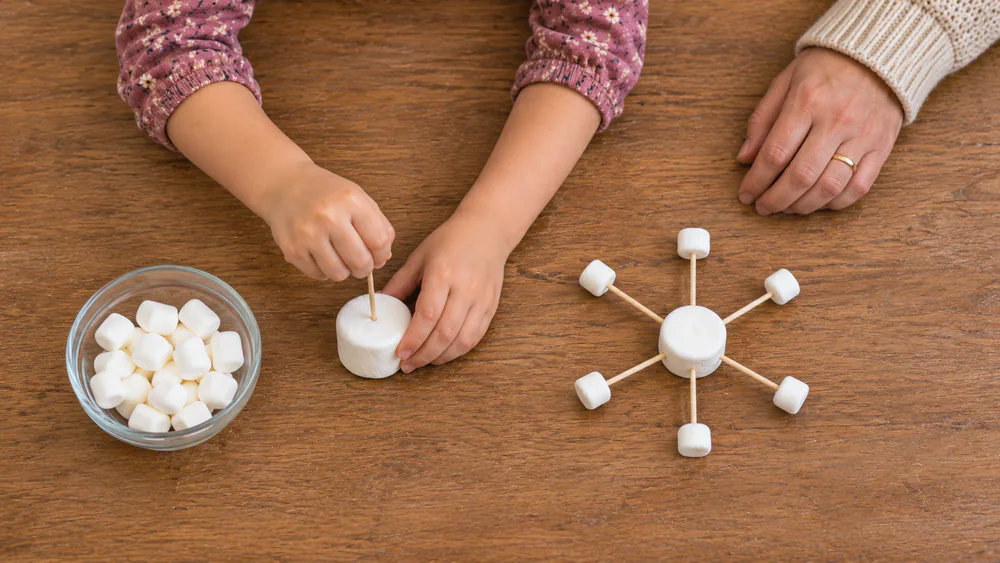
8. Marshmallow Snowflake Building
Toothpicks and marshmallows make a snowflake that kids can build themselves. Handling the small pieces develops fine motor skills and keeps kids interested.
You need: large marshmallows, mini marshmallows, and toothpicks.
- Set a big marshmallow down as the center.
- Push six toothpicks evenly around it.
- Add a mini marshmallow to each tip.
- Add short toothpick branches if you like.
Ages 3+, about 20 minutes, low cost. Tip: the toothpick has to go into the middle of the marshmallow, or the snowflake sags, and kids work this out quickly. For three- and four-year-olds, stacking two or three marshmallows without a collapse is a win. Count the toothpicks as you go.
9. Polar Bear Blubber Experiment
Kids feel for themselves why polar bears stay warm in icy water. It is a winter animal lesson, and it works for children from preschool through second grade.
You need: shortening, two zip bags, a tub of ice water, and a towel.
- Fill one bag about 3/4 with shortening.
- Slide a second bag inside and seal it.
- Put one bare hand in the ice water, briefly.
- Put your other hand in the bag, then into the water, and compare how each feels.
Ages 3+, about 15 minutes, low cost. Tip: seal the bags well, because a tiny hole lets water in and you must start again. Keep hand time short. Our kids decided the bagged hand felt warmer and announced they could never swim in icy water.
10. Snowball Catapult
A craft-stick catapult launches soft snowballs across the room. Kids learn about simple machines by pressing, releasing, and measuring how far the pom-pom flies.
You need: craft sticks, rubber bands, a plastic spoon, and big soft pom-poms.
- Stack the sticks and wrap a rubber band around each end.
- Slide a second pair of sticks in to form the arm.
- Tape or band the spoon to the arm.
- Place a pom-pom in the spoon, press down, and let go. Then measure how far it went.
Ages 4+, about 20 minutes, low cost. Tip: pre-stack the sticks in groups for small hands, and skip glue, which is too fiddly to build alone. Use soft pom-poms indoors.
11. Winter Light and Shadow Play
Short winter days are perfect for shadow play. A flashlight and a few toys turn a dark room into a science lab.
You need: a flashlight, small winter toys, and a white wall or sheet of paper.
- Darken the room.
- Shine the flashlight at a toy so its shadow lands on the wall.
- Move the light closer and farther away.
- Trace the shadows or compare their sizes.
Ages 3+, about 15 minutes, free. Tip: move the light, not the toy, to change the size of the shadow. Outdoors, mark a shadow in the morning and again in the afternoon, then talk about how it changed. Ask your child what they think made it move.
12. Mitten Matching and Counting
Mittens come in pairs, which makes them an easy way to practice matching, sorting, and counting. It also helps clear the pile by the door.
You need: a basket of mismatched mittens, or paper mitten cutouts, and clothespins.
- Dump the mittens in a pile.
- Have your child find two that match and set them side by side.
- Pin each pair together with a clothespin.
- Count the pairs, then count all the mittens.
Ages 2 to 5, about 10 minutes, free. Tip: start with three pairs and add more as your child gets quicker. Clothespins build the pinching grip that little hands need for writing. Let your child hang the finished pairs on a string to dry or display.
How to Adapt These Activities for Younger and Older Preschoolers
Parent tipKeep the idea, change the job. Younger kids can pour, sprinkle, and stack. Older kids can predict, measure, and record.
For two- and three-year-olds, use fewer steps and handle the tricky parts yourself. Let them squirt, stack, and sort, and skip the fine details. Two or three stacked marshmallows count as a success.
For four- and five-year-olds, add a question each time. Ask what will happen, then ask why. Let them count, draw what they saw, or run the test a second way.
No Snow? Indoor Swaps
You do not need snow for any of these activities. Ice cubes from your freezer stand in for snow in the sink and float activity, and a muffin tin of ice works for the melt race. Shadow play, mitten counting, and the shape snowman work on any gray afternoon.
If you do get snow, try our snow STEM activities or the snowflake STEM activity for more. Older siblings may like our Winter Olympics STEM activities.
Winter STEM Activities FAQ
What age are these activities for?
They fit ages 3 to 5. Most work for two-year-olds with help, and the blubber experiment works from preschool through second grade.
What STEM skills do preschoolers learn?
They practice predicting, comparing, and counting. They also learn about melting, freezing, floating, shadows, and simple machines, and build fine motor strength.
Are ice and baking soda activities safe for preschoolers?
Yes, with an adult close by. Keep salt, tablets, and fizzing mixes away from mouths and eyes, and rinse hands afterward if anything splashes.
Final Thoughts
Pick one activity and try it this week. Start with the ice melt race if you want the easiest setup, or the marshmallow snowflake if your child loves building. Either way, ask for a guess first and have fun.
If you want more seasonal ideas, our Christmas STEM activities are a good next step.