15 Snow STEM Activities for Kids (Tested at Home)
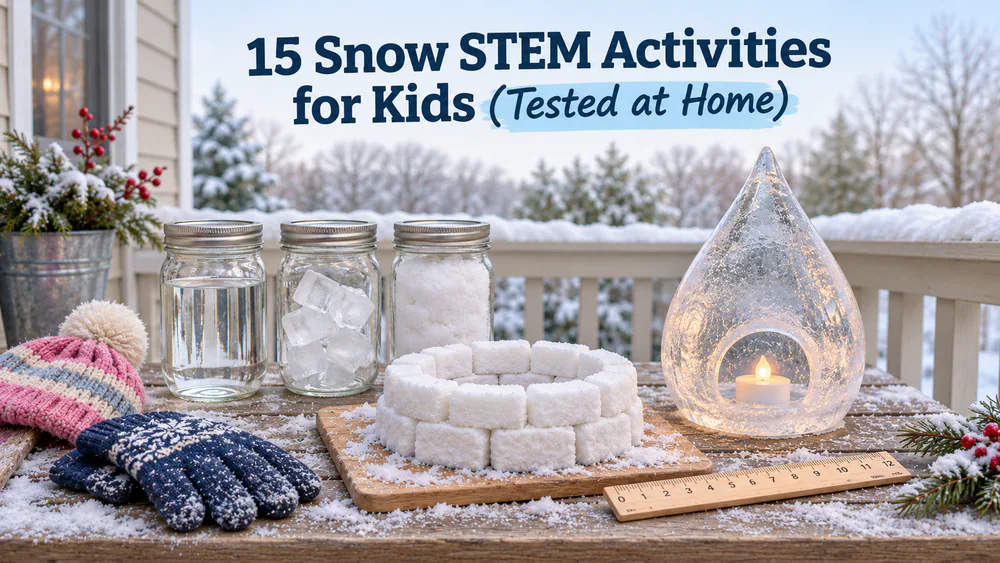
Here are 15 hands-on snow STEM activities for kids, and most need only snow, ice and everyday supplies from your kitchen. When we ran the snow volcano, our kids asked for eruption after eruption until the baking soda and vinegar were gone. Each activity below has a supply list, clear steps and a quick age and time note. Read Before You Start: Snow Safety and Supplies before heading out on a snow day.
Snow and Ice Science Experiments
These first four are the easiest way to start. They use plain snow, ice cubes and a few jars.
1. Snow Volcano
Foamy eruptions pour out of a snow mountain, and kids can repeat them as often as supplies last. In our home the extra baking soda and vinegar disappeared fast, so stock up.
You need: clean snow, a tall cup, baking soda, dish soap, food coloring, white vinegar, a tray.
- Set the cup in a snow pile and pack snow tightly around it, leaving the top open.
- Add 2 spoonfuls of baking soda, a spoonful of dish soap and a few drops of coloring.
- Pour in about half a cup of white vinegar.
- Watch the foam and talk about the carbon dioxide gas pushing it out.
- Rinse the cup and try a new color.
Ages 3+, about 15 minutes, low cost. Tip: tight packing makes the foam rise through the top instead of leaking out the sides.
2. Melting Snow vs. Melting Ice Race
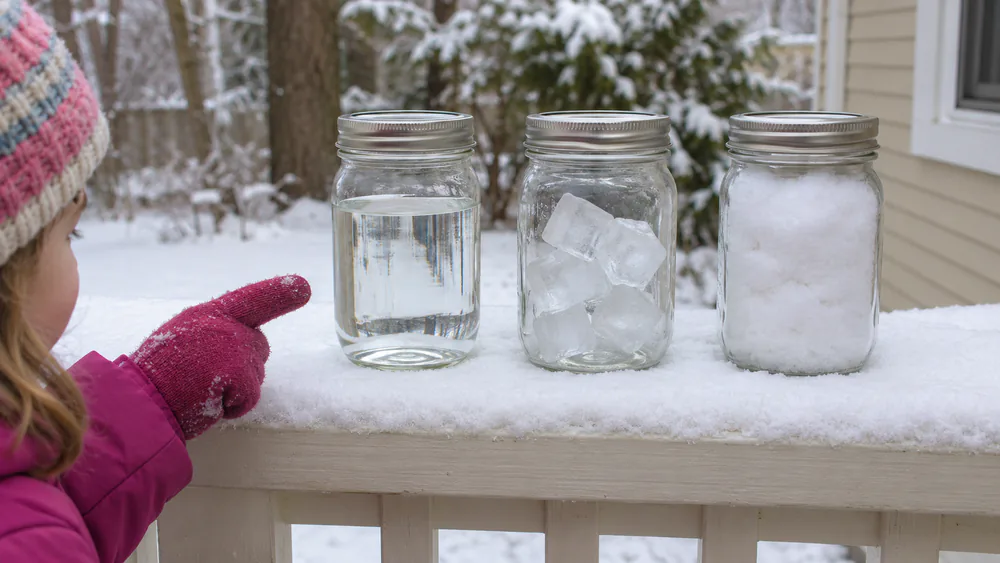
The result surprised our kids: it was the opposite of what they had predicted. Snow melts faster than ice, yet gives far less water.
You need: 3 matching jars with lids, water, ice cubes, snow or crushed ice.
- Fill one jar with water as the control.
- Fill a second jar loosely with whole ice cubes.
- Pack the third jar full of snow.
- Seal all three, set them somewhere safe indoors, and have everyone predict which will hold the most water.
- Check them as they melt and compare the water levels.
Ages 5+, about an hour of waiting, low cost. Tip: snow crystals hold a lot of air, which is why the snow jar ends up so low. Use whole cubes, not shavings, and keep the lids on.
3. Snow Sink or Float
A bowl of cold water turns snow into a quick density lesson, with a twist that shows up a few minutes in.
You need: a bowl of cold water, packed snow, ice cubes, a spoon, small toys.
- Ask everyone to predict whether snow will sink or float.
- Drop a spoonful of packed snow into the cold water.
- Add an ice cube beside it and compare how each one sits.
- Watch again after a few minutes as the snow soaks up water.
Ages 3+, about 10 minutes, low cost. Tip: packed snow floats because it is mostly air, and it can sink once it fills with water. Loose powder falls apart and hides the result, so squeeze it into a ball first.
4. Catch and Study Snowflakes
Snowflakes vanish on warm paper almost instantly. Cold paper lets kids see individual crystals before they disappear.
You need: black construction paper, a freezer, a magnifying glass, falling snow.
- Chill the paper in the freezer for at least two hours.
- Carry it outside during snowfall.
- Hold the paper out and catch a few flakes.
- Look through the magnifier at single crystals before they melt.
- Compare the shapes, then see our guide on how to catch snowflakes for more ideas.
Ages 4+, about 20 minutes, low cost. Tip: the paper must be as cold as the air or the flakes melt on contact. Dark paper shows the crystals best, so black or navy works better than white.
Snow Chemistry and Crystals
Next come reactions and crystals. A few of these need an adult for the hot or messy parts.
5. Salt and Ice Experiment
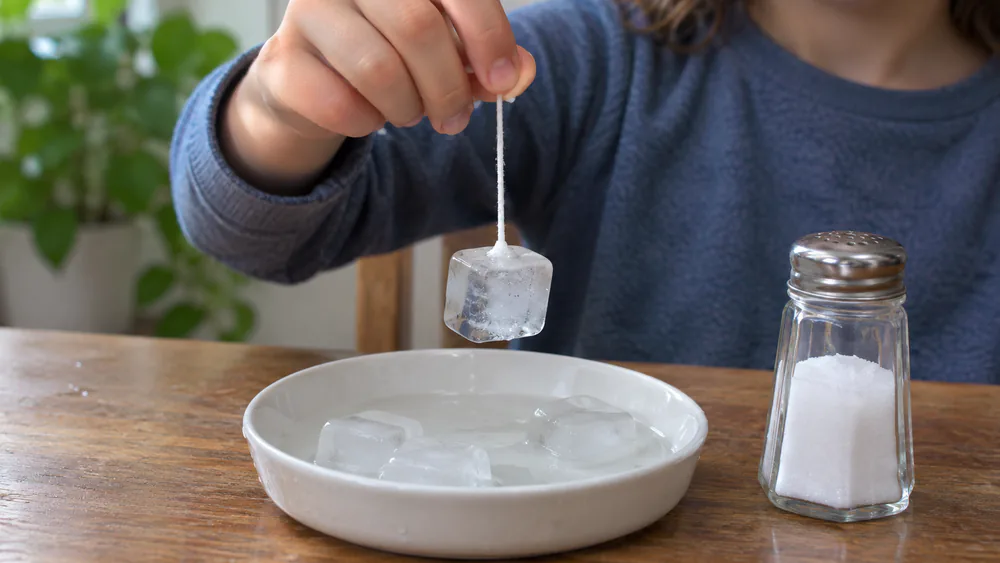
Kids lift an ice cube with nothing but a piece of string, which feels like magic until you explain it. Salt lowers the melting point of ice, so the ice around the string melts and then refreezes, trapping it.
You need: ice cubes, string, salt, a shallow dish.
- Try lifting a cube with plain string first, so everyone sees it fail.
- Lay the string across a cube.
- Sprinkle salt over the string.
- Count out a wait and try 10 seconds, 30 seconds and 1 minute.
- Lift the string gently.
Ages 4+, about 15 minutes, low cost. Tip: it took us a few tries. If the cube will not lift, add more salt and wait longer, since the right wait varies with cube size.
6. Frozen Bubbles in the Cold
Watching ice crystals spread across a bubble is a quiet, sensory moment. It only works on a very cold day, so pick one.
You need: water, dish soap, corn syrup, a straw or wand, a calm very cold day, a cold surface.
- Mix about 1 cup of water with 2 tablespoons each of corn syrup and dish soap.
- Take the mix outside on a calm, very cold day.
- Blow a bubble onto snow or another cold surface.
- Watch the ice crystals spread across it.
Ages 4+, about 20 minutes, low cost. Tip: the colder the better. Our bubbles often popped before they froze, and wind or a warm mix made that worse. The mix can also start freezing in its cup, so skip near-freezing days.
7. Grow Crystal Snowflakes
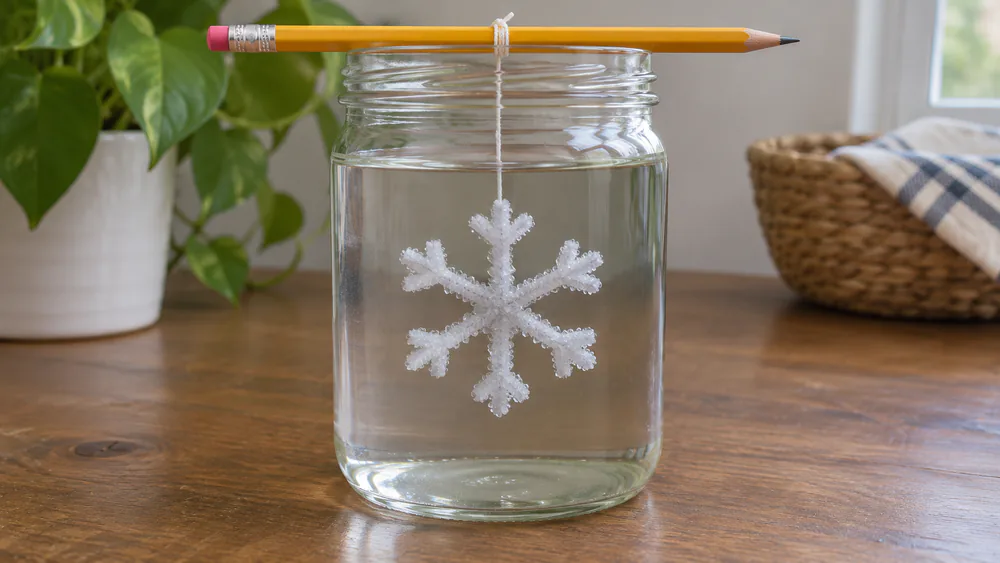
Pipe-cleaner snowflakes come out sparkling overnight. This one needs an adult at the stove.
You need: pipe cleaners, borax, boiling water, a jar, string, a pencil.
- Twist pipe cleaners into a six-armed snowflake and tie it to a pencil with string.
- An adult dissolves about 3 tablespoons of borax per cup of boiling water.
- Let the solution cool slightly, then hang the snowflake in the jar.
- Leave it undisturbed overnight.
- Lift it out and let it dry.
Ages 6+, about 20 minutes plus overnight, low cost. Tip: we used that 3 tablespoon ratio, though tutorials differ. Hot solution is a burn risk, and borax is never tasted. Do not bump the jar while the crystals grow.
8. Snow Storm in a Jar
Oil, water and a fizzing tablet make a glittery blizzard you can hold. Oil floats on water, and Alka-Seltzer releases carbon dioxide bubbles that lift the white water and glitter. Our snow storm in a jar looked best with extra glitter.
You need: a mason jar, water, white paint, baby oil, glitter, Alka-Seltzer.
- Mix water with a few tablespoons of white paint.
- Fill the jar about three-quarters full.
- Pour the baby oil in slowly to form a top layer.
- Add glitter.
- Drop in a piece of Alka-Seltzer and watch.
Ages 5+, about 15 minutes, low cost. Tip: pour the oil slowly so the layers stay separate, and let an adult handle the tablets for younger kids.
Snow Engineering Challenges
Now the building starts. These challenges reward testing, adjusting and trying again.
9. Build the Strongest Snow Fort
Kids compare thick and thin walls and decide which one holds. Wet, dense snow is the secret.
You need: uniform plastic containers, wet packing snow, a shovel, a ruler.
- Check that the snow is dense and wet.
- Pack snow firmly into the containers.
- Stack the bricks in overlapping rows.
- Fill the gaps with loose snow.
- Compare walls: thick versus thin, packed versus loose.
Ages 5+, about 45 minutes, free. Tip: powdery snow will not hold, so test a brick in your hand first. Keep walls low, and nobody works inside a wall that could collapse. Have kids measure each wall's thickness with the ruler and predict which will stand longest.
10. Snowball Catapult
Kids turn a craft-stick launcher into an experiment by changing one thing at a time. We treated it as a test, not a toy.
You need: craft sticks, rubber bands, a plastic spoon, pom-poms or cotton balls.
- Stack craft sticks and bind them with rubber bands.
- Attach a spoon to the top stick.
- Load a pom-pom into the spoon.
- Launch it and measure the distance.
- Change one thing, such as the number of sticks or the rubber band tension, and test again.
Ages 6+, about 30 minutes, low cost. Tip: adjusting the sticks or tension changed how far our pom-pom flew, so write each result down. Keep the same pom-pom and the same launch spot every time, or you will not know which change made the difference.
11. Ice Lantern Build
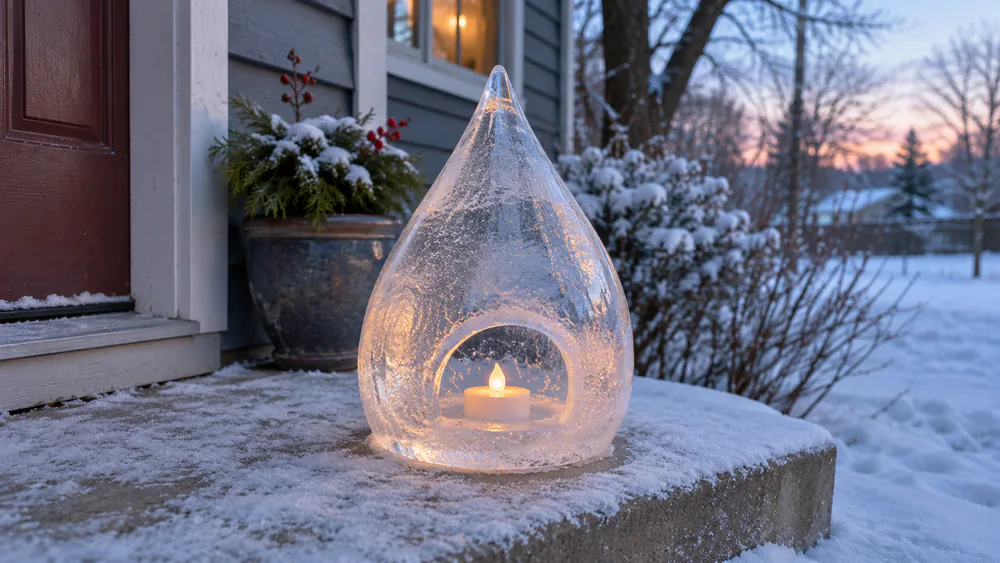
A glowing ice globe on the porch is worth the wait. Filling the balloon is a two-person job, so grab a helper.
You need: balloons, a faucet, a bowl, food coloring (optional), an LED tealight, a table knife, an adult helper.
- Fill a balloon with cold water.
- Tie it off and hang it by the neck, outside or in the freezer, for a teardrop shape.
- Check after several hours.
- Peel off the balloon and pour out any unfrozen water.
- Set an LED tealight inside.
Ages 5+, about 30 minutes of work plus freezing, low cost. Tip: freeze time depends on the cold and balloon size, so check the shell thickness instead of trusting a clock. Thin shells melt or crack. An LED is easier and safer for kids than a real candle.
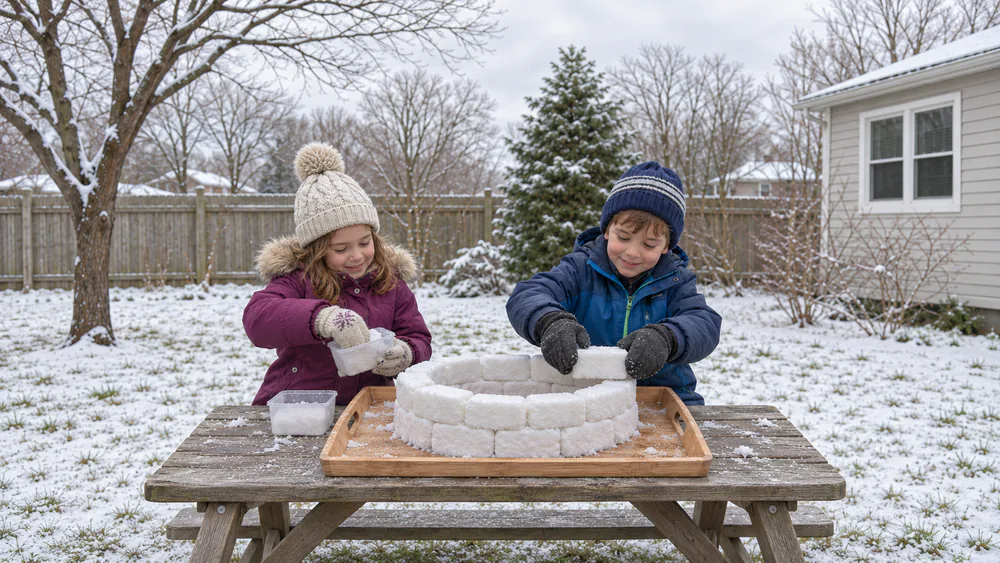
12. Mini Igloo Challenge
The ceiling is the hard part of any igloo. Small containers make it manageable for kids.
You need: small plastic containers, wet snow, a tray or flat board.
- Pack snow into the small containers.
- Build a ring of bricks, leaving a gap for a door.
- Shift each layer slightly inward.
- Close the top and fill the gaps.
- Test it with a small toy.
Ages 6+, about 45 minutes, free. Tip: igloo bricks need firm, wet, dense snow, because powdery snow will not hold. Expect the top to take the most tries. Let kids pick a toy to live inside, then see whether the roof holds it. A flat board under the ring makes it easy to carry the finished igloo to a shaded spot.
Snow Math and Measuring
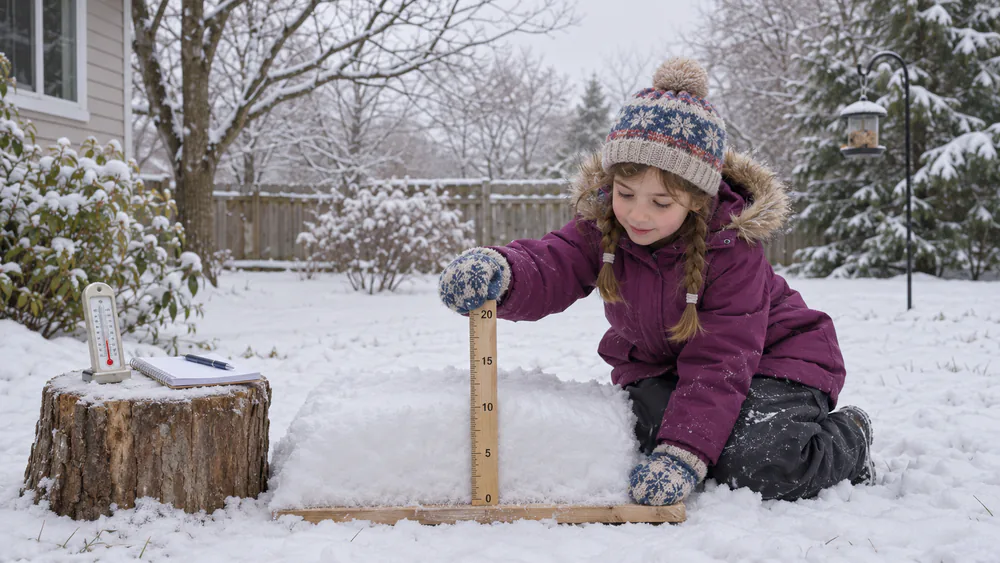
These last three turn snowfall into numbers. Kids measure, record and compare.
13. Snow Weather Station (Measure Depth, Temperature and Snowfall)
A simple station gives kids data to track all winter, and recording it in a spreadsheet offers a step toward coding.
You need: a ruler, an outdoor thermometer, a flat board, a jar, a notebook or spreadsheet.
- Place the board on the snow surface before snowfall.
- After the snow, measure the depth with a ruler.
- Record the air temperature.
- Melt a core sample indoors and measure the water.
- Log each reading in a spreadsheet, then chart the days side by side.
Ages 7+, about 20 minutes per reading, low cost. Tip: measure new snow on a board, not drifted snow, which gives false depths. Older kids can add a column for the ratio.
14. Snowflake Symmetry
Every real snowflake has six arms, so a paper version makes the pattern easy to see. Folding into sixths is the tricky part.
You need: paper, scissors, a ruler, a pencil, a small mirror.
- Fold a paper hexagon into sixths.
- Cut shapes along the folded edges.
- Unfold and count the identical arms.
- Hold the mirror along one arm to check the match.
- Compare your paper flake to a real one on cold paper.
Ages 4+, about 20 minutes, low cost. Tip: fold equally into six sections or the arms will not match. Hexagon grids and half-pattern mirroring work for preschoolers. Older kids can try drawing half an arm and mirroring it to finish the pattern.
15. Snow-to-Water Ratio
How much water is hiding in a tub of fluffy snow? Kids find out by melting it. Our snow and ice simple science reading is a good follow-up.
You need: a tall straight-sided container, a ruler, snow, a warm room.
- Fill the container with loose snow and do not press it down.
- Measure the snow depth.
- Let it melt completely.
- Measure the water depth.
- Divide the snow depth by the water depth.
Ages 8+, about an hour of melting, free. Tip: ten parts snow to one part water is the common rule of thumb, but real ratios run from about 6 to 1 for wet snow up to 30 to 1 for cold, fluffy snow. Your number is one result for your day.
Before You Start: Snow Safety and Supplies
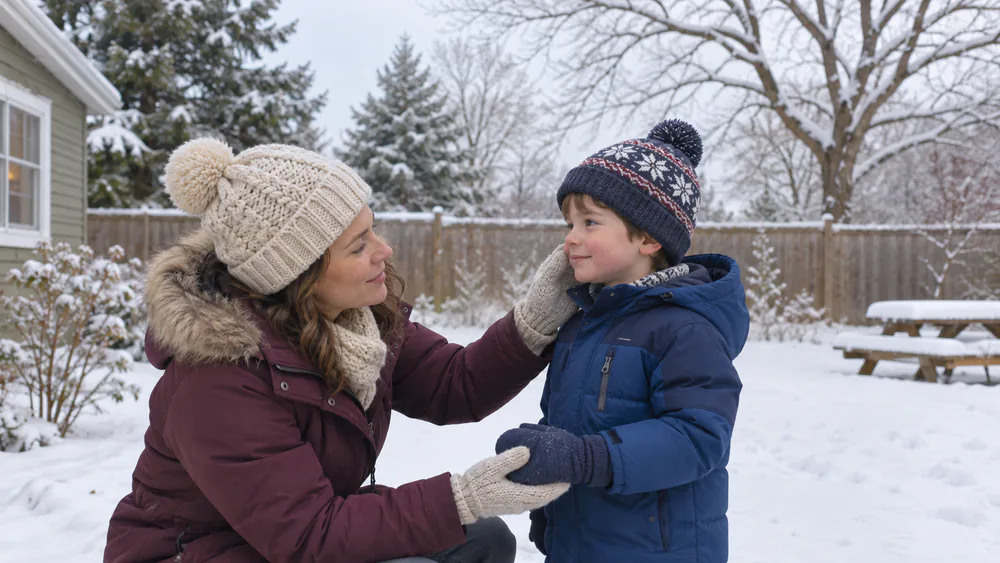
Cold exposure is the real risk with snow STEM activities, so plan the outing before the experiment.
Watch outAt wind chills of -20 F or lower, frostbite can begin in under 15 minutes. Check ears, nose, cheeks and fingers often, and bring everyone in for a warm-up about every hour. Children often do not say they are cold, so check them yourself instead of waiting for a complaint. Never let kids eat the snow or taste borax, salt mixes or bubble solution.
Early signs of trouble are red, tingling or numb skin and clumsy fingers. Frostbite looks white, gray-yellow or waxy, and shivering, drowsiness or confusion signal hypothermia. An adult should supervise every activity, and handle the boiling water and the ice lantern tools.
Supplies are simple: a few jars, plastic containers, a ruler, a thermometer and dry mittens to swap in. Collect snow from a clean spot, away from roads and animal tracks.
No Snow? Indoor Substitutes
You do not need snow for most of these. Crushed ice stands in for snow in the volcano, the melting race and the sink-or-float test. The salt-and-ice, crystal, storm-jar, catapult and symmetry activities already work fully indoors.
You will still need real winter weather for snow measurements and frozen bubbles. For more cold-weather ideas, try our Winter Olympics STEM activities, Christmas STEM activities for elementary kids or STEM art projects for kids.
Snow STEM Activities FAQ
What ages are snow STEM activities good for?
Preschoolers can do the sink-or-float test, the volcano and paper snowflakes. Ages 6 and up can handle the catapult, crystals and lanterns, and ages 7 and up can run the weather station and ratio measurements.
Do we need real snow?
No. Crushed ice replaces snow in several activities, and the crystal, storm-jar, catapult and symmetry projects need no snow at all.
What science concepts do kids learn?
These activities cover melting and freezing, density, gas from chemical reactions, crystals, symmetry, structural engineering, and measurement and ratios.
Can I use these in a classroom or co-op?
Yes. Split the group into small teams, give each a set of jars or containers, and have them predict, test and record results. Save the borax and boiling water for an adult to handle.
How do we stay safe and warm?
Dress in dry layers, take warm-up breaks about every hour, check cheeks, ears and fingers often, and never eat snow. Bring everyone indoors if anyone shivers or seems drowsy.
Bundle up, pick a favorite, and let the snow do the teaching.