20 Christmas STEM Activities for Elementary Kids
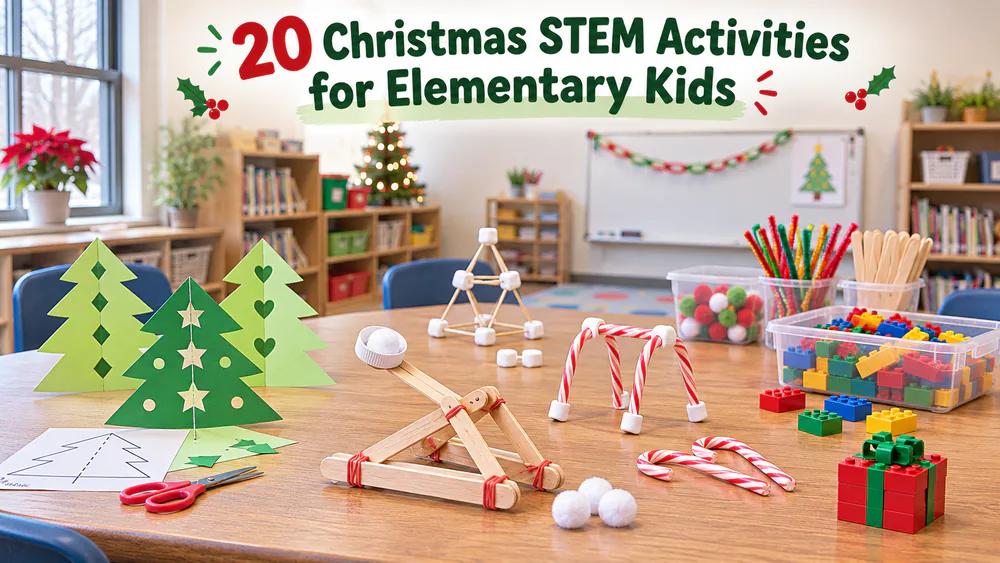
If December has your kids bouncing off the walls, a festive challenge can turn that energy into real learning, because cookies, candy canes, and ornaments make science feel like a treat instead of a worksheet. Elementary kids will love guessing, building, and watching things fizz, grow, and light up. Every idea below is hands-on and low-prep, and most use supplies you already have, so we sorted them into science, technology, engineering, and math to help you pick a favorite for your classroom or kitchen table.
How to Use These Christmas STEM Activities in Your Classroom or at Home
Pick one activity per session and set out the supplies before the kids arrive, since each entry lists what you need, the steps, and a quick tip with age, time, and cost.
Most of these follow the engineering design process of Ask, Imagine, Plan, Create, and Improve, and the second attempt is where the critical thinking happens.
Parent tipAsk for a prediction before anyone touches the supplies, because kids start arguing hypotheses as soon as they guess which design will win.
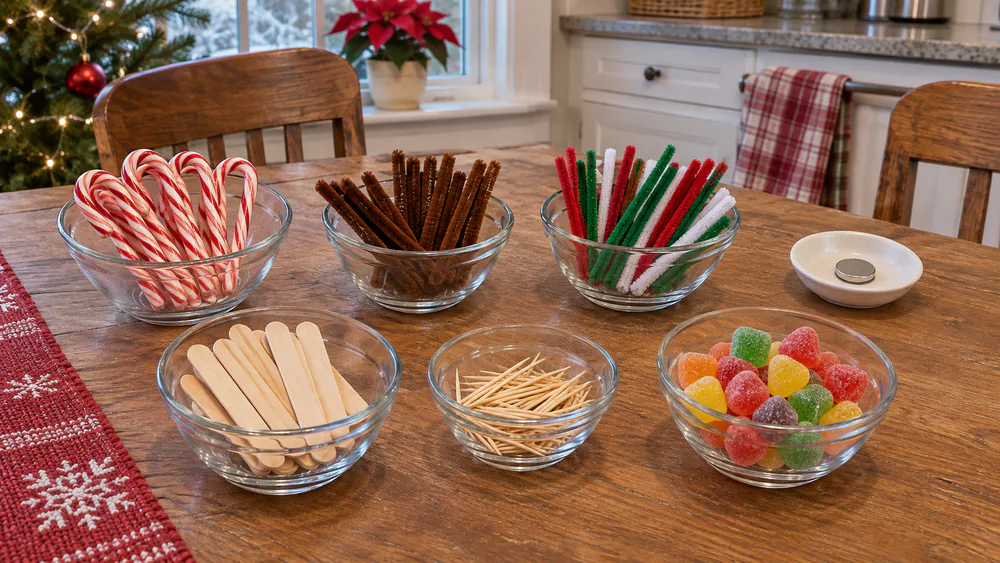
Basic Supplies for Christmas STEM
Most of the list comes from the pantry and the craft drawer.
- Candy canes, gumdrops, graham crackers, and toothpicks
- Pipe cleaners, pony beads, craft sticks, and rubber bands
- Baking soda, vinegar, dish soap, and food coloring
- Copper tape, 5mm LEDs, and 3V coin cells for the circuits
Watch outTreat candy used in experiments as non-edible, and check for allergies before any sticky building project. Adults should handle hydrogen peroxide, borax, and anything hot.
NoteCandy canes are the one treat our kids happily give up for science.
Christmas Science Experiments
These five experiments bring fizz, color, and sparkle. They work well for K-5 with an adult helping on the messier steps.
1. Dissolving Candy Canes
Kids guess which cup will dissolve a candy cane first, then watch the race unfold.
You need: 3 clear cups, candy canes of the same size, hot, warm, and cold water, a timer, paper to record.
- Predict which cup will dissolve its cane first.
- Fill each cup to the same line with water at a different temperature. An adult tests the hot water, and warm means not boiling.
- Drop one cane in each cup and start the timer.
- Check every 10 minutes and write down what you see.
- Compare results and talk about why warmer water was faster.
Ages 5+, about 45 minutes, low cost. Tip: unequal water levels or different cane sizes make the test unfair.
2. Reindeer Toothpaste
Foam shoots out of a bottle and the warm bottle surprises everyone who touches it.
You need: a narrow 16 oz plastic bottle, 1/2 cup of 3% hydrogen peroxide, a squirt of dish soap, 1 tablespoon of yeast, 3 tablespoons of warm water, brown food coloring, a tray, goggles.
- Set the bottle on a tray.
- An adult pours in the 1/2 cup of peroxide, and kids add a squirt of soap and 6 drops of coloring.
- Stir the 1 tablespoon of yeast into the 3 tablespoons of warm water for 30 seconds.
- Pour the yeast in and step back.
- Feel the warm bottle and talk about the gas.
Ages 5+, about 20 minutes, low cost. Tip: the 3% drugstore bottle makes a modest foam that can disappoint kids hoping for a big eruption, but it is the safe choice, and everyone wears goggles.
3. Crystal Candy Canes
Pipe cleaner candy canes sprout sparkling crystals overnight.
You need: red and white pipe cleaners, borax, warm water, jar, string, craft stick, paper towels.
- Twist the red and white pipe cleaners into a candy cane.
- An adult stirs borax into warm water until it dissolves. About 3 tablespoons per cup is a common starting ratio, and recipes vary.
- Tie the cane to a craft stick and hang it fully under the water.
- Leave it overnight, roughly 10 to 12 hours.
- Lift it out, drain it on a paper towel, and hang it to dry.
Ages 6+, one evening plus the next morning, low cost. Tip: keep it off the jar bottom and sides, or the crystals fuse to the glass.
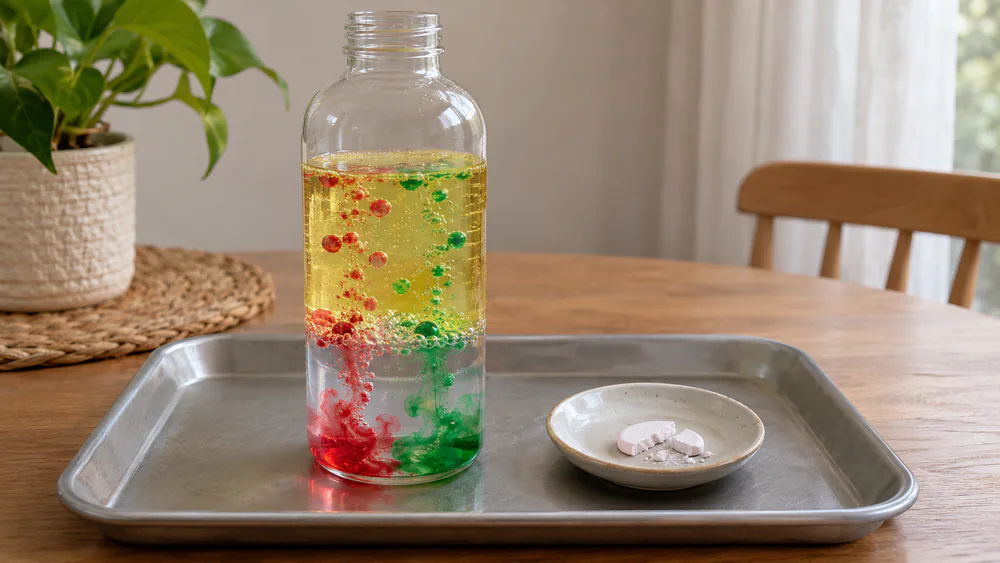
4. Christmas Lava Lamp
Red and green blobs rise and sink in a bottle of oil.
You need: clear bottle or jar, vegetable oil, water, liquid food coloring, Alka-Seltzer tablet broken in pieces.
- Fill a clear bottle about three quarters full with vegetable oil.
- Add water until the bottle is nearly full, which makes roughly three parts oil to one part water.
- Drop in red or green liquid coloring and watch it sink.
- Drop in one small tablet piece.
- Add another piece when the bubbling slows.
Ages 5+, about 20 minutes, low cost. Tip: gel coloring clumps, while liquid coloring spreads into bright blobs, and adding pieces one at a time keeps it bubbling longer. The tablet contains aspirin, so an adult handles it.
5. Grinch Heart Baking Soda Experiment
A tiny red heart on a green balloon grows as the gas inflates it.
You need: green balloon, red marker, plastic bottle, vinegar, baking soda, funnel, tray.
- Draw a small red heart on the balloon.
- Pour vinegar into the bottle.
- Use a funnel to put baking soda inside the balloon.
- Stretch the balloon over the bottle mouth without tipping the soda in.
- Lift the balloon so the soda drops in, then watch the heart grow.
Ages 5+, about 15 minutes, low cost. Tip: attaching the balloon without spilling soda early is the fiddly part, so work over a tray, and have a second balloon ready in case the first one tears.
Christmas Technology and Coding Activities
Kids practice code, circuits, and debugging with these five projects.
6. Binary Code Ornament
Kids spell a word in beads using the same 0s and 1s computers use.
You need: pipe cleaners, pony beads in two colors plus a spacer color, a binary alphabet chart, pencil.
- Pick a short word like ELF or STAR.
- Look up each letter on the chart.
- Choose one color for 0 and another for 1.
- Thread each letter's beads in order with a spacer between letters.
- Twist the ends into a hook.
Ages 8+, about 30 minutes, low cost. Use 8 beads per letter for the full alphabet code with children in grade 3 and up; younger kids do better with a shorter 5-bead code. A four-letter word roughly fills one pipe cleaner.
7. Christmas Coding Game
This unplugged game teaches sequencing with arrow cards and a token.
You need: a printed grid board, arrow cards, a token such as an elf or sleigh, scissors.
- Cut out the arrow cards.
- Set the token on the start square.
- Lay out a row of arrows as the program.
- Follow the arrows one at a time, moving one square per arrow.
- Debug the program if the token misses the goal, then try again.
Ages 5+, about 25 minutes, low cost. Tip: kids often skip a square when counting, so remind them that each arrow means exactly one move. Fixing a broken program is the best part of coding, so celebrate every debug.
8. Light-Up Circuit Ornament
A paper shape glows once the copper tape completes the circuit.
You need: cardstock shape, copper tape, 3V coin cell, 5mm LED, clear tape, hole punch, ribbon. See our Snap Circuits beginner kit review for a plug-in alternative.
- Run two separate copper tape strips across the shape.
- Poke the LED through where it should glow.
- Tape the long leg to one strip and the short leg to the other.
- Press the coin cell on both strips to test.
- Tape it down and thread ribbon.
Ages 8+, about 30 minutes, low cost. Tip: if it will not light, look for a gap in the tape, an LED leg that is not touching, or a battery flipped the wrong way.
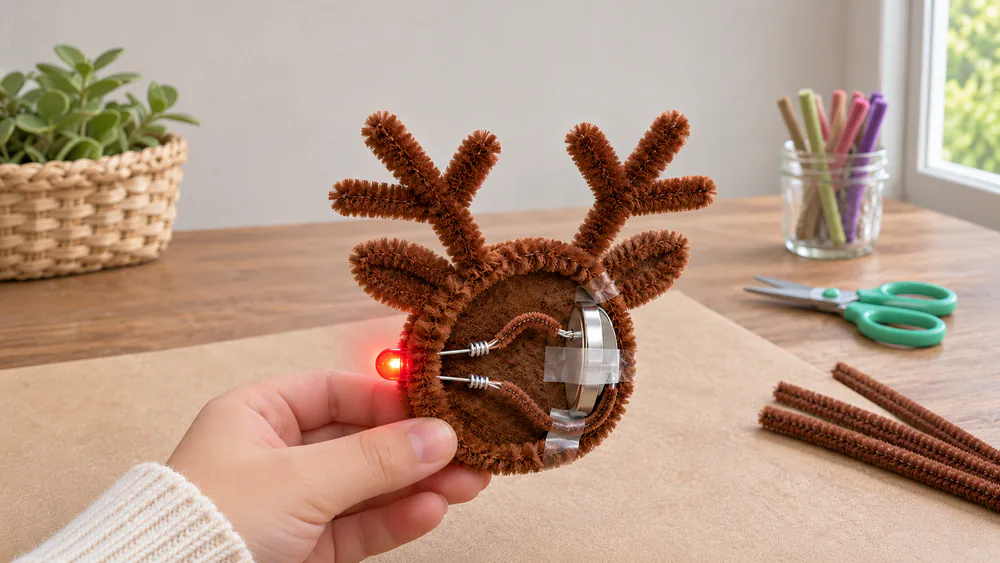
9. Pipe Cleaner Reindeer Circuit
Rudolph's red nose lights up when the wires meet the battery.
You need: brown pipe cleaners, a red 5mm LED, a CR2032 coin cell, tape.
- Strip the fuzz from the pipe cleaner ends.
- Twist each end onto an LED leg.
- Bend the pipe cleaners into a head and antlers.
- Tape the wires to the coin cell with the long leg on the positive side.
- Flip the battery if the nose stays dark.
Ages 7+, about 25 minutes, low cost. Tip: with younger kids, an adult trims and strips the wire ends, and the kids can then twist and tape the pieces themselves. A dim nose usually means a tired coin cell.
10. Light-Up Holiday Card
Closing the card completes the circuit and lights a tree or star.
You need: folded cardstock, copper tape, LED, coin cell, clear tape, markers.
- Draw a tree or star on the front.
- Mark the LED spot and tape two copper strips from it to the inside fold.
- Attach the LED legs, one to each strip.
- Tape the coin cell between the strips so that closing the card touches it.
- Close the card to light it.
Ages 8+, about 35 minutes, low cost. Tip: tape over copper blocks the current, so keep the contacts bare and tape only the edges. If the light stays off, check for a gap in the strips first.
Christmas Engineering Challenges
Build, test, and improve with these five structure and motion challenges.
11. Gingerbread House Structure
Kids plan walls and a roof, then test whether the house stands.
You need: 8 graham cracker squares, 1 cup of royal icing in a zip bag with the corner snipped, a plate, a ruler, an optional milk carton support.
- Sketch a house with four walls, each one cracker tall.
- Pipe a thick line of icing on the plate and stand the four walls in it, pressing the corners together.
- Wait 10 minutes for the icing to harden before building higher.
- Lean two crackers together as the roof and pipe icing along the seam.
- Test and improve the design by gently pressing on the roof or shaking the table.
Ages 6+, about 45 minutes, low to moderate cost. Tip: houses usually fail at the roof, where its weight can push through weak walls and flatten the structure. Icing that is too runny or too stiff will not hold.
12. Candy Cane Tower
Kids build the tallest freestanding tower they can from candy canes and tape, working against a timer.
You need: 20 candy canes, a 3 foot length of tape, a ruler, a 10 minute timer.
- Set the rule that the tower must stand on its own for 5 seconds.
- Sketch a base on paper using 3 or 4 canes.
- Tape the hooks of the canes together to form the base, using no more than half your tape.
- Start the 10 minute timer and stack more canes on the base, taping each joint.
- Stop at the buzzer and measure the height with the ruler.
- Rebuild with a new plan and compare the two heights.
Ages 5+, about 30 minutes, low cost. Tip: candy canes slide and curve, so a wide base helps, and a clear tape limit keeps the challenge fair.
13. Paper Chain Challenge
One sheet of paper becomes the longest chain a child can make.
You need: one sheet of printer paper per child, scissors, a glue stick or tape, a ruler.
- Lay the paper flat and mark lines every 1 inch along the short side.
- Cut along the lines to make strips about 1 inch by 11 inches.
- Curl the first strip into a loop and tape the ends together.
- Thread the next strip through that loop and tape its ends.
- Keep linking until the paper runs out.
- Stretch the chain flat and measure it with the ruler.
Ages 5+, about 30 minutes, very low cost. Tip: strips cut thinner than half an inch tear, and a broken chain cannot be measured.
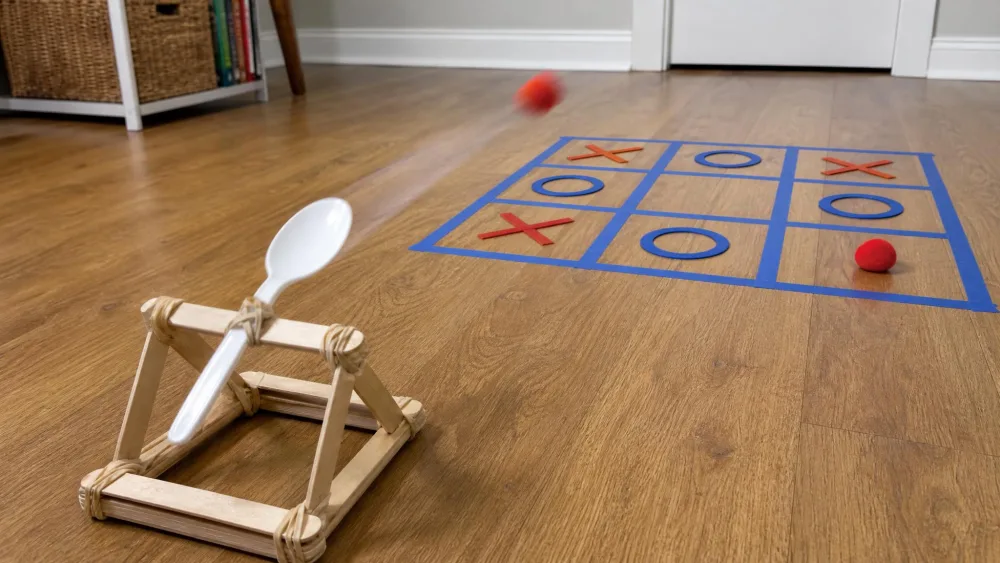
14. Santa's Sleigh Catapult
A craft stick catapult launches pom-poms across the room.
You need: 10 jumbo craft sticks, 6 rubber bands, a plastic spoon, a handful of pom-poms.
- Stack 7 craft sticks and wrap a rubber band tightly around each end.
- Wrap a rubber band around 2 more sticks at one end only to make the lever.
- Slide the stack between the 2 lever sticks, close to the banded end, and band them together.
- Band the spoon handle to the top lever stick so the bowl points forward.
- Set a pom-pom in the spoon, press the spoon down, and let go.
- Add one more rubber band to the stack and measure how far the next shot flies.
Ages 6+, about 40 minutes, low cost. Tip: wrap the bands tightly at both ends to keep the catapult from wobbling apart, and use soft pom-poms for safe indoor launches. Kids turn the launching into a tic-tac-toe game.
15. Parachute for an Elf
A coffee filter parachute carries a toy elf safely to the floor.
You need: a basket style coffee filter, 4 pieces of string cut to 8 inches, a small toy elf, tape, a timer.
- Tape one string to each of 4 evenly spaced points on the filter edge.
- Gather the 4 loose string ends and tape them to the elf's back.
- Open the filter wide so it forms a bowl shape.
- Hold the elf at 6 feet, about the height of a tall adult's head, and drop it while a partner starts the timer.
- Stop the timer when the elf lands and write down the seconds.
- Cut a second filter down to half its width, attach it the same way, and drop it from the same height.
Ages 5+, about 25 minutes, low cost. Tip: the parachute falls slowly only if the canopy is opened wide before the drop, not balled up.
Christmas Math Activities
Counting, measuring, and shapes come alive with festive supplies.
16. Christmas Roll and Graph
Each die roll colors a box, and kids see which picture wins.
You need: a die, a Christmas picture chart, crayons, paper.
- Assign a Christmas picture to each die number.
- Roll the die.
- Color one box in that column.
- Keep rolling until a column fills.
- Count and compare the columns.
Ages 5+, about 20 minutes, very low cost. Tip: ask kids to predict the winner before the first roll, then talk about whether the result surprised them. This is a gentle way to introduce bar graphs to K-2 students, and older kids can write two sentences comparing the columns. Rolling 30 times gives a clear winner, and a die with six sides matches six pictures.
17. Ornament Measuring Challenge
Kids estimate, measure, and order a pile of ornaments by length.
You need: assorted ornaments, a ruler or paper clips, a recording sheet.
- Choose a handful of ornaments.
- Estimate each length.
- Measure with a ruler or paper clips.
- Record every measurement.
- Order the ornaments from shortest to longest.
Ages 5+, about 25 minutes, free if you own ornaments. Tip: remind kids to start at zero on the ruler, since many start at the edge. Paper clips work well for younger kids who are not ready for centimeters, and a written guess before each measurement makes the comparison more fun. Order the ornaments from shortest to longest when everyone is done.
18. Pattern Block Christmas Trees
Pattern blocks build festive trees while kids count shapes.
You need: pattern blocks, challenge cards or plain paper.
- Pick a tree card.
- Cover the shapes with matching blocks.
- Count each shape.
- Make your own tree design.
- Describe the pattern to a partner.
Ages 4+, about 20 minutes, low cost if you own blocks. Tip: let kids design a tree first and then count the triangles, squares, and rhombuses it needs. Older kids can write a rule for their pattern, and partners can swap cards to see who can rebuild the other tree from a description alone. Count how many of each shape the tree uses, then write the totals under the picture.
19. Gumdrop Shape Building
Gumdrops and toothpicks become flat shapes, then 3D structures.
You need: 30 gumdrops, 40 toothpicks, shape cards.
- Push 3 toothpicks into 3 gumdrops to make a triangle.
- Build a square from 4 toothpicks and 4 gumdrops, then press on a corner to test the wobble.
- Add one diagonal toothpick across the square to make two triangles.
- Build a cube from 8 gumdrops and 12 toothpicks by joining two squares with 4 upright toothpicks.
- Count the 12 edges and 8 corners aloud.
Ages 6+, about 30 minutes, low cost. Tip: squares wobble into diamonds until a diagonal makes two triangles, which is a quick lesson in why triangles are strong. Loading a toothpick cube with a hardcover book makes it collapse, prompting kids to try a pyramid. Use fresh gumdrops, since toothpicks are hard to push into stale ones.
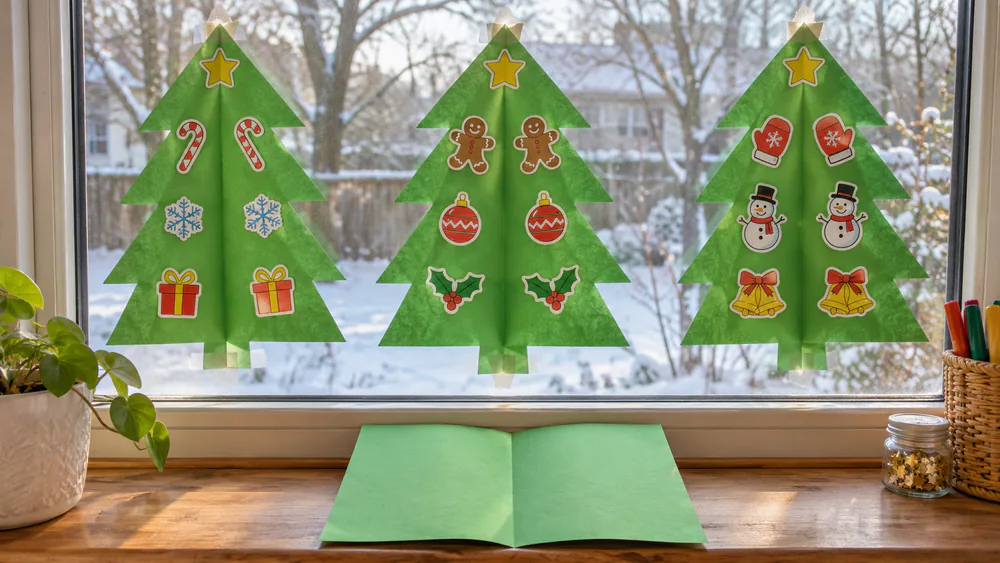
20. Symmetry Christmas Trees
A fold and a cut create a tree with two matching sides.
You need: green paper, scissors, glue, decorations.
- Fold the paper in half.
- Draw half a tree on the fold.
- Cut it out and unfold it.
- Decorate both sides to match.
- Fold again to check.
Ages 5+, about 25 minutes, low cost. Tip: cut the half tree on the fold side, with the straight edge kept on the fold. The fold is a mirror line, and kids can test it by folding again to see if both sides match. Cut with the paper still folded, and keep the straight edge on the crease. Hang the finished trees in a window.
Matching Activities to Grade Levels
The Next Generation Science Standards group science learning into K-2 and 3-5 bands, and this table follows that split.
| Grade band | Best fits | Notes |
|---|---|---|
| K-2 | 1, 2, 4, 5, 7, 12, 13, 15, 16, 17, 18, 20 | Adults handle peroxide, borax, and wire stripping. |
| 3-5 | 3, 6, 8, 9, 10, 11, 14, 19 | Binary and circuits click best here. |
FAQs About Christmas STEM Activities
What are easy Christmas STEM activities for classrooms?
Paper chains, candy cane towers, roll and graph, and symmetry trees need only basic supplies and work for a whole group.
Can I run these with a whole class?
Yes, and small groups of three or four at stations work best, with an adult supervising the messy experiments.
What can I swap if I have no copper tape or LEDs?
Skip the circuit projects and try the binary ornament or the coding game, which need only beads, paper, and a pencil.
How do I make the activities harder for older kids?
Add a budget, a measurement goal, or a written explanation of why the design worked.
What does STEM mean?
STEM stands for science, technology, engineering, and math. These projects touch all four.
Final Thoughts
Pick one idea this week and let the kids lead the testing. For more, try our Winter Olympics STEM activities next, or browse the best STEM kits for kids.