20 Christmas Science Experiments for Kids
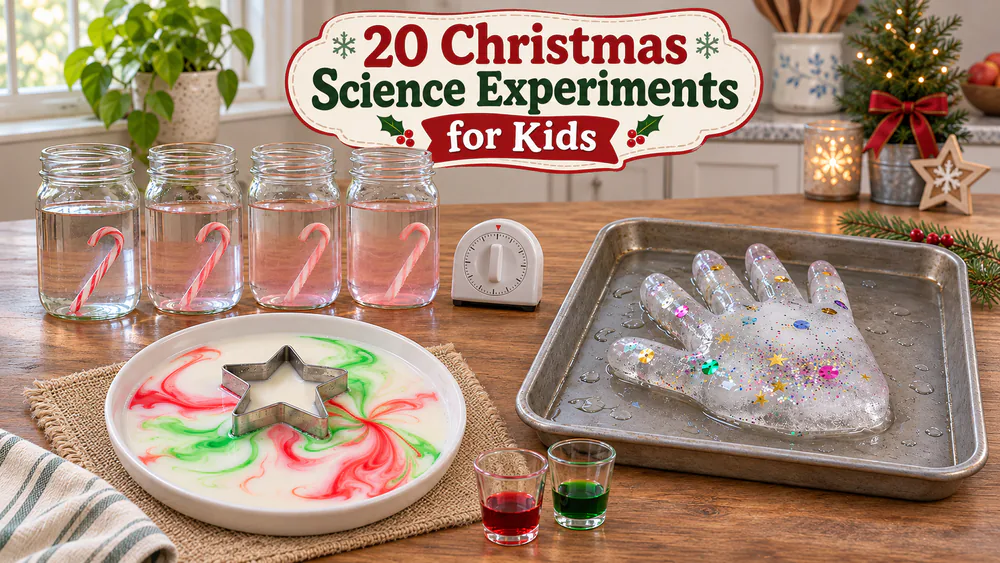
December days are short and cold, and the kids are buzzing about Christmas. We gathered 20 hands-on experiments that use candy canes, kitchen staples and a few craft supplies to keep kids busy and engaged. Read the safety notes in Quick Start: Safety, Supplies, and Ages before you begin.
Candy Cane and Candy Science
These four use candy canes, so stock up on a box.
1. Dissolving Candy Canes
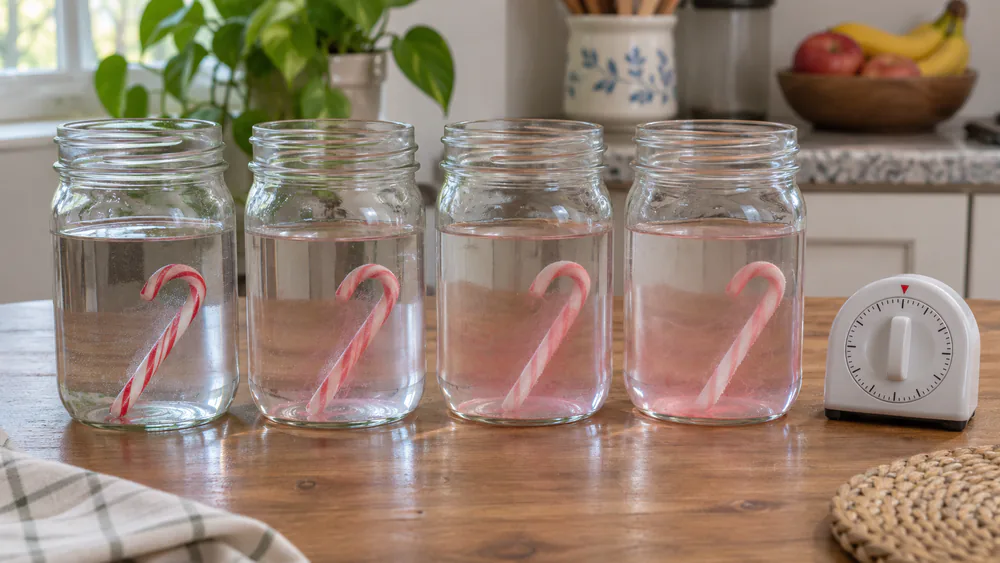
In this classic experiment, kids predict which candy cane will dissolve first and learn that heat speeds up dissolving.
You need: 4 clear jars, mini candy canes, cold water, room-temperature water, hot water (adult), vinegar or soda, a timer.
- Line up four jars and fill them to the same level with cold water, room water, hot water, and vinegar or soda.
- Ask everyone to predict which cane will vanish first.
- Drop one mini cane into each jar at the same moment and start the timer.
- Watch the red stripes and the white base, and write down the times.
- Compare the results with your predictions.
In our home the red stripes vanished first while the white sugar base lasted longer, which got the kids talking about what is dye and what is sugar; ages 4+, about 20 minutes, low cost.
2. Crystal Candy Canes
Borax crystals grow a sparkly coat on a pipe cleaner cane, and the result hangs on the tree like a real ornament.
You need: red and white pipe cleaners, borax, very hot water, a jar, a pencil, string.
- Twist a red and a white pipe cleaner together and bend a candy cane hook.
- Tie string to the top, then tie the other end of the string to a pencil.
- An adult stirs borax into very hot water until it stops dissolving.
- Hang the cane in the jar fully under the liquid, not touching the sides or bottom.
- Leave it overnight, then lift it out and dry it on a paper towel.
Overnight is the practical default and longer gives thicker crystals, but these ornaments are not edible; ages 6+, about 15 minutes of work plus the wait, low cost.
3. Melting Peppermint Candy Colors
Warm water pulls the color out of peppermints and spreads it across a plate in a pretty pattern.
You need: a white plate, round red and green peppermints or star mints, warm water.
- Arrange the mints in a ring about an inch apart on the plate.
- Pour warm water in slowly until it just touches the bottoms of the mints.
- Watch the color spread across the plate.
- Note whether the colors blend or stay as separate stripes.
The colors may blend or stay as separate stripes, so let your kids watch and decide why, but too much water floats the mints and makes the dye run together; ages 3+, about 10 minutes, low cost.
4. Bending Candy Canes
Warm candy canes turn soft and shape into hearts and circles.
You need: candy canes, a parchment-lined baking sheet, an oven, oven mitts.
- An adult heats the oven to 250F and lays the canes on the parchment.
- Warm them for about 3 to 5 minutes, checking every couple of minutes.
- The adult pulls the tray and waits a few seconds.
- Gently bend each cane into a heart or circle, holding it against the pan.
- Let it cool and harden.
Oven times vary by cane size, so keep watching, because the working window is about a minute and firm canes go back in for a minute or two; ages 7+, about 20 minutes, low cost.
Fizzing, Foaming, and Chemistry Experiments
Baking soda (a base) plus vinegar (an acid) releases carbon dioxide gas, and that gas makes the fizz. Alka-Seltzer in water does the same in the density experiments.
5. Fizzing Christmas Trees
Nothing beats a fizzing tree for a first chemistry reaction, and the sequins shift and dance as the vinegar sinks in.
You need: baking soda, vinegar, a tree cookie cutter, a tray, sequins, a dropper.
- Set the cutter on a tray and press baking soda into it, leveling it with a spoon.
- Scatter sequins on top.
- Fill a dropper with vinegar, tinted with food coloring if you like.
- Squeeze vinegar onto the tree and watch the sequins shift.
- Repeat with more vinegar until the soda is used up.
The dropper keeps the fun going until the soda is used up, but food coloring in vinegar can stain clothes, so aprons or old shirts help; ages 3+, about 15 minutes, low cost.
6. Fizzy Cookie Cutter Ornaments
The reaction is instant and high-contrast, and squeezing a pipette gives real fine motor practice.
You need: a rimmed baking sheet, holiday cookie cutters, baking soda, vinegar, red and green food coloring, a pipette or small spoon.
- Set the cutters on the sheet.
- Cover the bottom of each cutter with a thin layer of baking soda.
- Tint small cups of vinegar red and green.
- Drop the colored vinegar onto the soda with a pipette.
A thin layer reacts fast while too much soda wastes vinegar, and a rimmed tray catches the overflow. Add the vinegar one drop at a time so each shape fizzes in turn, and add more as the fizz fades; ages 3+, about 15 minutes, low cost.
7. Christmas Magic Milk
Colors burst and swirl the moment soap touches the milk, and kids ask to do it again right away.
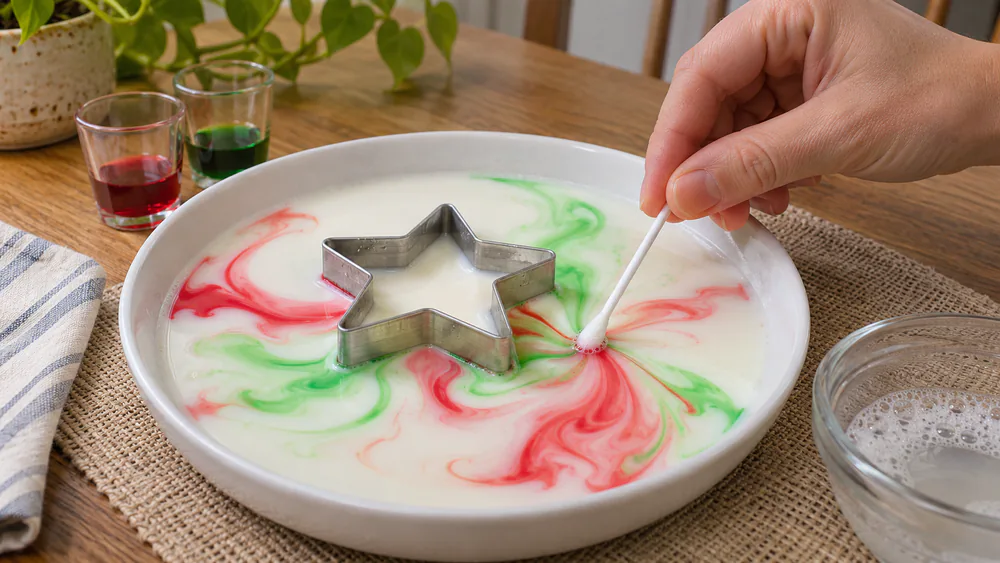
You need: whole milk, a shallow dish, star cookie cutters, liquid food coloring, dish soap, cotton swabs.
- Put a star cutter in the dish and pour in enough milk to cover the bottom.
- Dot food coloring inside and outside the star.
- Dip a cotton swab in dish soap.
- Touch the swab to the milk and watch the colors burst.
Use whole milk because the fat is what makes it work, and the dish soap grabs the fat and pushes the water and coloring outward in swirls, which is why the colors keep moving; ages 3+, about 10 minutes, low cost.
8. Peppermint Oobleck
Oobleck is both a liquid and a solid, and peppermints make it smell like the holidays. It works well for sensory play.
You need: cornstarch, water, peppermints, tweezers, a cookie sheet. See the peppermint oobleck variation for another take.
- Mix about 1 cup of cornstarch with 1/2 cup of water, adding the water slowly.
- Pour it onto the cookie sheet.
- Add the peppermints.
- Let kids pick them out with tweezers, then squeeze the oobleck and let go.
Pulling mints out with tweezers was a hit with the small ones, and each mint leaves a color stain, so you need no food coloring. Cornstarch brands vary, so add water a spoonful at a time until it flows slowly and hardens when squeezed; ages 3+, about 20 minutes, low cost.
9. Christmas Lava Lamp
Oil and water will not mix, so colored bubbles rise and fall in two clear layers.
You need: a clear jar or bottle, vegetable oil, water, red and green food coloring, Alka-Seltzer, optional glitter.
- Fill the bottle about a third with water and add 10 to 15 drops of coloring.
- Pour oil on top until the bottle is nearly full.
- Wait for the layers to settle.
- Drop in a piece of Alka-Seltzer.
- Add more when the bubbles slow down.
The tablet releases gas bubbles that carry colored water up through the oil, then it sinks again. Pour the oil gently down the side of the bottle, and add one piece of tablet at a time so the bubbles do not overflow; ages 5+, about 15 minutes, low cost.
10. Candy Cane Slime
Red and white swirled slime is soft, stretchy and smells of peppermint.
You need: white school glue, baking soda, saline contact solution, peppermint extract, red food coloring or paint.
- Stir the glue and baking soda together.
- Add a few drops of peppermint extract and red color to half the batch.
- Stir in the contact solution a little at a time until it pulls away from the bowl.
- Knead and swirl the red and white parts together.
Add the activator slowly, since too much makes the slime rubbery. Clear slime made this way looks cloudy at first and clears after sitting overnight. Slime is not edible and needs supervision; ages 6+, about 20 minutes, low cost.
Kitchen Science: Hot Cocoa and Gingerbread
Your kitchen already holds the lab equipment for these three.
11. Hot Chocolate Science (Marshmallow Melt Test)
Kids guess hot water will win, then time it to find out how much faster it is. Here is the hot chocolate science idea we followed.
You need: 3 heat-proof mugs, 3 instant cocoa packets, water, a timer, a notebook, marshmallows.
- Write down predictions.
- Pour one packet into each mug.
- Add the same amount of cold, room-temperature and hot water to each (an adult handles the hot).
- Start the timer and stir each mug until the mix disappears.
- Record the times and compare.
Cold water never fully dissolved the mix, while hot water finished in under half a minute. We discard the unappetizing cold cup and drink the other two with whipped cream. Use exactly the same amount of water in every mug for a fair comparison; ages 5+, about 20 minutes, low cost.
12. Dissolving Gingerbread Men
Baking soda dough shaped into little men melts into foam when vinegar hits it.
You need: baking soda, water, gingerbread spices, vinegar, a dropper.
- Mix baking soda with a little water and spices until it feels dough-like.
- Mold it into gingerbread men.
- Drip vinegar on them with a dropper.
- Watch them melt into foam.
Keep the dough crumbly and moldable, not runny, because the spices make the foam smell like baking, and toddlers like the fizz and the colors most. Add the water a few drops at a time, because dough that turns runny will not hold a shape. Drip the vinegar slowly so each figure fizzes and melts before you start on the next one; ages 3+, about 15 minutes, low cost.
13. Dancing Cranberries
Cranberries pick up bubbles, float up, then sink and rise again, like tiny dancers.
You need: a clear glass, club soda or other clear soda, dried or fresh cranberries.
- Fill the glass about three quarters full with club soda.
- Drop in the cranberries.
- Watch them rise and sink.
- Top up with fresh soda if they stop.
The dance lasts about 10 to 20 minutes, depending on how fresh and fizzy the soda is, so flat soda will not work well at all. Use a tall clear glass so kids can watch the whole trip, since fresh, bubbly soda always gives the longest show of all; ages 4+, about 20 minutes, low cost.
Ice, Snow, and Winter Science
These winter experiments bring the cold indoors.
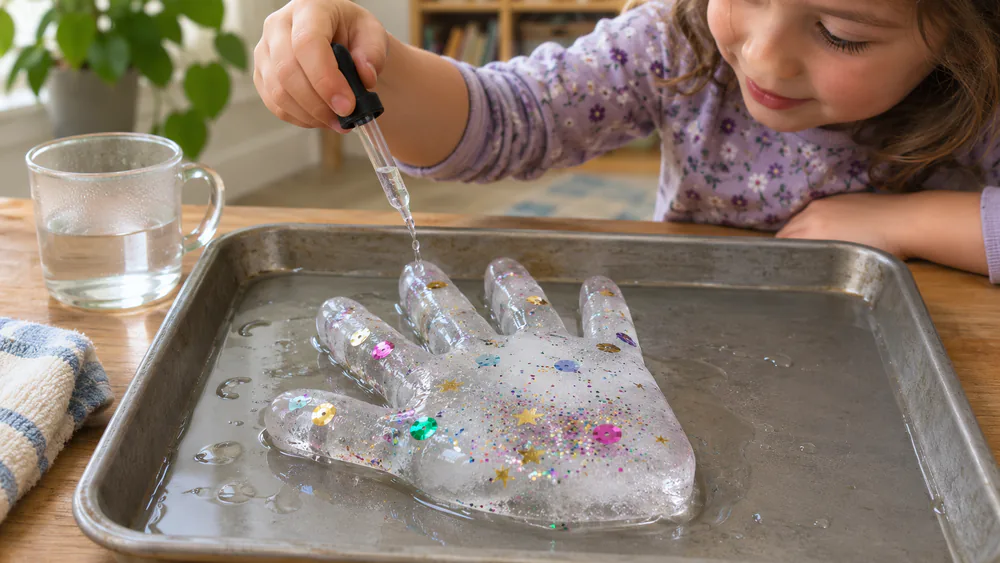
14. Santa's Frozen Hands Ice Melt
Kids melt frozen glove hands to free hidden treasures, which makes it a good pick for sensory play.
You need: disposable gloves, water, glitter, sequins or small ornaments, rubber bands, a tray, salt, droppers or basters, warm water.
- Drop small treasures and glitter into a glove.
- Fill it with water and tie it off with a rubber band.
- Freeze it on a tray for about a day, then peel off the glove.
- Melt the hand with warm water and droppers.
- Try salt on it to compare how fast the ice melts.
Start the night before, because our kids checked the freezer again and again while they waited. The meltwater is painfully cold, so use warm water in the dropper; ages 3+, about 30 minutes plus freezing, low cost.
15. Frost in a Can
Salt and ice chill a can below freezing, so frost forms on the outside.
You need: a clean metal can, crushed ice, salt, water, a towel.
- Fill the can with crushed ice.
- Add several spoons of salt and a splash of water.
- Stir and wait a few minutes.
- Look for frost on the outside of the can.
Without salt, the can only gets wet, so add more salt and a splash of water if nothing happens, though ice cubes work more slowly than crushed ice. Stir gently and keep a towel handy, since the can gets wet and very cold as the salted ice melts; ages 6+, about 15 minutes, low cost.
16. Snowstorm in a Jar
Alka-Seltzer bubbles lift white paint droplets through oil, and a snowstorm swirls in the jar.
You need: a jar, baby oil, white paint, water, Alka-Seltzer, optional glitter.
- Fill the jar about two thirds with baby oil.
- Stir a little white paint into water until it is milky, then pour it in.
- Break an Alka-Seltzer into small pieces and drop in two or three.
- Watch the snow rise and settle, then repeat after it calms.
Pouring the oil makes bubbles that cloud the jar, so let it sit an hour for a clearer show. Baby oil stays clear where vegetable oil looks yellow, and if the snow will not rise, use smaller pieces or a bit more paint; ages 5+, about 20 minutes plus settling, low cost.
Physics, Engineering, and Circuits
The last four are builds for older kids.
17. Christmas Catapult
Craft sticks, rubber bands and a spoon turn into a pom pom launcher while kids measure how far it flies.
You need: 8 to 10 craft sticks, rubber bands, a plastic spoon or bottle cap, pom poms.
- Stack six to eight sticks and band both ends.
- Put one stick across the middle in a cross and band it.
- Attach the spoon to the top stick with rubber bands, letting it hang over the end.
- Load a pom pom, press down and release.
- Change the rubber bands or the projectile, then measure the distance.
Let the spoon overhang the end for a longer launch, and press the stack firmly before you band it, and try a bottle cap instead of the spoon to compare how far each one launches; ages 6+, about 25 minutes, low cost.
18. Jumping Tinsel (Static Electricity)
A rubbed balloon makes tinsel leap up, and it feels like a magic trick.
You need: a balloon, tinsel with no wire, scissors, hair or wool.
- Blow up the balloon.
- Snip the tinsel into small pieces.
- Rub the balloon on hair or wool for several seconds.
- Hold it just above the tinsel and watch it jump.
Smaller pieces jumped more readily than big chunks, and a tinsel bow clung to the balloon. If the tinsel falls, rub the balloon longer to restore the pull. Keep the tinsel flat on a table and hold the balloon close without touching it, then compare hair and wool to see which charges it better; ages 4+, about 10 minutes, low cost.
19. Light-Up Circuit Tree
A tiny tree that really lights up is a proud moment for any builder. For another take, see this circuit tree STEAM activity. It is built for ages 8 and up with an adult beside the child.
You need: LEDs, insulated wire, coin cell batteries, electrical tape, a clothespin, pipe cleaners, a LEGO base.
- Test each LED on the battery and flip it if it stays dark.
- Wire the LEDs in pairs and tape-mark the positive wires.
- Tape the pairs to the clothespin legs and test.
- Gather the positive and negative leads on opposite ends and pinch the battery between them.
- Wrap pipe cleaners around for branches and set the tree in a LEGO base.
Keeping positive and negative leads straight is the main hurdle, so test after every pair, and bare wire that touches the metal clothespin kills the circuit. Holding wires against the battery is fiddly and needs an adult's hands, and the tree wobbles until it sits in a LEGO base. For more, see our best circuit kits for kids; ages 8+, about 45 minutes, moderate cost.
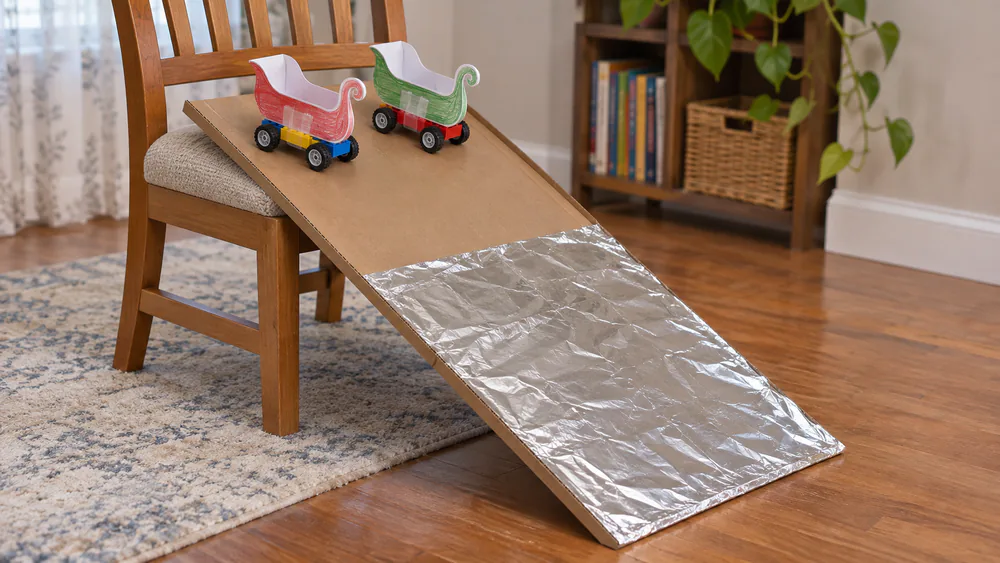
20. Sleigh Ramp Races
Paper sleighs race down a ramp, and kids learn to change one thing at a time. The idea comes from these Christmas sleigh races.
You need: a cardboard ramp, LEGO or toy car bases, paper sleighs, tape, a timer, aluminum foil or a towel.
- Tape the paper sleighs to the car bases.
- Prop the cardboard ramp on a chair.
- Race each sleigh and time it.
- Change the surface to foil or a towel and race again.
- Tape pennies on for weight and compare.
The sleighs finished at nearly the same time, so the real learning came from changing the ramp height or surface. Change one thing at a time or the results mean nothing, and the kids loved crashing wheel-less blocks into the sleighs at the bottom; ages 5+, about 30 minutes, low cost.
Quick Start: Safety, Supplies, and Ages
Watch outAdults handle hot water, the oven, borax and coin cell batteries. Slime, borax crystals and anything with food coloring in vinegar are not for eating, and small parts need watching with younger kids.
For ready-made options, browse our best science kits for kids, best chemistry sets for kids or best building kits for kids. Our STEM toys and science kits page has more.
Tips for Running Christmas Science at Home or in Class
Parent tipPut every messy experiment on a rimmed baking sheet. Fizz, oobleck and melting ice all stay contained.
Frequently Asked Questions
What is the easiest experiment for a toddler?
Fizzy cookie cutter ornaments. The reaction is instant, and a dropper builds fine motor skills.
Which experiments need the closest adult attention?
The circuit tree and the slime need a grown-up beside the child the whole time, and the frozen hands need care with the warm water. Nothing here is meant to be eaten except the hot chocolate.
How do I explain the science simply?
For fizz, say vinegar and baking soda make a gas. Keep it to one sentence.
Can I use these in a classroom?
Yes. Run them as stations with the same amounts for every group.