25 Easy Recycled Art Projects for Kids
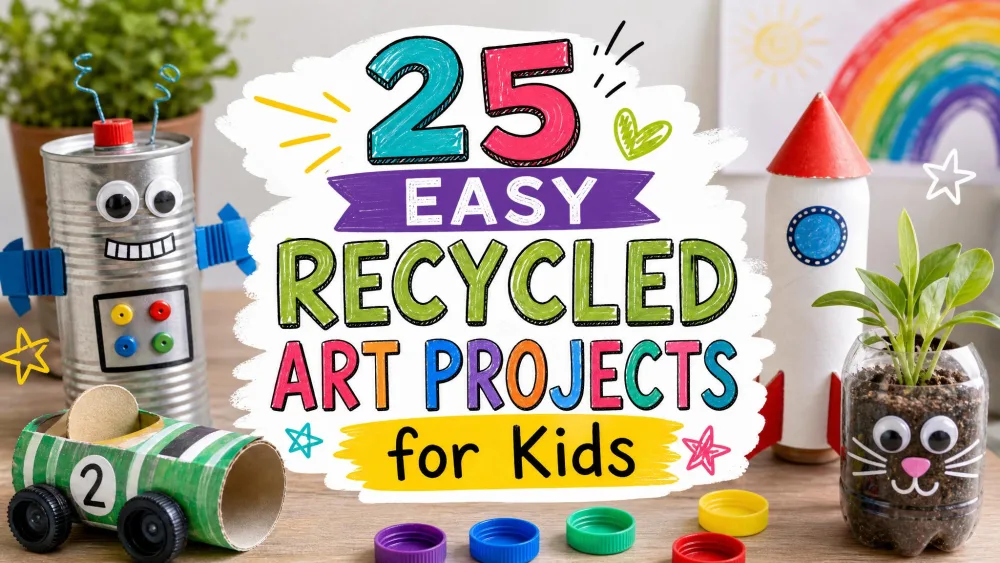
Recycled art projects turn the everyday items in your recycling bin into art the kids actually want to make. They cost almost nothing, since the cardboard, egg cartons, and bottles are already in your kitchen, and they teach kids that reuse is worth a second look before something gets tossed. We craft at our kitchen table most afternoons, and these projects have earned a repeat spot in our house.
The 25 ideas below are grouped by material, so you can grab whatever you already have on hand. Each uses recycled materials and steps a child can follow with a little help. We have made most of them at home, and picked up the tricks that keep the fun going.
NoteWe test kids' art projects the honest way: two children, ages 5 and 8, a kitchen table, and whatever the recycling bin coughs up that week. What follows is what actually held their attention.
Why Recycled Art Projects Are Great for Kids
Recycled crafts are close to free, because they use items you would otherwise recycle or throw away. That low-stakes feeling matters: nobody frets over a "wasted" cereal box the way they might over pricey supplies. The projects also build fine-motor skills, and give kids a real reason to think about reuse. In our home, the best part is watching a child look at a bottle cap and see a flower.
Cardboard Box & Cereal-Box Crafts
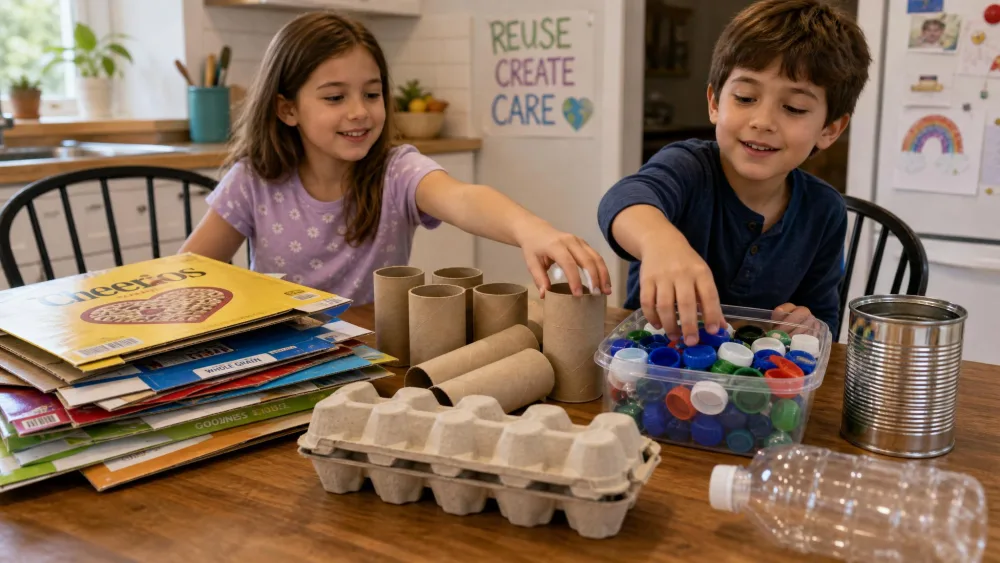
Cardboard is the workhorse of recycled art. It cuts easily, takes paint and glue well, and there is always more of it. Wipe each piece clean first, and let an adult handle the heavier cutting.
1. Cereal-Box Elephant
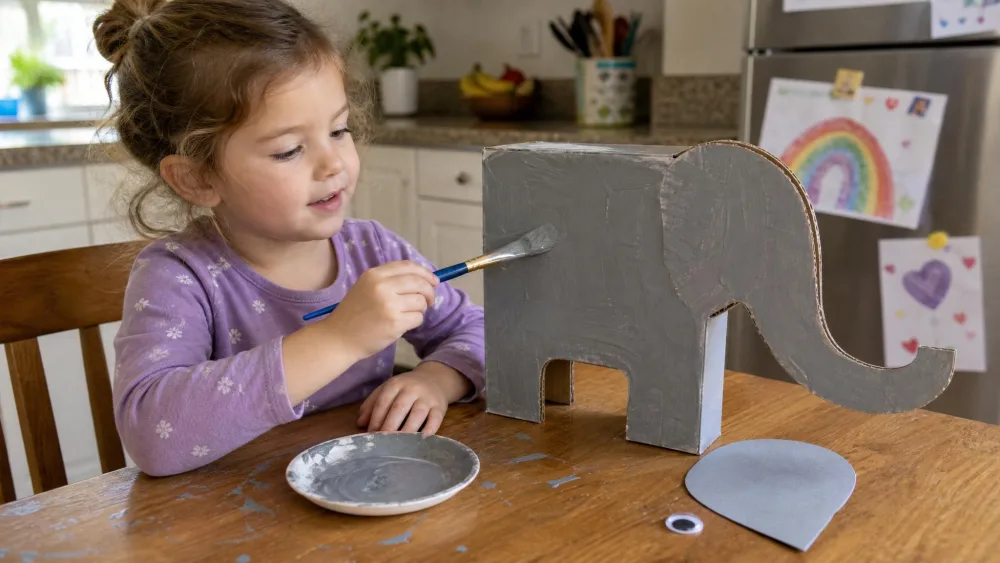
Cut a simple elephant shape from a flattened cereal box, then let kids paint it gray and glue on paper ears. Kids love watching the printed box side disappear under a coat of paint.
2. Milk-Carton Bird Feeder
Rinse and dry an empty milk carton, cut a window in one side, and add a stick perch. Fill it with seed and hang it outside. This one keeps working long after craft time ends.
3. Cardboard Mailbox
Turn a small box into a working mailbox for notes between siblings. Tape a flap for the door and let each kid decorate their own. The notes-between-siblings game tends to run for days.
4. Bean-Mosaic Shapes
Draw a simple shape on cardboard, spread glue inside the lines, and press on dried beans. Coloring the beans ahead of time with a little vinegar makes the craft far less chaotic in the moment. Template shapes like a heart or a star cut down on frustration for younger kids.
Toilet-Paper & Paper-Roll Crafts
Paper rolls are small, sturdy, and endless. The projects that double as a toy afterward hold kids' interest longest, so we lean on those.
5. Paper-Roll Binoculars
Tape two rolls side by side, punch a hole on each end, and thread a yarn strap. Decorate, then head outside on a "bird hunt."
6. Paper-Roll Shakers
Seal one end, add a spoonful of dry rice, and close the other end. Kids decorate the outside and shake along to music. Keep the rice inside for a firm tape seal.
7. Paper-Roll Koi Fish
Pinch and fold the roll into a fish shape, then paint it orange and white. Cut fins from scrap paper. Limiting kids to two or three colors here prevents the muddy brown that comes from mixing everything on one brush.
8. Paper-Roll Bird Feeder
Coat a roll in nut-free seed butter, roll it in birdseed, and slide it onto a branch. It takes five minutes and gives the birds a snack. Because it doubles as a toy that keeps working after craft time, it holds interest longer than a display-only piece.
Egg-Carton Crafts
Egg cartons are one of the most toddler-friendly materials in the bin. The molded cups are already the perfect base for bugs, flowers, and small animals, with no sharp edges to worry about.
9. Egg-Carton Turtle
Cut a single cup, paint it green, and add paper legs and a head. This classic egg carton turtle craft is a simple, forgiving starter project for a first recycled craft.
10. Egg-Carton Caterpillar
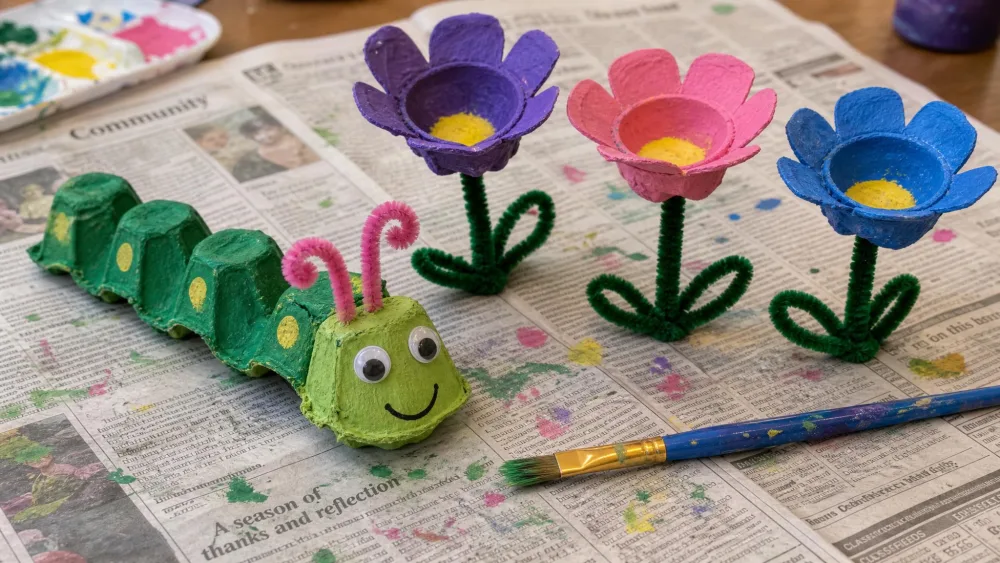
Cut a strip of connected cups, paint each one, and add pipe-cleaner antennae. Kids can count the segments as they paint.
11. Egg-Carton Painted Flowers
Trim cups into flower shapes, paint them bright, and poke a pipe cleaner stem through the base. A bouquet of these makes a sweet homemade gift.
12. Egg-Carton Butterfly Garland
Paint several cups, string them on yarn, and hang the row like a garland. Taped across a window, the light shows through the colors.
Plastic Bottle, Cap & Lid Crafts
Wash and dry every bottle, cap, and lid before crafting. Bare plastic often needs a multi-surface acrylic paint or a primed surface for the color to stick. Keep small caps away from children under three, since they are a choking risk.
13. Plastic-Bottle Piggy Bank
Lay a clean bottle on its side, cut a coin slot, add cap feet and paper ears, and paint it pink. An adult should make the slot with a craft knife.
14. Bottle-Cap Flower Collage
Glue clusters of caps into flower shapes on cardboard, then paint stems and leaves around them. It is a great way to use the caps that always pile up.
15. Plastic-Lid Suncatcher
Decorate a clear lid with translucent paint or tissue, punch a hole, and hang it in a sunny window. Some lids poke through easily and others do not, so an adult should handle the hole-punching.
16. Plastic-Lid Necklace
Decorate small lids, string them on cord, and you have a wearable plastic-lid necklace tutorial result. Wearable, gift-able projects boost kid buy-in more than anything: ours wanted to make one for every friend. If you use paint pens, let each color dry first, or the layers smear.
Parent tipFor a magical evening project, tuck a battery tea light into a decorated bottle to make a bottle fairy-house night light. Simple designs read better than fussy ones on plastic.
Paper, Magazine & Newspaper Crafts
Old magazines and newspaper are free, colorful, and endless. These projects turn flat paper into beads, flowers, and layered art with nothing more than glue and scissors.
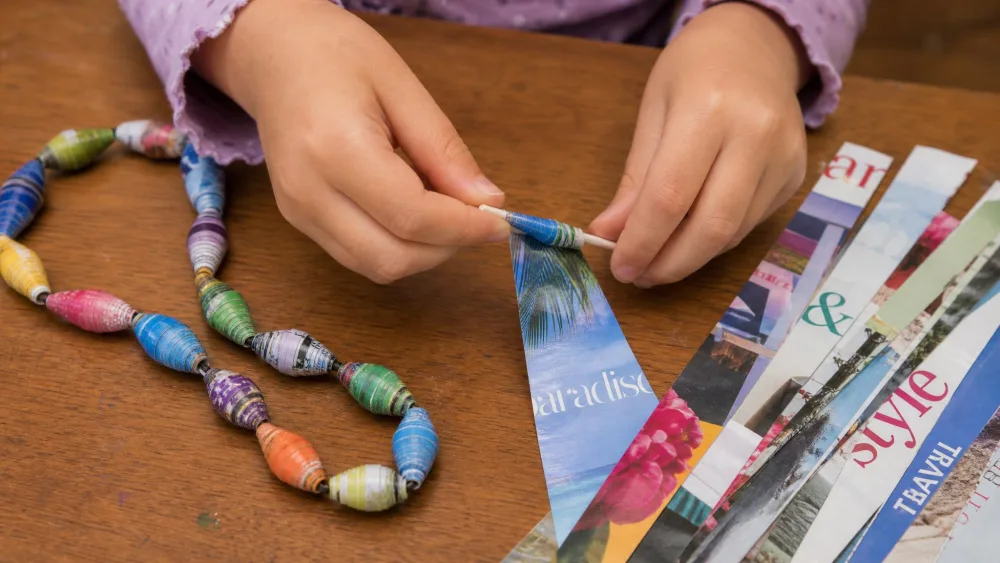
17. Rolled Magazine Beads
Cut long triangles from glossy magazine pages, roll each around a skewer, and seal with glue. String the beads once dry.
18. Magazine-Strip Butterflies
Fold magazine strips accordion-style, pinch the center, and add a pipe-cleaner body. Kids pick their own color pages, which makes each butterfly one of a kind.
19. Newspaper Flowers
Stack a few newspaper squares, pinch and twist the center, then fluff the layers into petals. A dab of paint on the tips adds color.
20. Torn-Paper Mosaic
Tear scrap paper into small pieces and glue them inside a drawn outline. Tearing instead of cutting means even young kids can do the whole thing themselves.
Tin-Can & Jar Crafts
Clean cans and jars make sturdy holders, lanterns, and vases. The rim is the one real hazard, so prep matters here more than with any other material. See "Before You Start" below for the full prep routine.
21. Tin-Can Pencil Holder
Wrap a clean can in paper or paint it, then fill it with pencils. Prep the can first so the label is off and the rim is safe, then let it dry fully.
22. Tin-Can Lantern
Freeze the can full of water, then let an adult tap a nail-hole pattern into the side. Drop in a battery light and the holes glow.
23. Decorated Jar Vase
Wrap a clean jar in yarn, paint, or paper cutouts, and fill it with flowers. This one is nearly mess-free and makes a lovely gift.
Watch outTin-can rims are the main hazard in this whole guide, so a can is only kid-ready once an adult has smoothed the edge. Keep sharp scissors and the hot glue gun as adult-only jobs, and hand kids the decorating step instead.
Recycled Crafts for Toddlers & Preschoolers
For the youngest crafters, we stick to big-grip, few-step projects where the doing is the whole point. The finished piece rarely matches the photo, and that is fine.
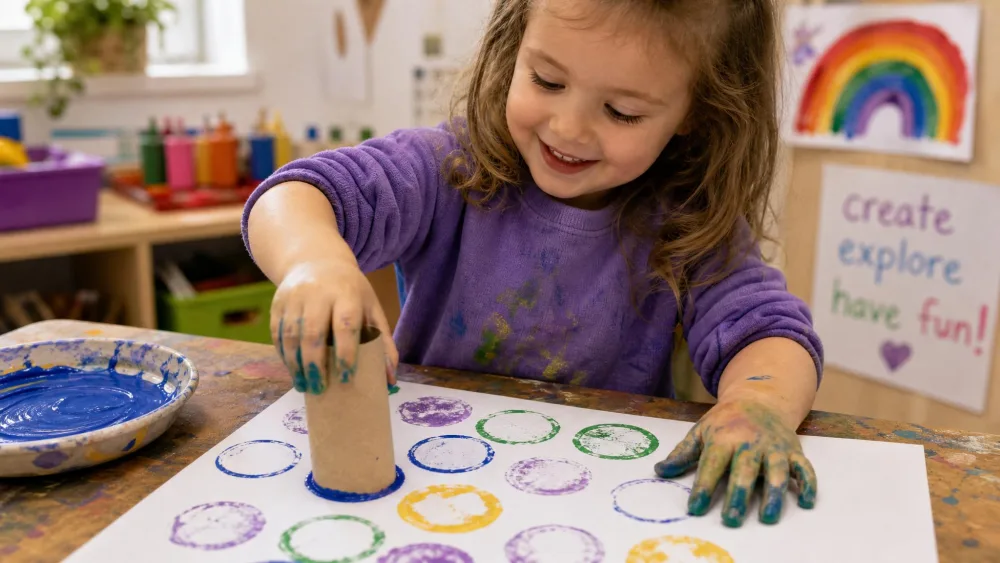
24. Paper-Roll Stamping
Dip the end of a paper roll in paint and stamp circles on paper. Pinch the roll into a heart or petal shape for different prints. Pour out only a little paint at a time, since less paint means far less to clean up.
25. Bottle-Cap Stamp Printing
Hand a toddler a few clean caps and a shallow dish of paint for polka-dot prints. Big caps are easy for small hands to grip, and the repetition keeps little ones happy.
Before You Start: Prepping Recycled Materials Safely
A little prep turns the recycling bin into a craft cupboard. Rinse and dry anything that held food, and flatten cardboard so it stores neatly. For tin cans, soak them in warm soapy water for 10-15 minutes to loosen the label, peel it, scrub any leftover glue with a little oil, and dry fully to prevent rust. Then smooth the sharp rim so it is safe for a child to hold: sand or file it, tap it down with pliers, or cover the rim with tape or hot glue. Wash and dry plastic the same way, and remember that bare plastic usually needs a multi-surface acrylic or a primed surface to hold paint.
Reach for the right glue, too. Elmer's is our go-to for young kids and works on paper, popsicle sticks, and tissue. Save the hot glue gun and structural gluing for a grown-up. A stash of googly eyes makes nearly every animal craft more fun. If you want more low-mess ideas, our roundup of easy art projects for kids pairs well with these.
Frequently Asked Questions
How should I store recycled craft materials so they are ready when the mood strikes?
Keep a shallow bin or two by material, flatten cardboard so it stacks, and let anything that held food dry completely before it goes in. A ready-to-grab stash is the difference between crafting on a rainy afternoon and hunting through the recycling for a clean box.
How long do these projects usually take from start to finish?
Most take fifteen to thirty minutes of hands-on work, and the real wait is the drying. Painted plastic and thick glue need the longest, so we often start a project before lunch and finish assembling after nap or quiet time.
What can we do with all the finished crafts afterward?
The best ones earn a second life: bird feeders and lanterns go outside or on a shelf, necklaces and vases become gifts, and shakers and binoculars turn into toys. When a piece has run its course, it usually heads right back into the recycling bin.
Do recycled crafts hold up, or do they fall apart quickly?
Paper and newspaper pieces are fragile by nature and are meant to be short-lived, while painted cans, jars, and sealed beads last much longer. If you want a craft to survive daily handling, lean toward the sturdier materials and a good adult-applied glue.
Final Thoughts
The best recycled art projects are the ones you can start today with what is already at home. Pull a few things from the recycling bin, pour out a little paint, and let the kids run with it. Some pieces will look nothing like the plan, and that is fine. For more ideas, browse our art projects for kids anyone can make collection.