30 Easy Halloween Art Projects for Kids (Spooky & Fun)
Halloween art is the easiest kind of seasonal crafting to say yes to. The projects are simple, the mess is manageable, and most use paper, paint, and odds and ends you already own. Looking for spooky crafts that actually hold a kid's attention? This is a motif-grouped list of pumpkins, ghosts, spiders, bats, witches, and more, sorted so you can jump straight to whatever your kids are into. Every one is easy to make, friendly for little hands, and a fun way to spark creativity before the trick-or-treating starts.
NoteWe make most of these at the kitchen table over a few afternoons, one motif at a time. The notes below are the little things we learned by actually doing them, so your first try goes smoother than ours did.
Why Halloween Art Projects Are Great for Kids
Seasonal art gives kids a reason to create without any pressure to make it perfect. A lumpy torn-paper pumpkin is still a win, because the messy, uneven version looks better than a tidy one. Best of all, these crafts double as free decorations, so the fridge and windows fill with spooky art the whole family made together.
Halloween Art Supplies You'll Need
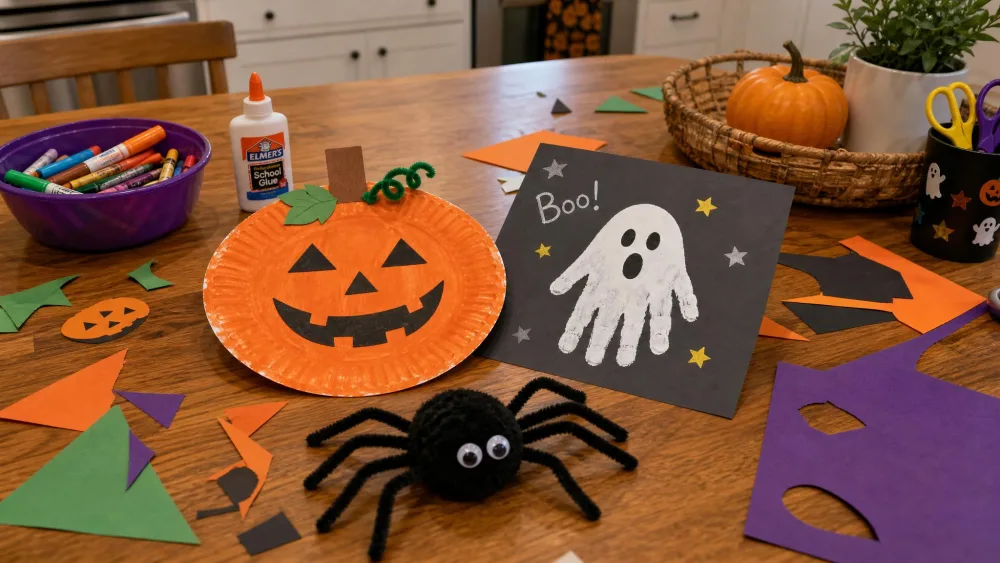
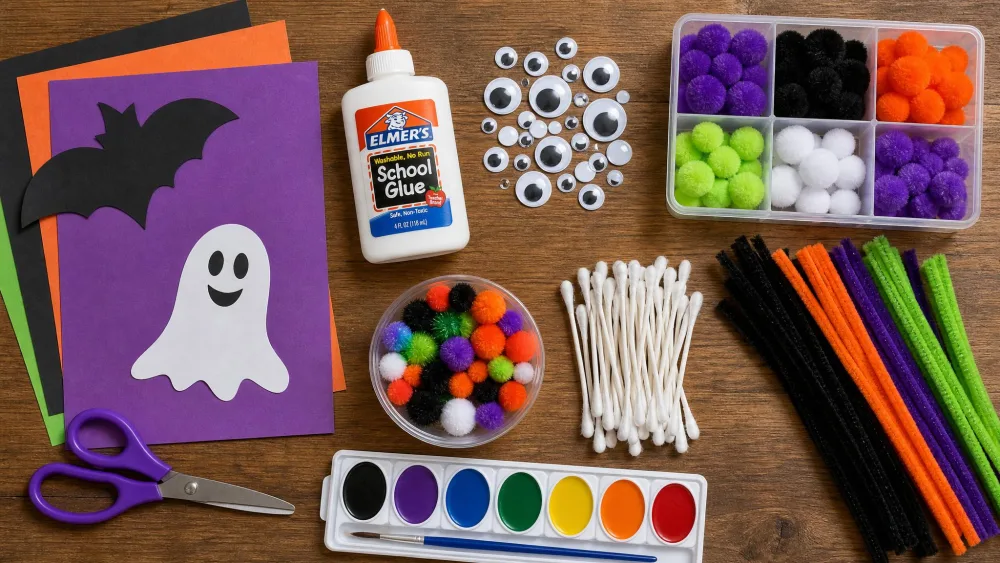
You do not need a craft store run for most of this list. The same household materials show up again and again: paper plates, construction paper, coffee filters, salt, watercolors, white crayons or oil pastels, pipe cleaners, pom poms, googly eyes, Q-tips, and glue. Keep black paper on hand for ghosts and cats, orange and green for pumpkins, and white paint for handprints. Many of these crafts come together in under 30 minutes, though that is a general guideline and busier projects will run longer.
Parent tipSqueeze white glue onto a spare plate and let kids brush it on with a small paintbrush. It is far less frustrating than a glue stick, especially for the paper-tearing projects.
Pumpkin & Jack-o'-Lantern Art Projects
Pumpkins are the friendliest place to start, because there is no wrong shape and almost every technique works.
Salt-Painted Pumpkins
Paint a pumpkin shape with watercolor, then sprinkle salt onto the wet paint while it is still shiny. As it dries, the salt pulls the pigment into a raised, crystalline texture that kids love to watch appear. Slow and wet gives the best result.
Paper Plate Pumpkin
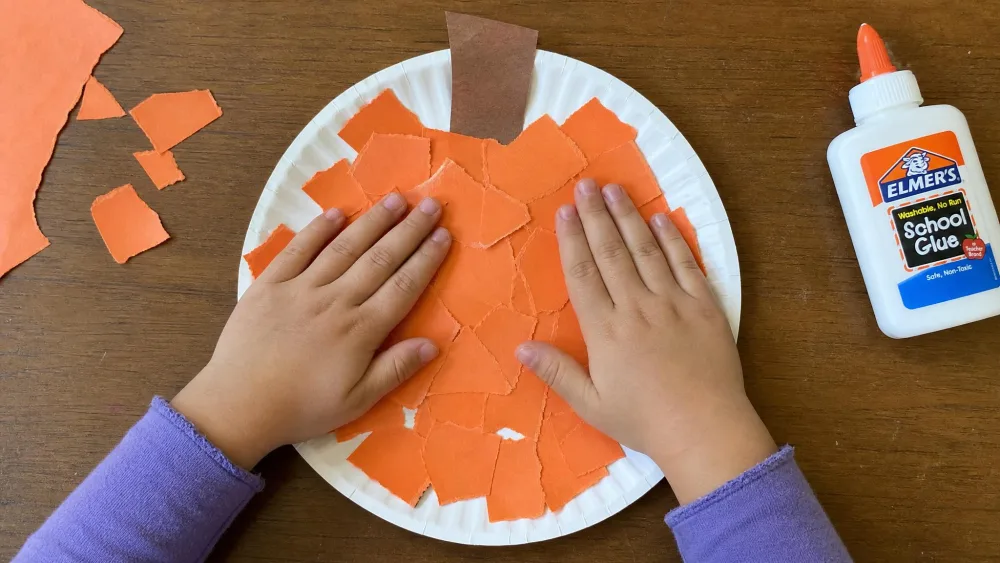
Tear orange construction paper into small pieces and glue them onto a paper plate, then add a brown paper stem and a green marker or pipe-cleaner vine. Kids can do it all on their own, and the messy, uneven coverage is the whole charm.
More pumpkin ideas
Try melted-crayon pumpkins on a real white pumpkin, using a hair dryer rather than an oven to melt crayon shavings down the sides. Space the crayons about half an inch apart, though that is one guideline and depends on your crayon size. This one is messy splatter work, so do it outside or over cardboard and angle the dryer downward. Thumbprint pumpkin patches and cut-paper jack-o'-lantern faces round out the theme.
Watch outWashable crayons on an outdoor pumpkin will wash away in the first rain. Save that display for a covered porch, and keep the hair dryer and melting steps in an adult's hands.
Spider & Spider Web Art Projects
Spiders bring in beads, legs, and a little happy chaos.
Handprint Spiders
Press a painted palm onto paper twice, thumbs tucked, so the fingers become eight legs, then add googly eyes for an instant spider. It is a fast, satisfying project for little ones who are not ready for cutting yet.
Spider Web Resist Painting
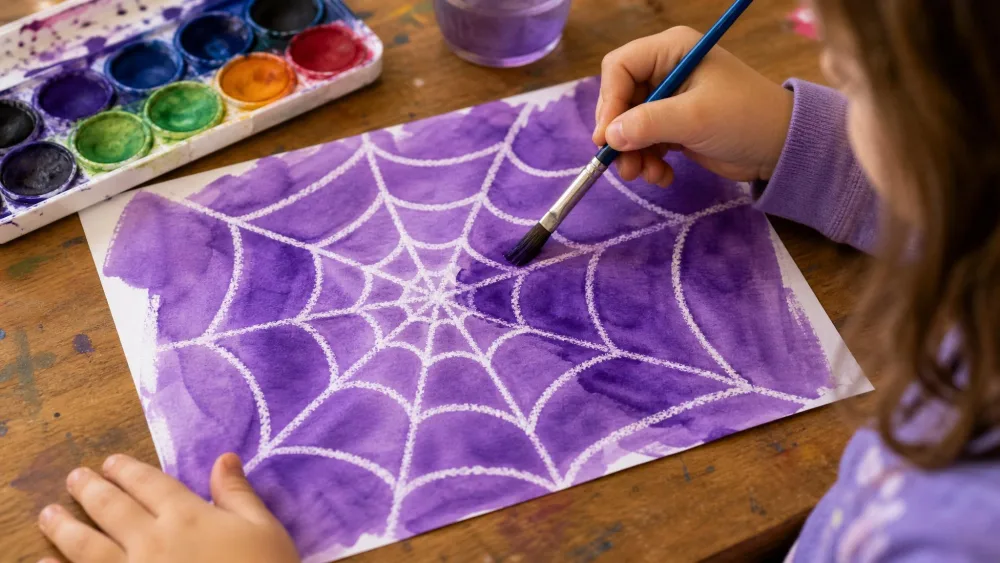
Draw a web with a white crayon or oil pastel, then wash watercolor over the top so the wax resists the paint and the web glows through. This one is a real confidence-builder, because the pre-drawn lines guide the color and younger kids cannot really mess it up.
Pom-pom spiders
Give kids a large black pom pom, googly eyes, and pipe cleaners cut into 8 equal legs, with a craft bead threaded onto each. Threading those beads is the part that engages little hands the most, so expect dropped beads. Fold the leg ends so the beads stay put. Gluing the legs on is fiddly, and tacky glue often is not strong enough, so switch to hot glue and let it dry fully or the legs pop off during play.
Ghost Art Projects
Ghosts are all about white on a dark background, and they could not be simpler.
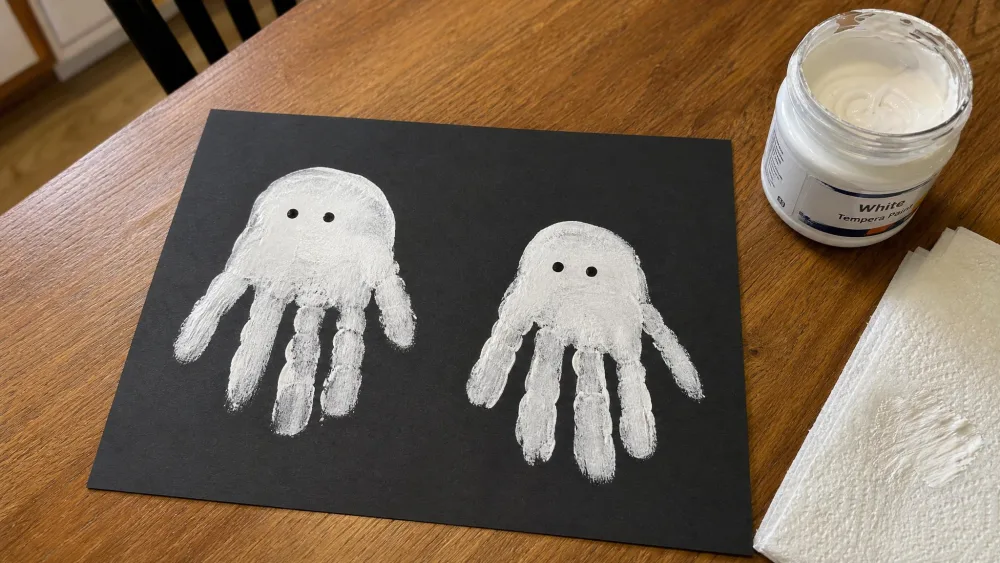
Handprint Ghosts
Paint a child's hand white and press it onto black paper, letting the fingers trail down as the ghost's wispy tail. Add two dot eyes and a round mouth once it dries. The tiny handprints are a sweet keepsake and a reason on their own to do this one every year.
Coffee Filter Ghosts
Shape a coffee filter into a floaty ghost body and decorate it with markers or a light wash of paint.
Drippy-glue ghosts and paper-strip garlands fill out a whole ghostly window display.
Witch & Black Cat Art Projects
Witches and cats bring in silhouettes and a bit more cutting for older kids.
Witch Hat String Art
Wrap yarn or string around a witch-hat shape to build up a textured, pointy hat. Keep the supplies simple, a hat outline plus string and glue, and let kids pick the colors for the band and buckle.
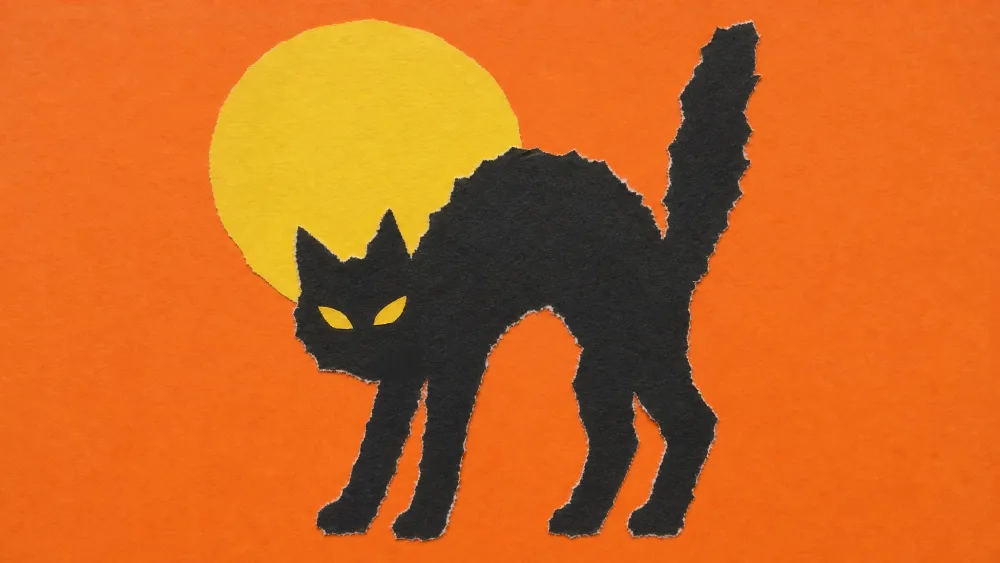
Torn-Paper Black Cats
Tear black paper into a cat silhouette, arched back and pointy ears, and glue it onto a contrasting background like orange or moonlit purple.
Bat Art Projects
Bats are perfect for a dark, layered night scene.
Torn Paper Bat Collage
Tear or cut black paper into bat shapes and assemble them into a night-sky collage, layering a few 3D paper bats so they lift off the page.
Monster Art Projects
Monsters are where kids get the most creative freedom, because there are no rules for what a monster looks like.
Paper Bag Monster Puppets
Turn a paper lunch bag into a monster puppet with layered cut-paper shapes, big teeth, and as many googly eyes as your kids insist on. The layered-shape approach, in the spirit of the Go Away, Big Green Monster style, lets little ones build a face from simple circles and triangles, and these double as toys after craft time ends.
Skeleton & Skull Art Projects
A little glue and a box of cotton swabs go a long way here.
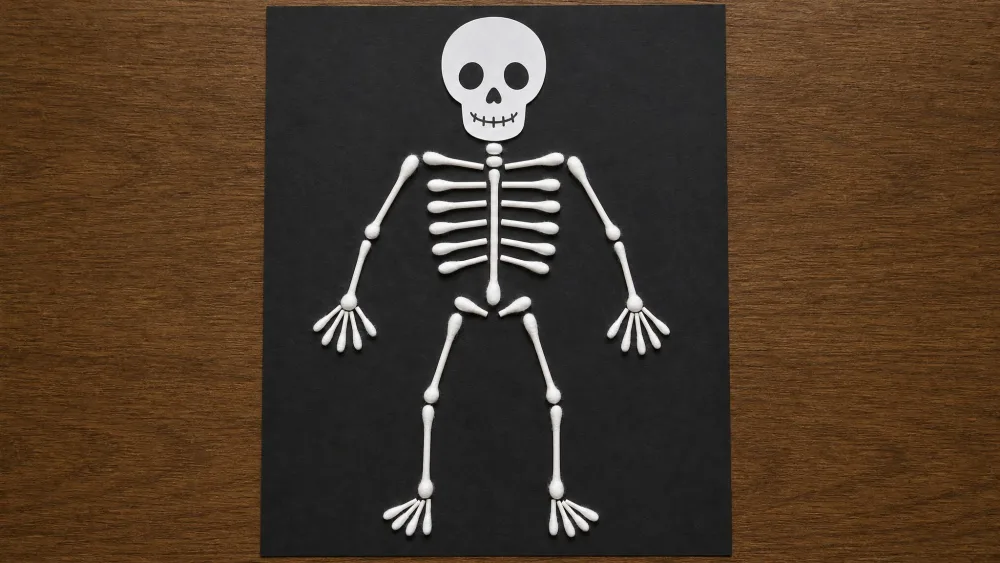
Q-tip Skeleton Art
Glue Q-tips onto black paper to build up a skeleton, with a paper skull on top and cotton-swab bones for the arms, legs, and ribs.
Handprint & Footprint Halloween Art
Prints are the sweetest keepsakes on this list, and they work for every age. Handprints become ghosts, spiders, and witches, while little footprints turn into candy corn, mummies, and monsters. Date the back of each one, because these are the pages you will be glad you saved. For the youngest little ones, a single guided print is a whole project on its own.
Silhouette & Spooky-Scene Art
Silhouette art gives kids a striking result with very little fuss. Cut or tear black shapes, a haunted house, bare trees, a witch on her broom, and glue them against a sunset or moonlit background. If you adapt a tutorial rather than freehand it, this silhouette Halloween art project from Arty Crafty Kids is an easy one to follow.
Haunted House Art Projects
Haunted houses let kids build a whole scene from scraps. Cut a tall, crooked house from black or gray paper, then add glowing yellow windows, a leaning chimney, and a spooky moon.
Candy Corn Art Projects
Candy corn's three stripes make it a friendly shape for the youngest crafters. Paint or tear paper into the classic white, orange, and yellow bands, or press fingerprints in stripes for a candy-corn wreath. For a sensory twist, whip up a batch of Halloween slime in candy-corn colors.
Our no-borax slime uses just 3 ingredients: 6 oz of Elmer's glue, half a teaspoon of baking soda, and 1.5 tablespoons of contact lens solution. It needs a good long knead before it stops being sticky, so a little lotion or baby oil on hands gets you through the first gooey minutes.
Watch outThis slime recipe is not suitable for children under 4. Orange food coloring stains hands, clothes, and the table, so cover your surface with wax paper before anyone starts.
Tips for Halloween Art with Kids (Ages, Safety, Cleanup)
Match the project to the age and everyone stays happy. Toddlers do best with tearing, printing, and gluing, where there is nothing to cut and no wrong outcome. Older kids can handle cutting, string art, and multi-step scenes that reward a little patience. Save the higher-risk steps for grown-ups: hot glue, hair dryers, and anything involving the oven are adult jobs, full stop. With melted pony-bead suncatchers, kids of all ages can do every step except the melting.
Watch outMelting plastic beads gives off strong fumes, so bake them outdoors in a toaster oven or on the BBQ, never inside the house. Ovens run hot around 400 to 450°F for roughly 8 to 12 minutes, but times vary a lot by oven and bead brand, so watch them closely.
For cleanup, cover the table before you start, keep a damp cloth within reach, and choose washable paints and crayons whenever you can.
Frequently Asked Questions
How do you make Halloween-themed art with kids?
Pick a motif your kids already love, like pumpkins or ghosts, and start with a simple technique such as handprints, torn paper, or a crayon-resist wash. Set out the supplies ahead of time, cover the table, and let them lead. These projects are easy to make and forgiving, so a lumpy pumpkin or a wobbly ghost is exactly right.
What are easy Halloween art projects for toddlers vs. older kids?
Toddlers do best with no-cut projects: handprint ghosts, torn-paper pumpkins, fingerprint candy corn, and gluing pre-cut shapes. Older kids enjoy more steps, like white-crayon spider webs, Q-tip skeletons, and layered haunted-house scenes.
What household materials can I use for Halloween art?
Most of this list runs on paper plates, construction paper, coffee filters, salt, watercolors, white crayons or oil pastels, pipe cleaners, pom poms, googly eyes, Q-tips, and glue. Add black paper for ghosts and cats and white paint for handprints, and you can make dozens of crafts without a craft store trip.
Final Thoughts
The best thing about Halloween art is how little it asks of you and how much it gives back. A stack of paper and a few household odds and ends turn into a month of pumpkins, ghosts, spiders, and bats that kids will love making. Start with one motif that lights your kids up, keep the mess where you can wipe it, and let the fridge fill with spooky art this October.