30 Easy Halloween Art Projects for Kids (Spooky, Silly & Simple)
Halloween art is really just five friendly monsters on repeat: pumpkins, spiders, ghosts, bats, and witches, with a few black cats and silly creatures thrown in. Every idea below is one your kids will love, and most use paper, paint, and things already in your craft bin. We tested these at our kitchen table with our two, ages 5 and 8, so the messy parts and the easy wins are ones we lived through. You will find handprints for little ones and moodier scenes for big kids, so there is something for all ages.
This is a make-it-today kind of list, so pick a creature category, grab the supplies, and get creative.
Supplies You'll Need for Halloween Art
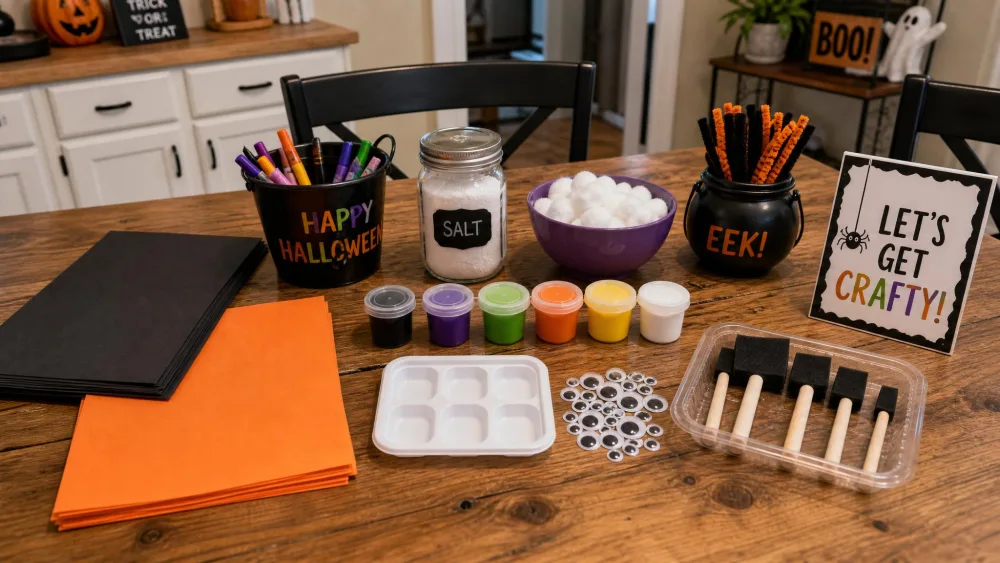
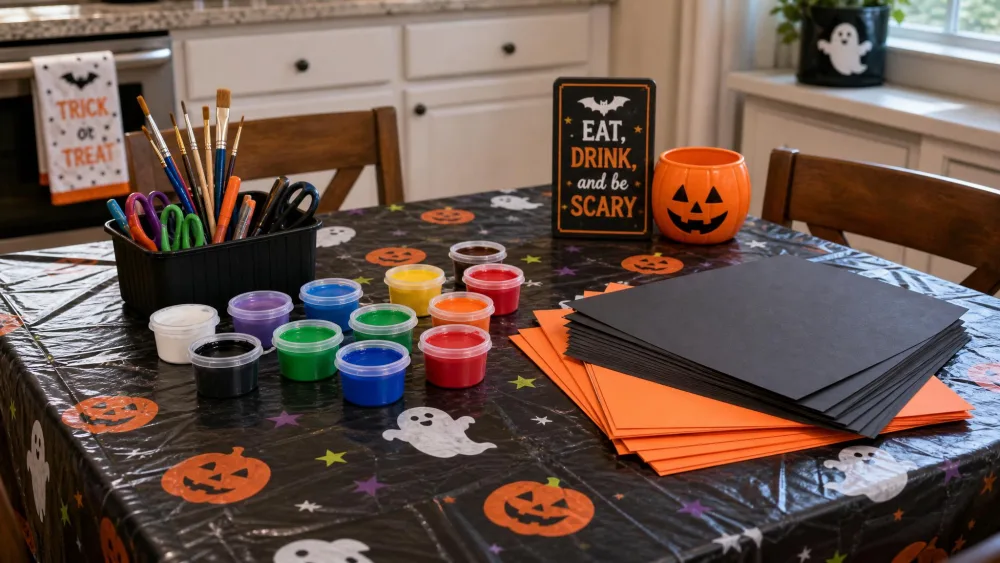
You do not need a special kit for spooky season. Keep washable and acrylic paint on hand, plus black and orange construction paper or cardstock. Add watercolors, white crayons or oil pastels, sponge brushes, cotton balls, googly eyes, chalk, salt, glue, scissors, paper plates, and toilet-paper tubes.
Parent tipFor toddlers, swap acrylic paint for washable paint everywhere in this guide. It lifts off skin and the table far more easily, and the finished colors are nearly as bright.
Pumpkin Art Projects for Kids
Pumpkins are the gentlest place to start, and every technique here scales from preschool up.
Salt-Painted Puffy Pumpkins
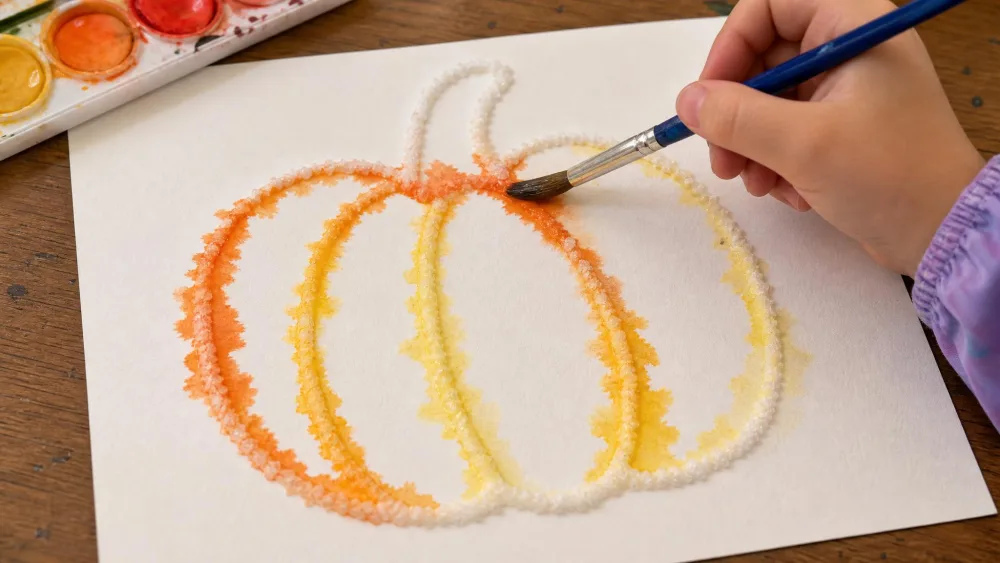
Draw a pumpkin outline in white glue, sprinkle salt along the wet lines, then touch a watercolor-loaded brush to the salt and watch the color travel. Raised salt painting gives the pumpkin real texture, and our kids were mesmerized watching the paint bleed along the glue-and-salt lines.
Chalk-Stenciled Pumpkins
Tape a pumpkin template onto black cardstock, trace orange chalk around the edge, then blend it outward with a cotton ball for a glowing look. These throw off a surprising amount of chalk dust, so we blow it off over the sink, and a stray q-tip cleans up smudges around the edges.
Parent tipPressing your double-sided tape against your hands a few times first takes the tack down, so the stencil peels off black paper without tearing it. If kids are cutting their own stencil, print two copies and cut the eyes from one and the pumpkin from the other. It saves a lot of frustration.
Torn-Paper Pumpkin Collage
Tear orange paper into small pieces and glue them inside a pumpkin outline, then add a green stem and a jack-o'-lantern face. Tearing instead of cutting makes this a no-scissors project for little hands.
Fork-Painted Mini Pumpkins
Dip the back of a fork in orange paint and press to build a ridged, textured pumpkin in seconds. It is fast, forgiving, and fills a whole page quickly.
Spider & Spider Web Art
Webs and their eight-legged residents cover a lot of ground, from resist painting to fine-motor building.
Watercolor Resist Spider Webs
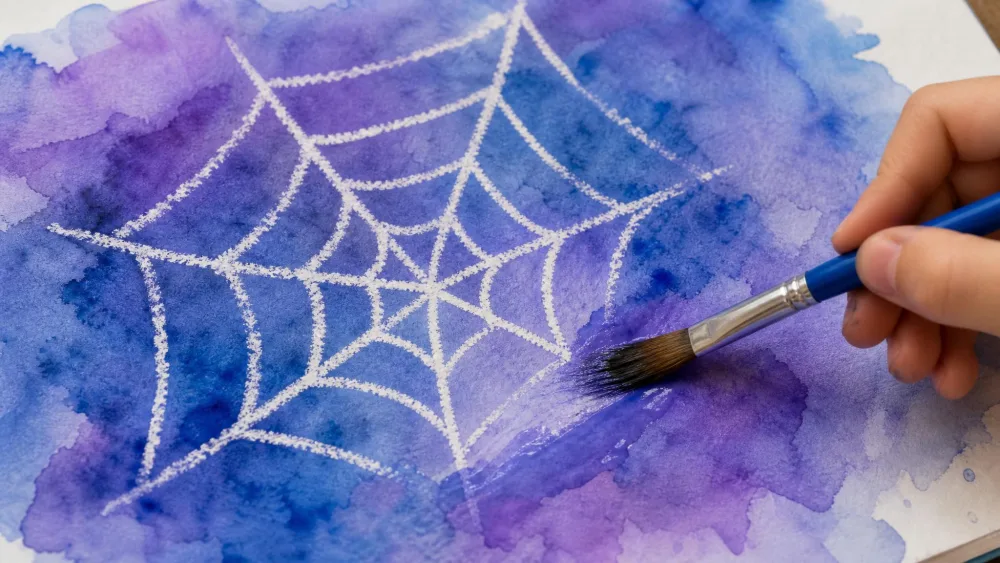
Draw a web with a white crayon or oil pastel, then wash watercolor over the whole page to make the hidden web appear. The reveal gets a big reaction, and the resist trick works for ghosts and stars too.
Handprint Spiders
Paint a palm and both sets of fingers, stamp two prints back to back, and you have eight legs and a round body. Add googly eyes and you have a keepsake for the littlest ones.
Straw-Blown Spooky Spider Webs
Drop watery black paint on paper and blow it outward through a straw to make spindly, web-like lines. Older kids love the control, and it suits a warm afternoon on the porch.
Paper Plate Spiders
Cut a paper plate in half, punch holes around the curve, and let kids lace black yarn back and forth for the web, then add a pom-pom spider. Threading and bending pipe-cleaner legs doubles as a fine-motor workout, and it is the real skill-builder for little hands.
Ghost Art Projects
Ghosts are the easiest creature to make friendly instead of frightening, so they suit nervous little ones well.
Coffee Filter Hanging Ghosts
Drape a coffee filter or tissue over a small ball, tie the neck, and draw on a face for a ghost you can hang in a window. They flutter in any breeze and cost almost nothing.
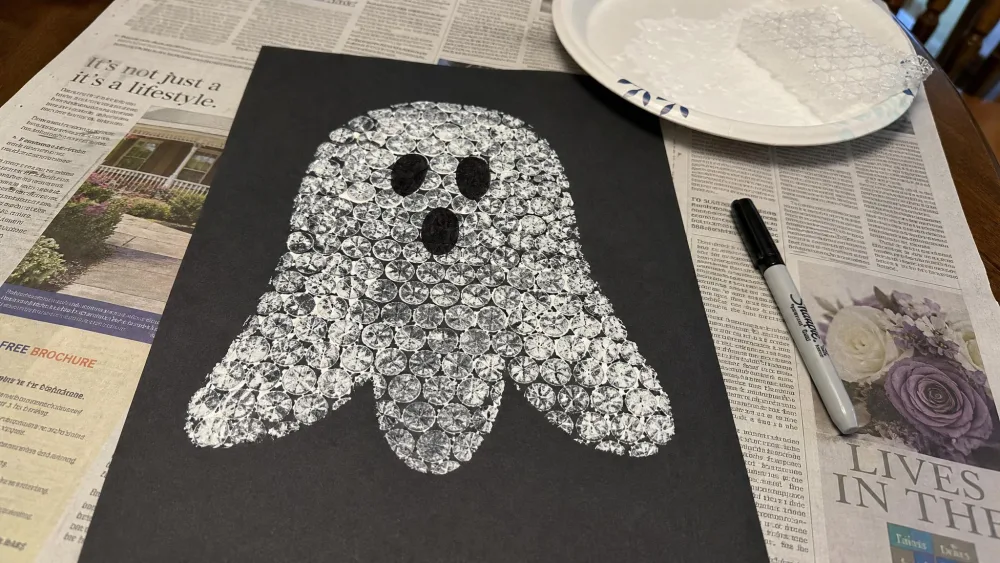
Bubble Wrap Ghost Prints
Paint white over a square of bubble wrap and press it onto black paper for a dotted, textured ghost body. Add marker eyes and you have instant wall art.
Fingerprint Ghost Cards
Press a white-painted fingertip onto folded black cardstock, then draw tiny faces to make a card full of little ghosts. It is a sweet, low-mess project for grandparents.
Swirly Paper-Plate Ghosts
Cut a paper plate in a spiral, paint it white, add a face, and hang it from the center. Swirly paper-plate ghosts actually spin and twirl as they hang, which got the biggest reaction of any ghost we made.
Bat Art Projects
Bats bring in black paper and a little symmetry practice for older kids.
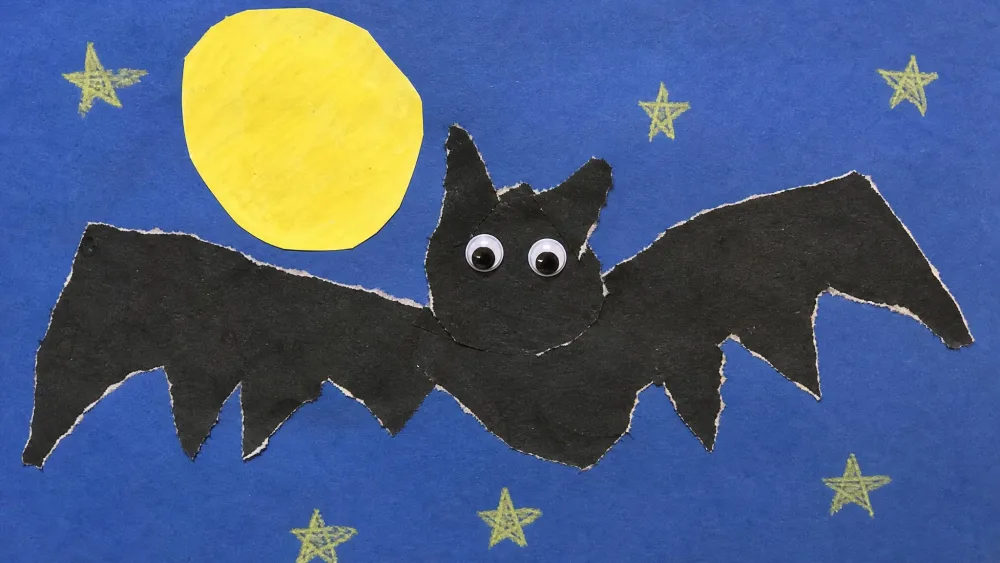
Torn Paper Bat Collages
Tear black paper into a rounded body and two jagged wings, glue them to a moonlit background, and add googly eyes. The torn edges give the wings a leathery look.
Toilet-Paper-Tube Bats
Paint a toilet-paper tube black, fold the top corners in for ears, and glue on paper wings. The hardest part is honestly just waiting for the paint to dry before adding wings, and our preschooler always wants to rush it.
Handprint Bat Garland
Trace and cut black handprints, curl the fingers slightly for wings, and string them along a ribbon. It is a fast way to fill a doorway.
Witch Art Projects
Witches are all hats and brooms, which makes them easy to build from simple shapes.
Witch Hat String Art
Draw a witch-hat outline on cardboard, hammer in small tacks along the lines with help, and wrap embroidery thread between them. This is a big-kid project, and the finished hat looks impressive on a shelf.
Cupcake-Liner Witch Faces
Flatten a green cupcake liner for a face, add a paper hat, yarn hair, and a wart or two. Little ones can assemble it with a glue stick and no scissors.
Painted Witch Broomsticks
Bundle strips of brown or yellow paper around a craft stick and tie the top to make a tiny broom. Line up a fleet of them on a windowsill.
Black Cat Art Projects
Every good Halloween scene needs a black cat somewhere.
Paper Plate Black Cats
Paint a paper plate black, add triangle ears, a pipe-cleaner tail, and bright yellow eyes. The round plate does most of the work.
Silhouette Black Cat Moon Scenes
Cut a cat template, sponge-dab paint around it on black cardstock, and lift the template to reveal a crisp silhouette against a colorful sky. Sponge-dabbing makes far less mess than brushing, and it makes this doable for toddlers with a helping hand. This silhouette technique is designed for ages 3-8, so it stretches across the whole family. Arty Crafty Kids has a silhouette painting tutorial with printable templates.
Rock-Painted Cats
Paint a smooth rock black, add a curled tail and two glowing eyes, and you have a little guardian for the front step. Rocks are durable, so these last past the season.
NoteKids get absorbed watching the colors blend as they layer paint around a silhouette. It quietly turns into an easy color-mixing conversation without any prompting from you.
Monster Art Projects
Monsters are where the silly takes over, and there are no wrong answers.
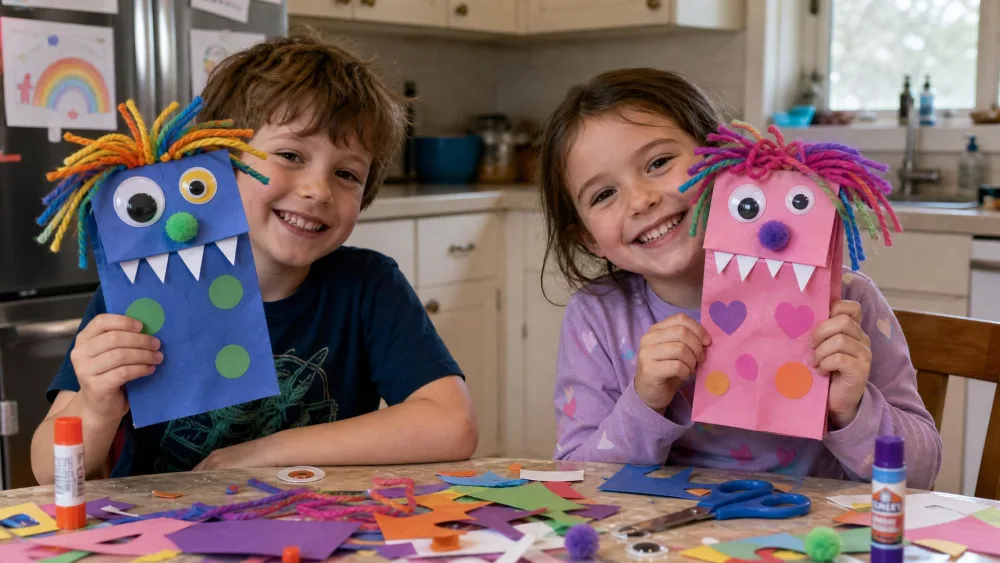
Paper Bag Monster Puppets
Turn a paper lunch bag into a puppet with a paper mouth, wild yarn hair, and mismatched googly eyes. Kids invent whole voices once the eyes go on.
Googly-Eye Monster Blob Painting
Drop paint on paper, blow it into a random blob with a straw, and once it dries, add googly eyes to whatever creature appears. The surprise is half the fun.
Egg Carton Monsters
Cut a couple of cups from an egg carton, paint them a bright color, and add pipe-cleaner antennae and teeth. These stand up on their own for shelf company.
Spooky Scenes & Silhouettes for Older Kids
When your big kids want something moodier, these lean into light and layered color.
Spooky Silhouette Landscapes
Paint a sunset sky in watercolor, let it dry, then glue on black cut-paper trees, fences, and a haunted house. The layered horizon gives older kids room to plan. Easy Peasy and Fun's bat silhouette walkthrough shows the same sponge-and-peel method on a smaller scale.
Chalk Pastel Haunted Houses
Blend chalk pastels into a stormy sky, then add a dark house and glowing windows smudged with a fingertip. The soft blending makes a simple shape feel atmospheric.
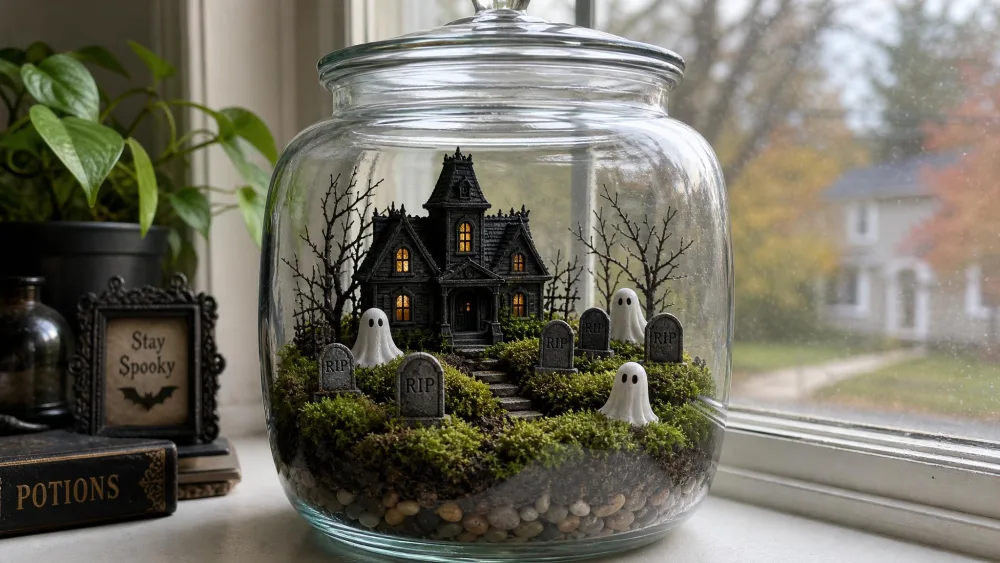
Halloween Terrarium Scenes
Layer pebbles, moss, and mini Halloween figures inside a large lidded glass jar for a tiny spooky world. This one is recommended for ages 8 and up, assembles in under 30 minutes, and runs an estimated under $7 per terrarium, though material cost swings a lot by where you source the jar and mini figures, so treat it as a rough per-jar figure. We leave the pieces unglued so we can repack and reuse the whole thing next year, and thrift-store jars keep the cost down. Crafts by Amanda has the full build.
Glow-in-the-Dark Night Sky Art
Brush glow paint across black paper to make stars, a moon, and drifting ghosts that light up at bedtime. Keep it simple, since the glow reads best as bold shapes.
Skeleton, Mummy & Candy Corn Crafts
A few classic icons round out the set.
Q-Tip Skeleton Paintings
Glue q-tips onto black paper as bones, add a paper skull, and you have a skeleton that doubles as a gentle body-parts lesson. Snapping them to different lengths makes the rib cage look right.
Cardboard Mummy & Candy Corn Collage
Wrap torn white strips or gauze around a body shape for a mummy, then tear orange, yellow, and white paper into layered candy corn triangles. Both are forgiving, no-scissors builds for little ones. One Little Project's chalk-stenciling method works nicely for a candy-corn stencil too.
Halloween Art Projects for the Classroom
If you are making these with a group, a few tweaks keep the table moving.
Pick projects that dry flat and fast, like torn-paper collages, fingerprint ghosts, and silhouette scenes, so nothing needs careful transport home. Pre-cut templates and portion paint into small cups ahead of time. Handprint projects work well for a group because each one comes out different.
Tips for Mess-Free Halloween Art with Kids
A little setup saves the cleanup you dread.
Cover the table with a cheap plastic cloth before anything opens, and give each child a single small cup of paint rather than the whole bottle. For dusty projects like chalk stenciling, work over the sink or outdoors so the dust rinses away.
Parent tipSponge-dabbing paint instead of brushing is the single biggest mess-reducer in this guide. It keeps drips down, uses less paint, and makes silhouette projects doable for even the youngest hands.
Safety Tips for Halloween Art (Scissors, Hot Glue & Small Parts)
Most of these projects are gentle, but a few need a grown-up nearby.
Handle hot-glue and hammer-and-tack projects like witch-hat string art yourself, or supervise closely for older kids. Keep googly eyes, pom-poms, and small figures away from babies and toddlers who still mouth things. Use safety scissors for young cutters, and step in for any symmetrical cut that needs precision.
Watch outHot glue, craft-hammer tacks, and small parts like googly eyes and mini figures are the three things to watch. Keep them for supervised, older-kid sessions, and swap in a glue stick or stickers for little ones.
NoteNearly every project here has been through a real trial run at our kitchen table with my 5- and 8-year-old. The messiest ones and the surprise hits both earned their notes the hard way.
More Fall & Halloween Craft Ideas for Kids
Once the spooky season winds down, the crafting does not have to stop.
Keep the seasonal momentum going with fall art projects for kids, then roll into Thanksgiving art projects for kids and Christmas art projects for kids. When the cold sets in, our winter art projects for kids pick up right where these leave off.
Final Thoughts
The best part of Halloween art is how little it asks of you. A stack of black paper, a few pots of paint, and an hour after dinner is enough to fill your fridge with pumpkins, ghosts, and grinning monsters. Start with whichever creature your kids love most, and let them make each one their own. Happy spooky season.